
I’ve been seeing glitter nails everywhere this winter, from subtle flecks to full-on disco ball. It’s not just for New Year’s Eve anymore, and honestly, it’s about time.
This roundup has 29 takes on Winter Glitter Nails, from barely-there shimmer to full-on sparkle, short squares to long stilettos, salon bookings to Sunday DIYs. Something for every skin tone and lifestyle.
I’ve spent years picking glitter out of my cuticles after removal, so I know which formulas are worth the trouble and which ones will haunt you. These are the ones I’d actually wear again.
Nude Base Silver Glitter French Almonds
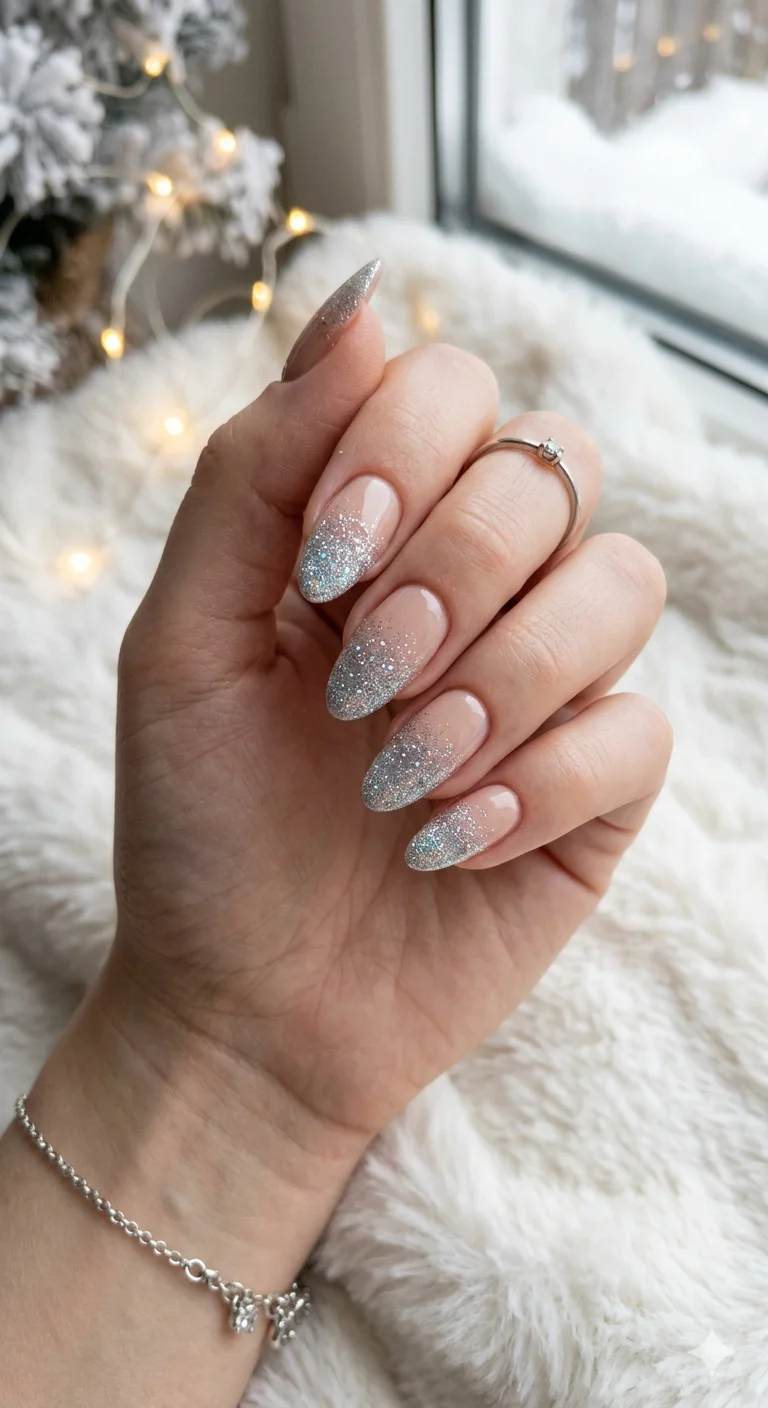
The nude base is so sheer it barely registers, which is exactly the point. A whisper of color lets the silver glitter french tips do all the work, catching light like tinsel on a tree. This is the winter manicure that doesn’t try too hard, just shows up and sparkles. Simple, yes. Boring, absolutely not.
Stiletto Silver Glitter Ombre with Celestial Art
The first time I saw celestial motifs on nails, I rolled my eyes. Too much, too try-hard. But this version gets it right: the silver glitter ombre fades softly from cuticle to tip, and the stars and moon are sparse, not a galaxy dump. The mistake people make is overcrowding. One tiny crescent per nail, a single star on the accent. That is it. The rest is negative space and a whole lot of shimmer. Ethereal without the clutter.
Short Square Winter Forest Scene Nails
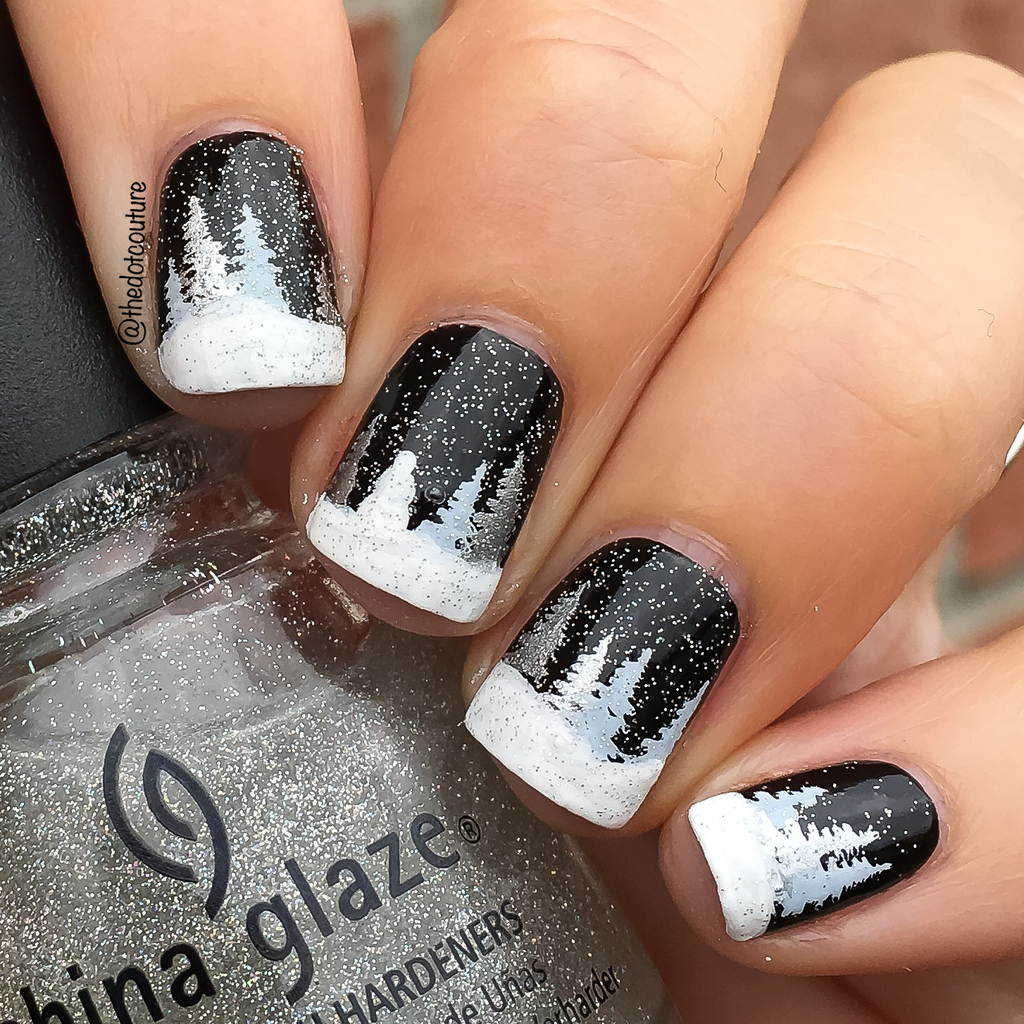
I wanted to love these. A tiny winter forest on each nail, snow-capped trees against a black sky, silver glitter for frost. The execution is gorgeous, no question. But here is the skeptic in me: this is not a DIY project. You need a steady hand and a lot of patience. The hand-painted details are delicate, and one wrong move and you are starting over. This is a salon appointment, and a long one at that.
If you are the type who enjoys sitting for two hours while someone paints a landscape on your thumbnail, go for it. If you want something you can do while watching TV, skip this. The artistry is undeniable, but the effort is real.
Pink Ombre Glitter French Oval Nails
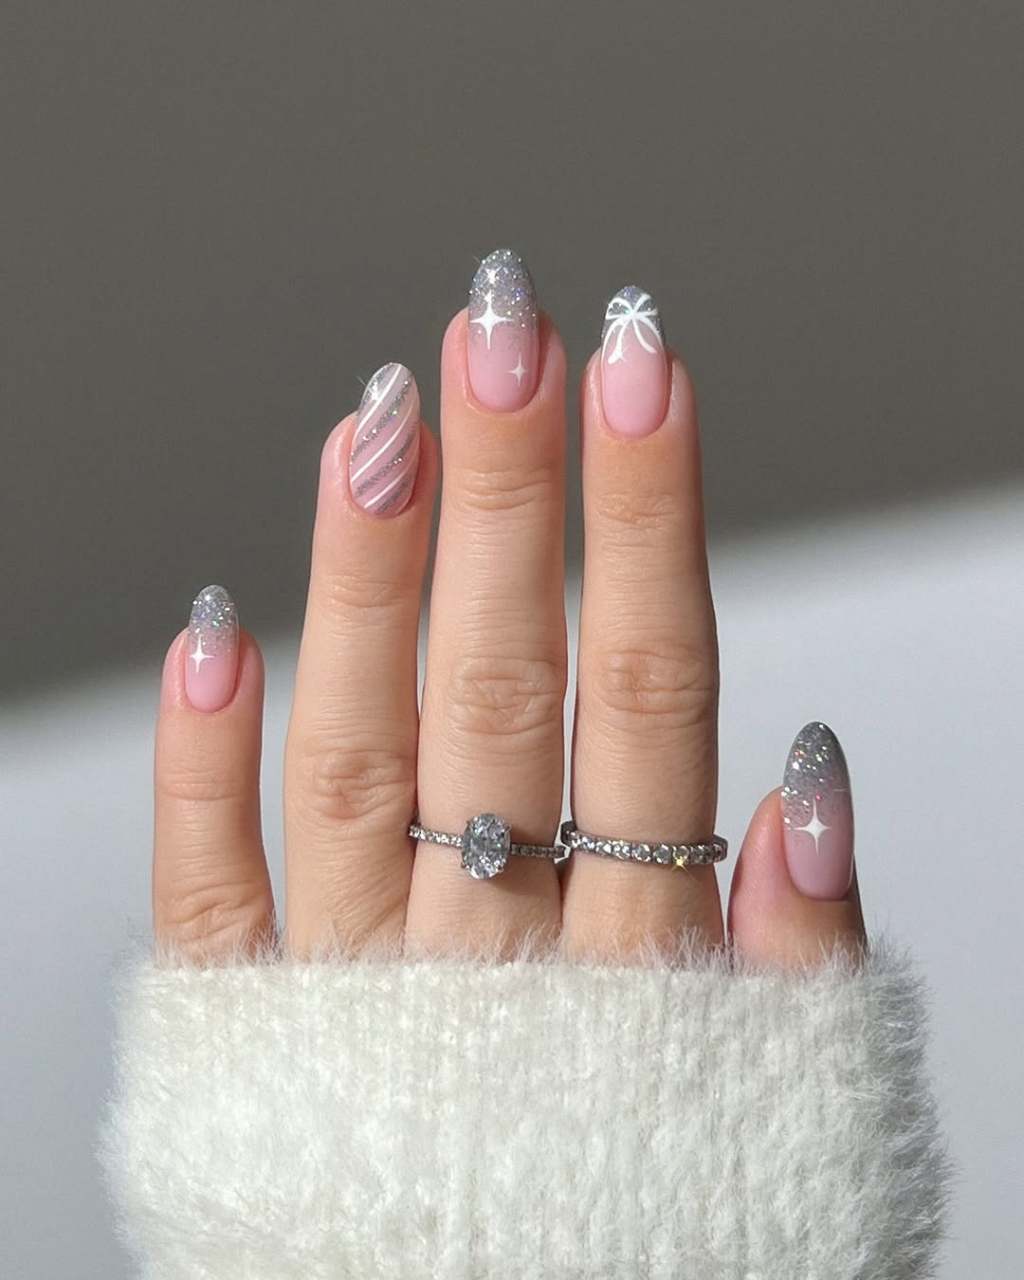
Are pink ombre glitter nails as universally flattering as everyone claims? Mostly yes. The soft pink fade to clear works on fair to medium skin tones, and the silver glitter French tips add brightness without washing anyone out. If you are deeper complected, ask for a warmer pink base, something with a touch of peach. The key is the gradient: too opaque and it looks like a bandage, too sheer and you lose the ombre. A fine silver glitter at the tip keeps it festive, not childish.
Plum Glossy Rose Gold Glitter Chrome Mix
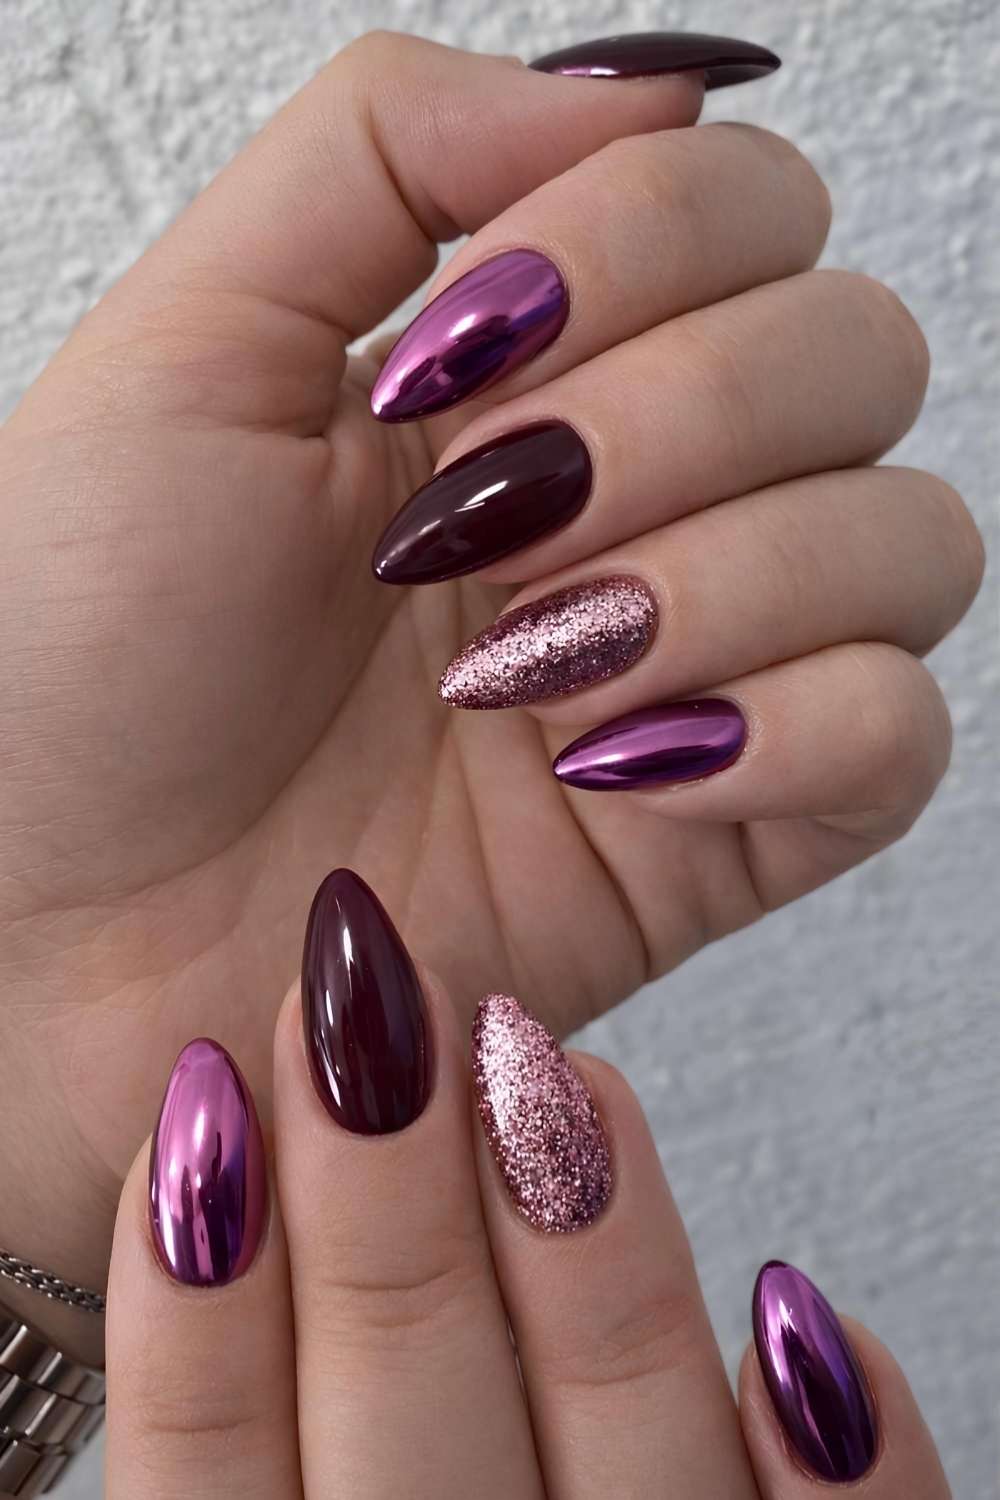
The mix of finishes here is the whole point, but it comes with a catch. Deep plum glossy on most nails, one accent in rose gold glitter, another in metallic purple chrome. It is luxurious, sure, but the chrome and gloss scratch easily, and the glitter catches on everything. Compared to an all-over shimmer, this is higher maintenance. I would pick the rose gold glitter accent every time, it hides wear better. The glossy plum shows every fingerprint.
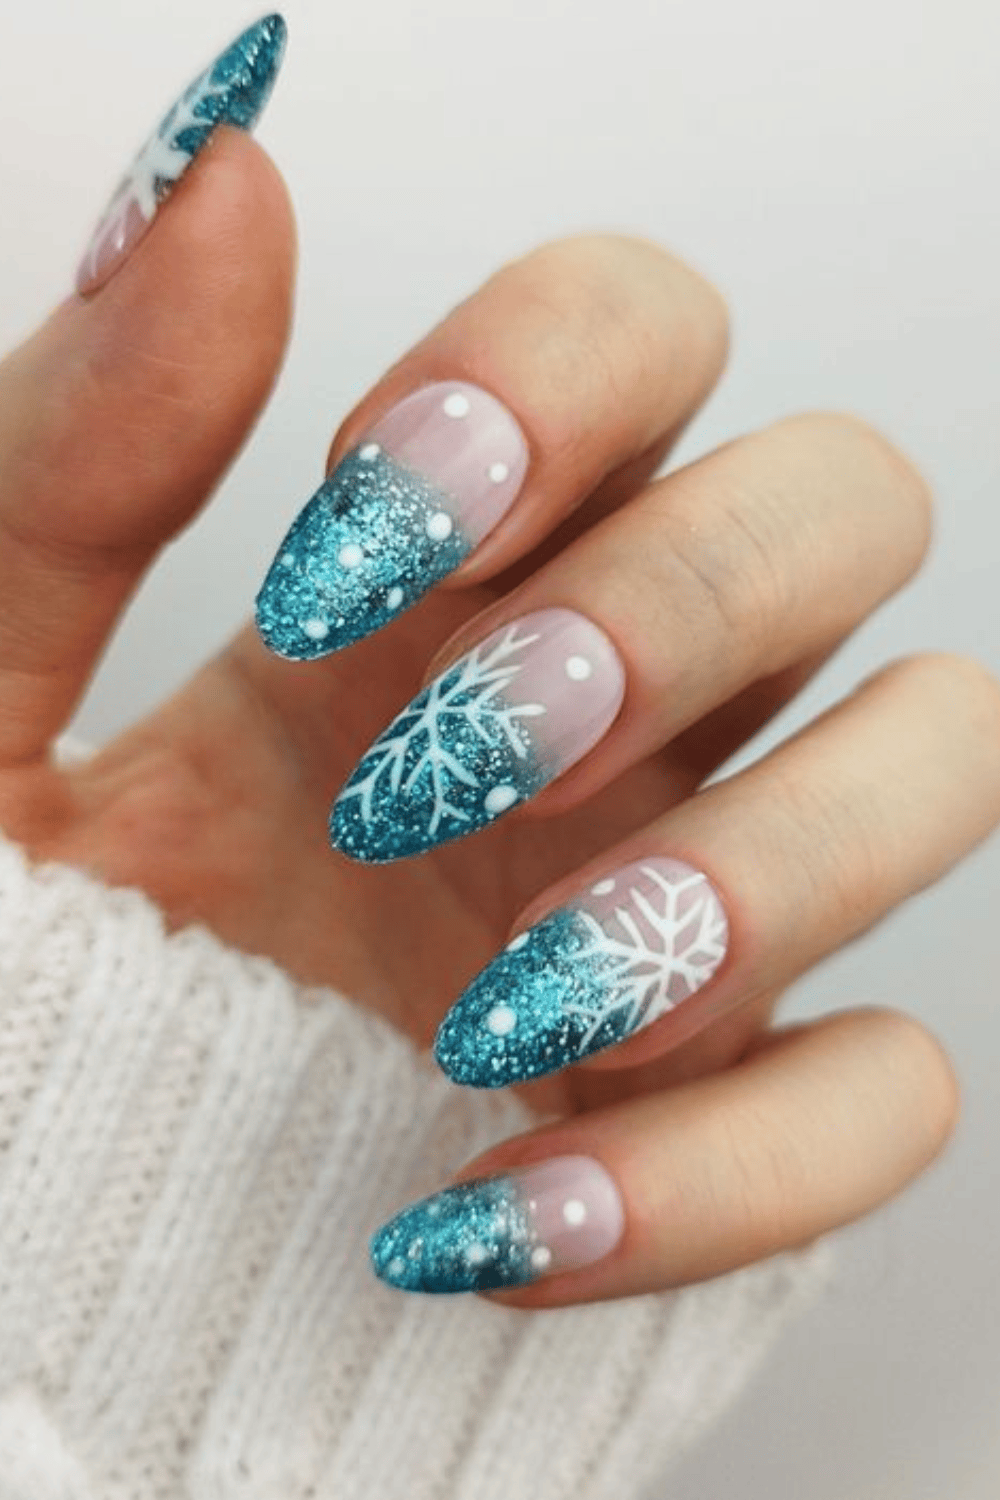
Frosty Blue Glitter Snowflake Stilettos
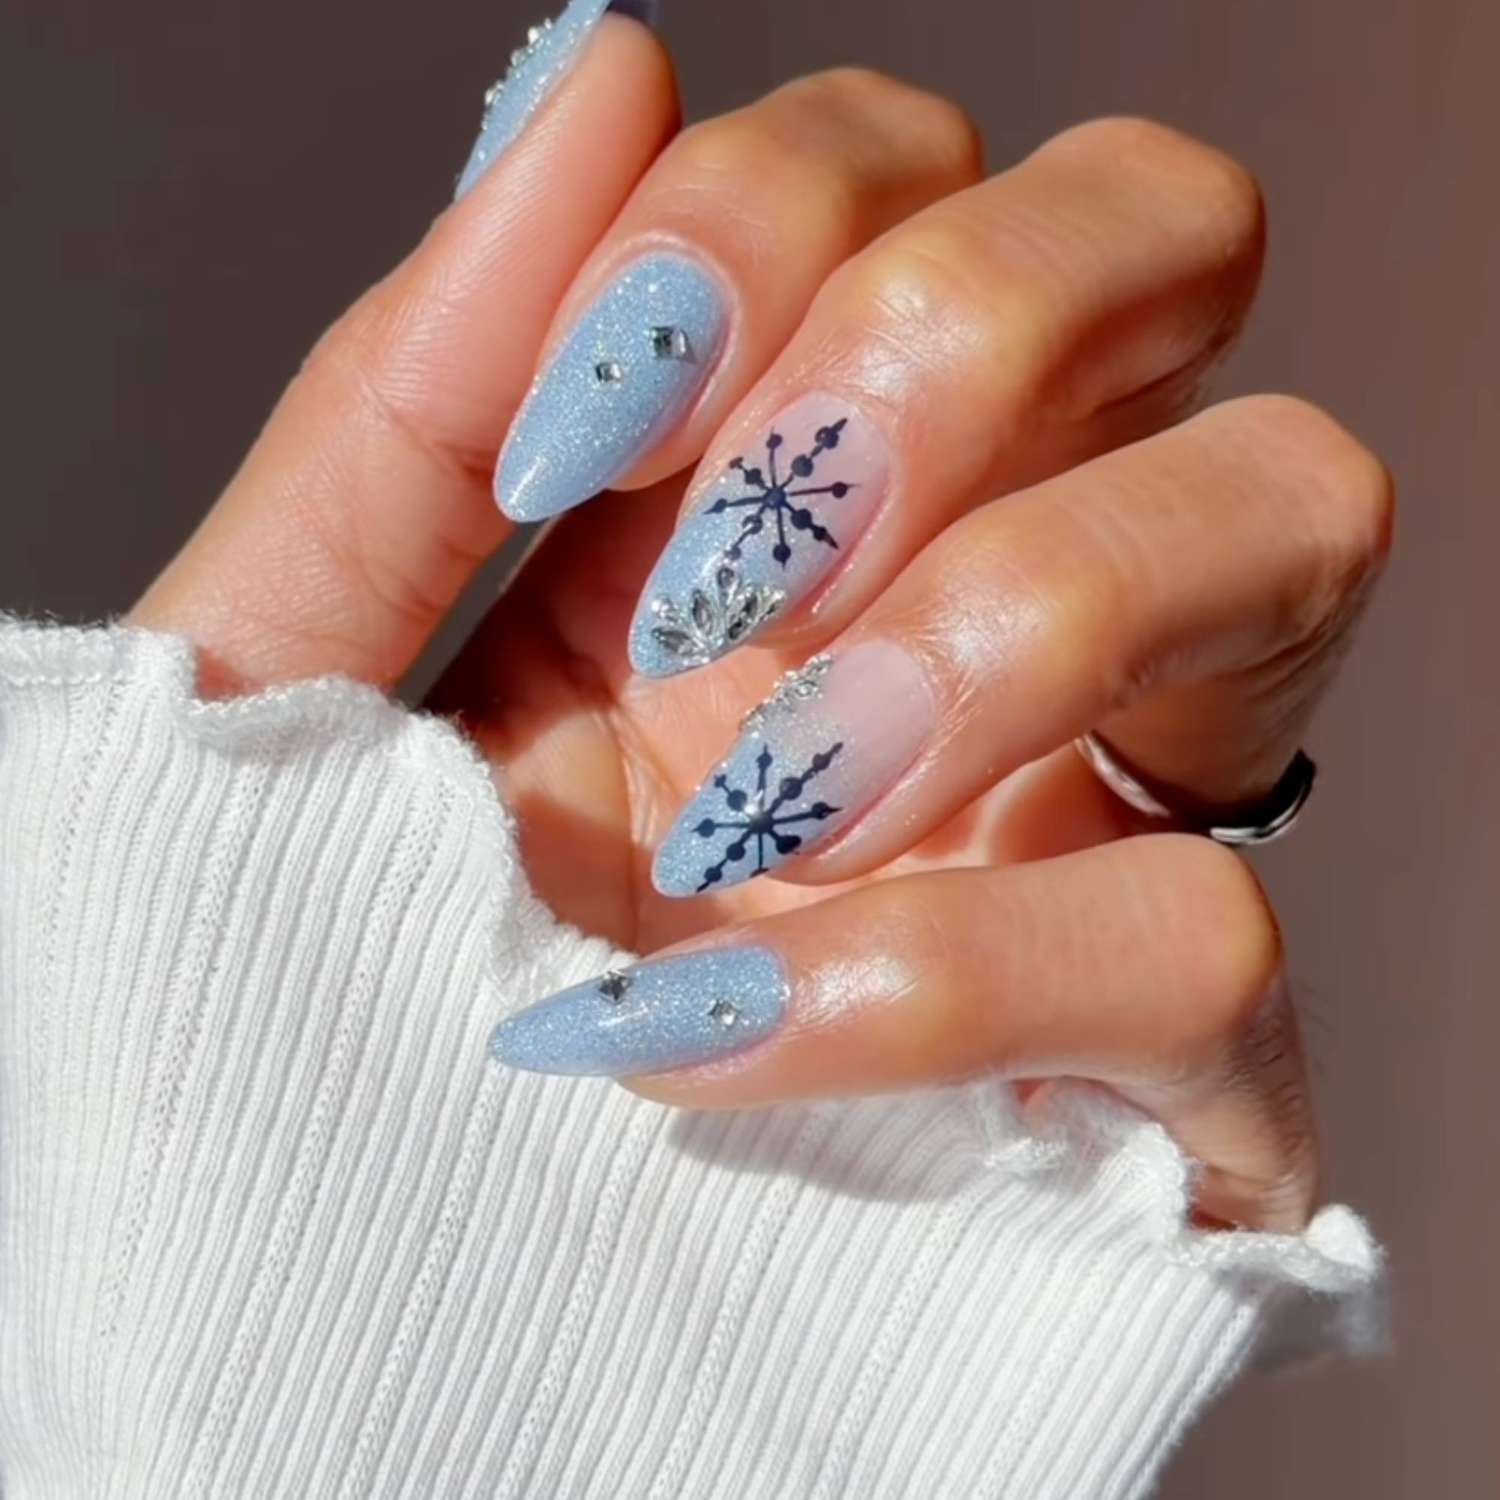
These are not for the faint of heart. Long stiletto nails coated in a frosty blue glitter base, each one topped with snowflake decals and a rhinestone or two. It reads like a winter costume in the best way — theatrical, unapologetic, and entirely festive. The snowflake glitter nails catch every light source in the room, which is the point. This is the design you wear to a holiday party where you plan to be noticed, not to type emails. The decals are crisp, the glitter dense enough to hide any visible nail line. It is a look, and it knows it.
Short Black Gold Rose Gold Glitter Gradient
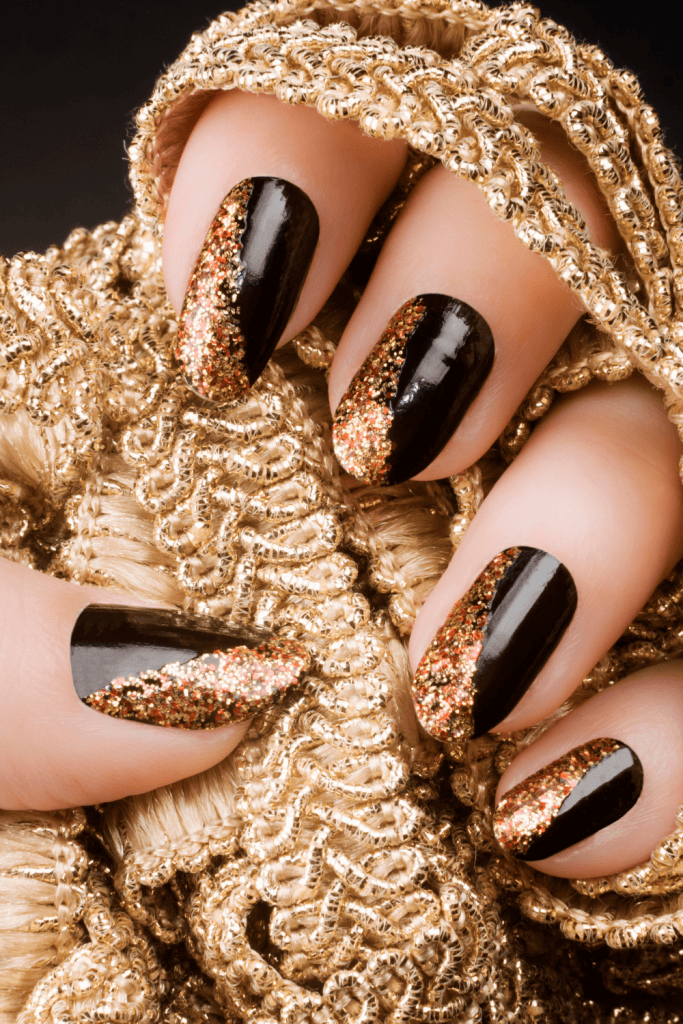
This gradient is worth the extra time in the chair. A black glossy base that fades into a gold rose gold glitter gradient — the transition is smooth, the two metallics playing off each other without fighting. On short square nails, the effect is condensed and punchy, not overwhelming. The visual impact comes from the contrast: dark and light, matte and sparkle. Achieving this at home means multiple thin coats of glitter and a patient hand, but the result looks like it took an hour of precision work. It did, but you can get close with practice.
Pale Pink Snowflake Glitter Almonds
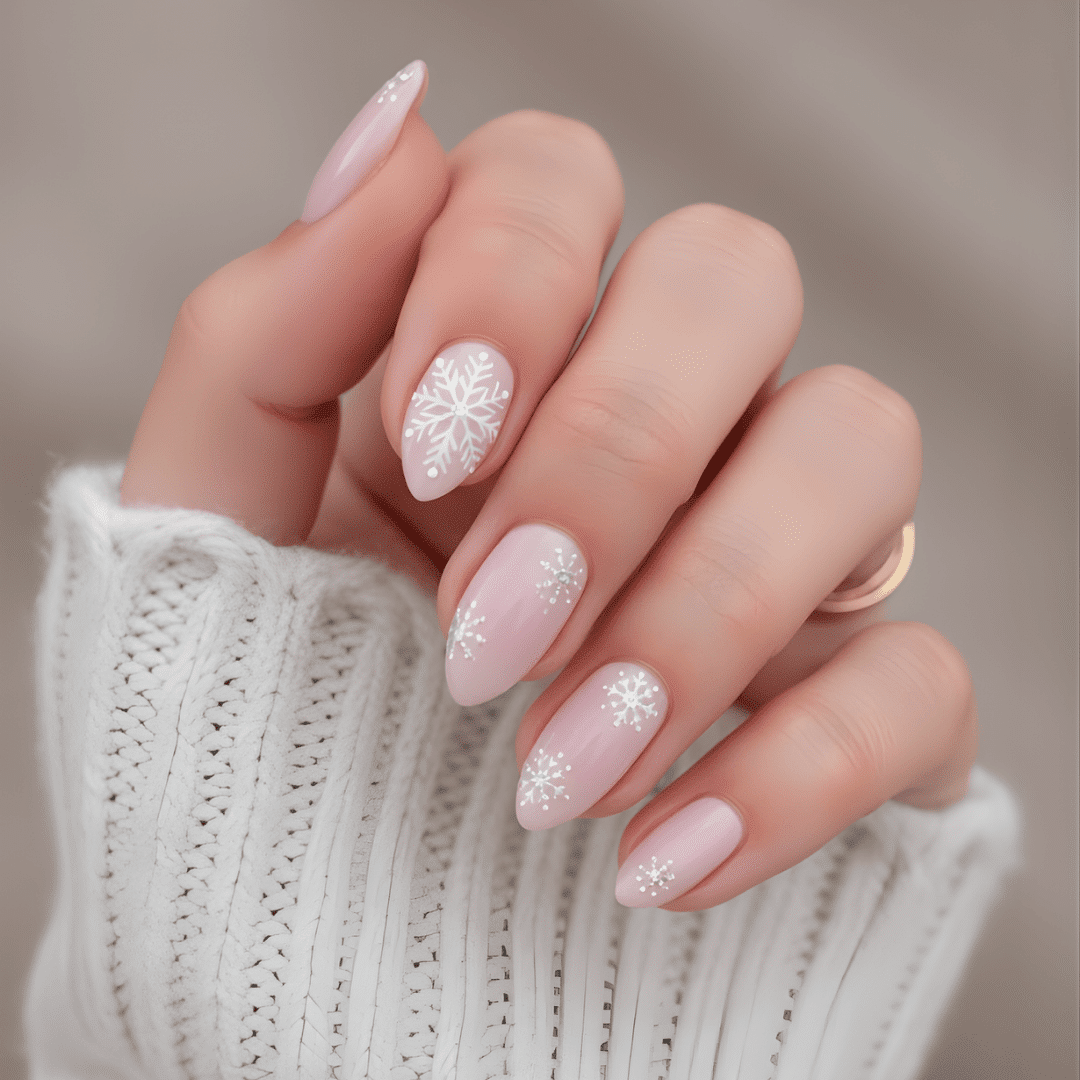
Picture this: a quiet evening, a bottle of pale pink, and some snowflake decals. Start with two coats of a pale pink snowflake nails base — something milky, not opaque. On the accent nails, add a layer of glitter accents at the cuticle or tip, then press on white snowflake decals while the top coat is still tacky. A few tiny dots around the snowflake for visual interest. Seal everything with a glossy top coat. The result is sweet without being childish, and the decals do the heavy lifting. No freehand skill required, just patience and tweezers.
Dusty Blue Silver Glitter Accent Short Squares
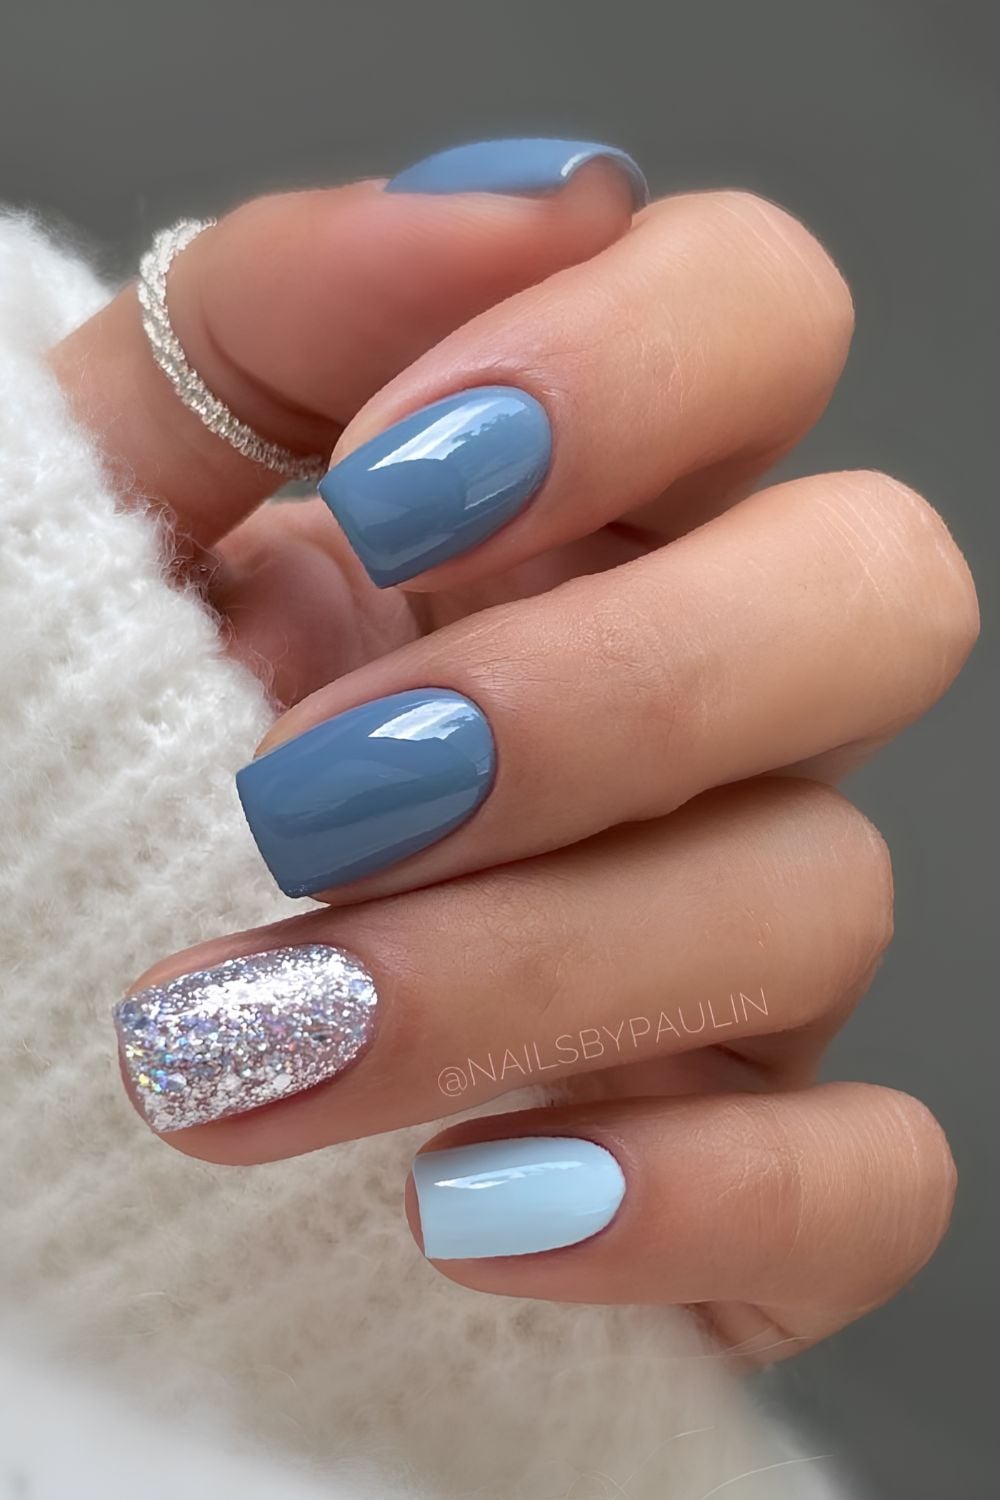
One glitter accent nail changes the whole dynamic. A matte dusty blue on the rest of the short squares, then a single silver glitter accent nails on the ring finger — dense, reflective, almost foil-like. The contrast is immediate and intentional. It is a statement without committing the whole hand to sparkle. The dusty blue grounds it, keeps it from tipping into costume territory. This is the design for someone who wants winter glitter but also wants to be taken seriously in a meeting. One finger gets the party, the rest stay professional.
Iridescent Pink Glitter Fade Stilettos
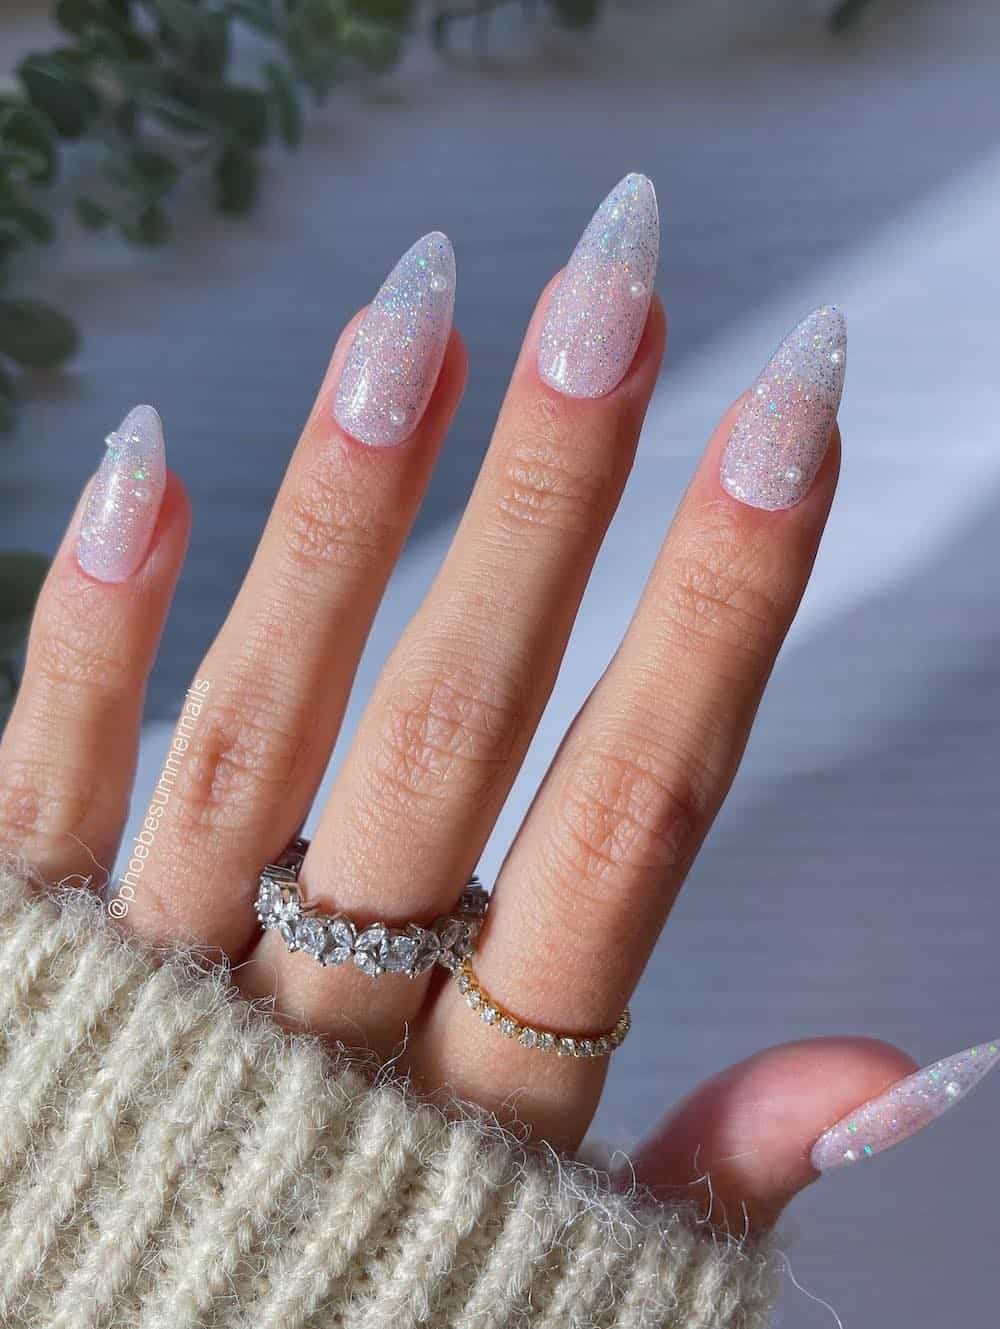
I’ll be honest: I wanted to hate full-coverage glitter. The removal dread, the texture, the way it catches on everything. But these iridescent glitter nails? Done in a pale pink glitter fade, they’re surprisingly wearable. The fade from a dense glitter at the cuticle to a sheerer tip keeps it from looking like a craft project. My skepticism lasted about three days. Then I noticed zero chips, no snagging on my sweater, and a shimmer that shifts from pink to lavender in winter light. The catch: removal is a soak-and-scrape situation, no shortcuts. Worth it for two and a half weeks of zero-maintenance sparkle.
Red Pink Gradient Gold Constellation Ovals
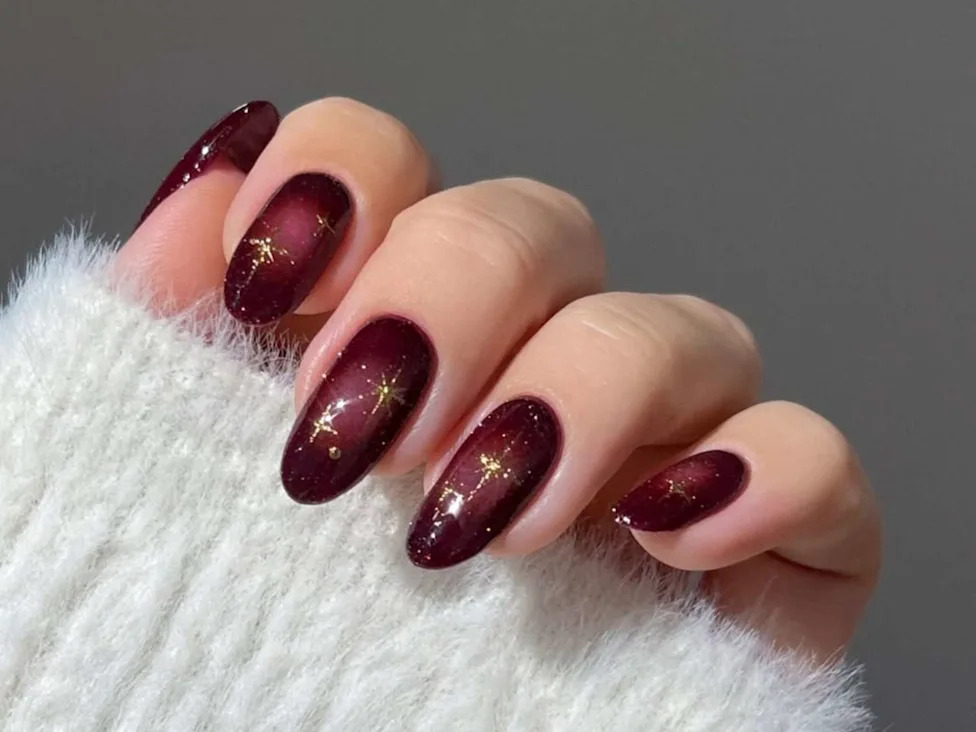
Who needs a vanilla holiday palette when the night sky is this rich? I am looking at a deep red to pink gradient that shifts like a winter sunset, with gold glitter constellation points scattered over the fade. This is for someone who wants her nails to match a cozy fireside evening, not a party. The medium oval shape keeps it romantic rather than sharp. The gold glitter constellation nails say celestial without screaming for attention. If your December mood leans more toward star maps than candy canes, this one calls your name.
Light Blue Chrome Snowflake Glitter Squares
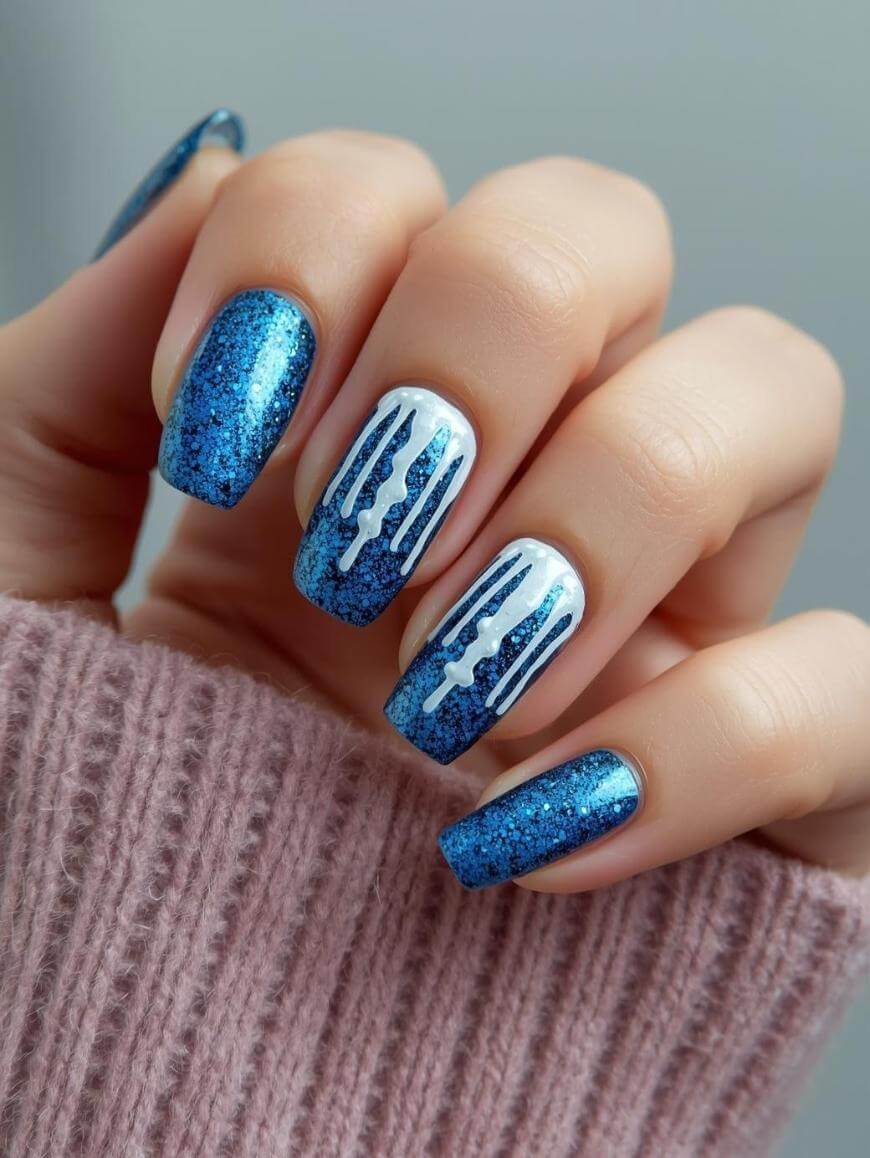
Here is the difference between a snowflake that sits on top of the nail and one that lives inside the surface. The chrome base on these short squares catches light like ice, then the white snowflake decals and silver glitter accents land on top. That layered depth is what makes chrome snowflake nails read modern instead of crafty. I would book a salon appointment for this one. Getting the chrome to cure evenly and the decals to lay flush without bubbles is not a beginner skill. Skip the home kit and let a pro handle the precision.
Navy Blue Shimmer Gold Star Decals
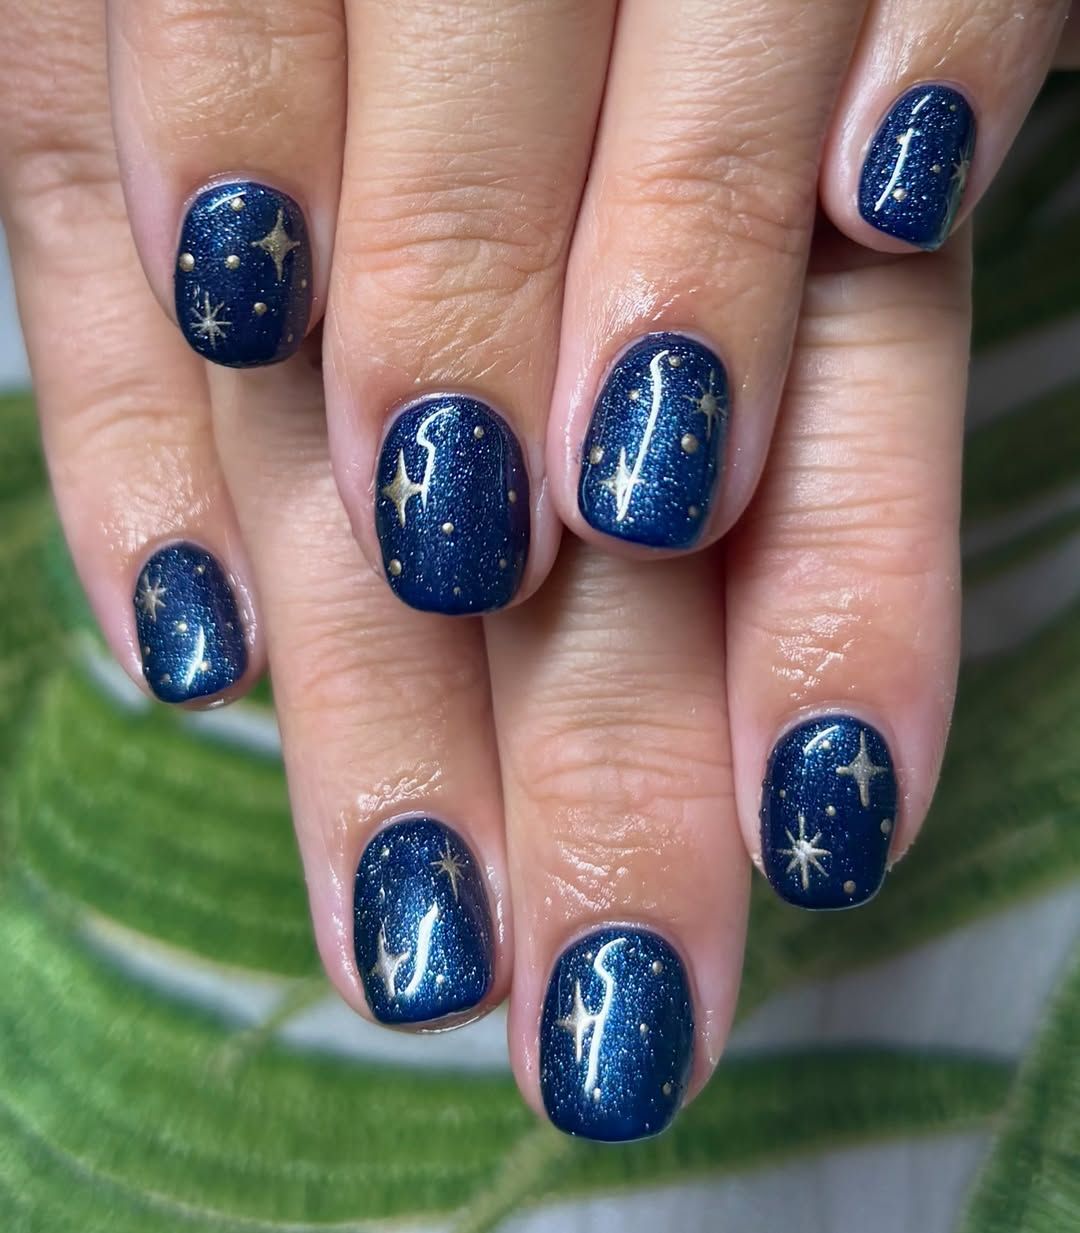
This one does not hold back. Navy blue glitter nails get a full treatment here: french tips, thin lines, dots, foil and gold star decals layered across the shimmer base. It should feel busy, but the dark navy keeps everything grounded. The gold stars read as deliberate constellations, not random stickers. If you want your manicure to do the talking at the holiday party, this is the design. Every element earns its place, and the density works.
Teal Matte Multi-Color Glitter Contrast
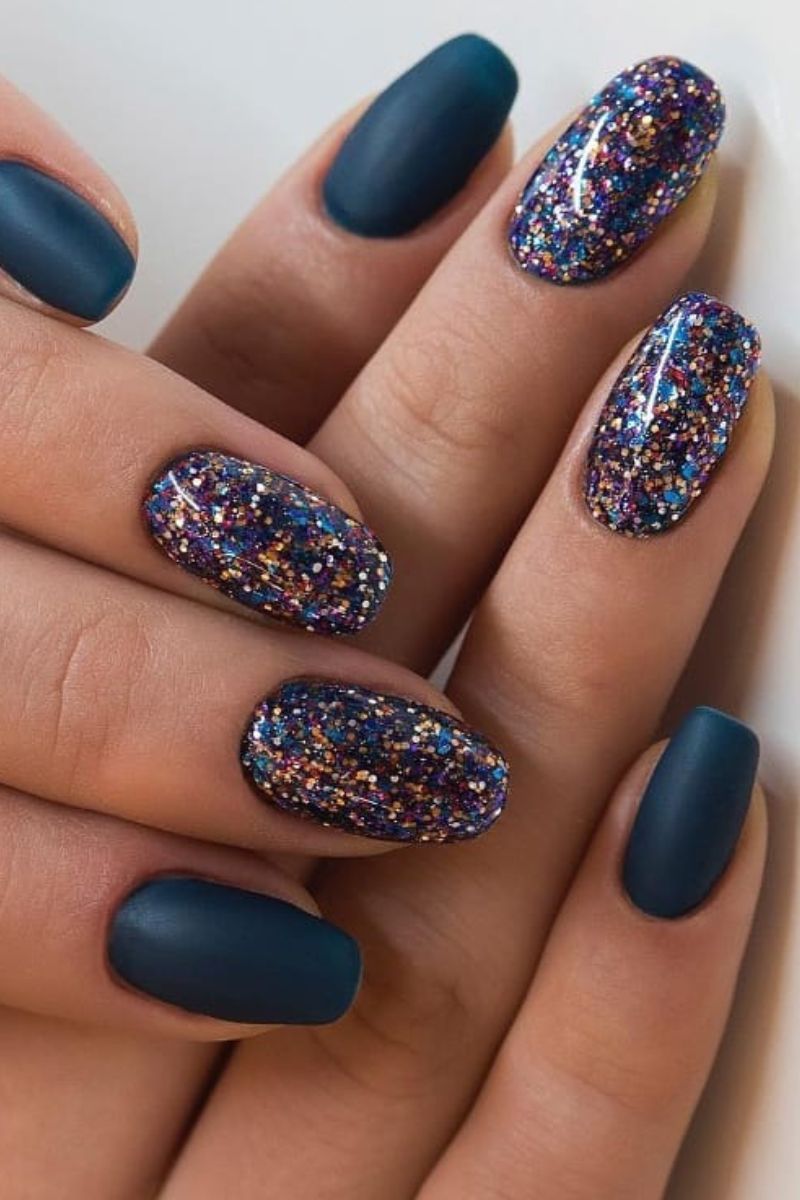
I’ll admit, I was skeptical about pairing a matte finish with full-on glitter. But this matte glitter contrast nails design, built on a deep teal matte base with multi-colored glitter accents, completely changed my mind. The matte nails do start to shine after a few days, but the glitter holds strong for two weeks. Removal is a soak-off situation, not a quick file.
- Short oval shape, practical for daily life
- Deep teal matte on accent nails
- Dense multi-colored glitter on others
- Contrast between matte and high-shine
- Two-week wear, removal requires soaking
It’s not a low-maintenance set, but the payoff is worth it.
Black Glitter Starburst Stilettos
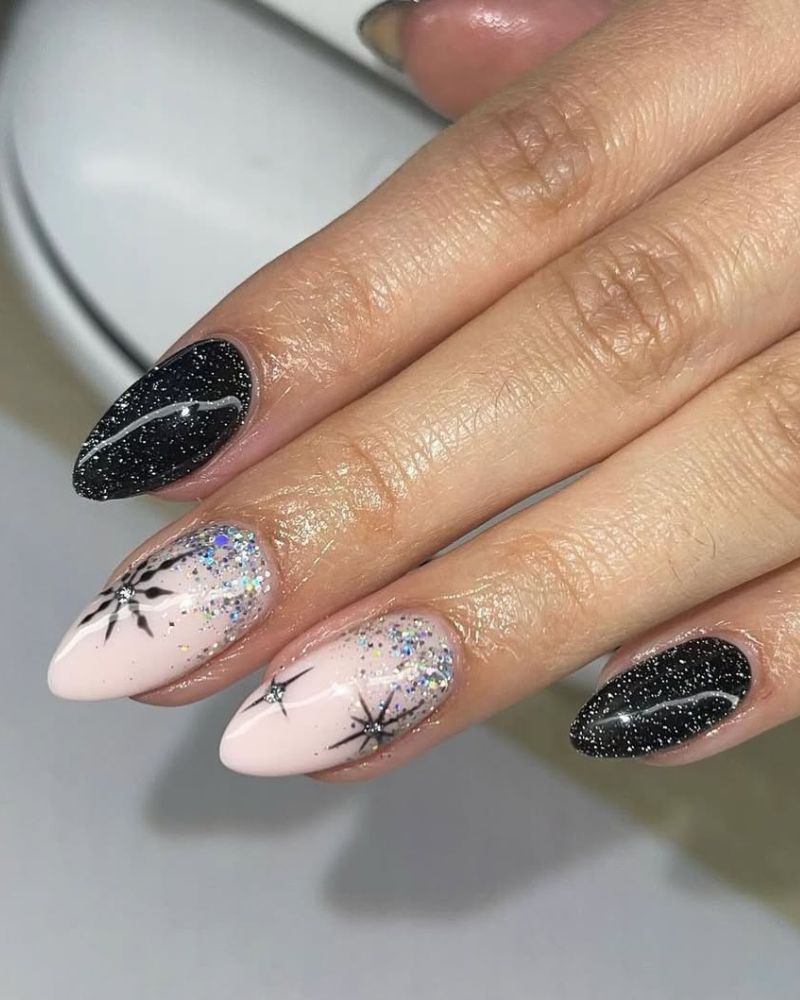
The price tag here is measured in patience. Black glitter starburst nails demand careful placement of each starburst on that medium stiletto canvas. The light pink accents break up the darkness, but every layer adds minutes under the lamp. A salon session with this detail runs at least 90 minutes. The silver glitter in the starbursts catches light and justifies the time. Removal is a separate undertaking, full soak-off with no shortcuts. It is a look you book, not a weekend project.
Light Blue Glitter Glossy Short Ovals
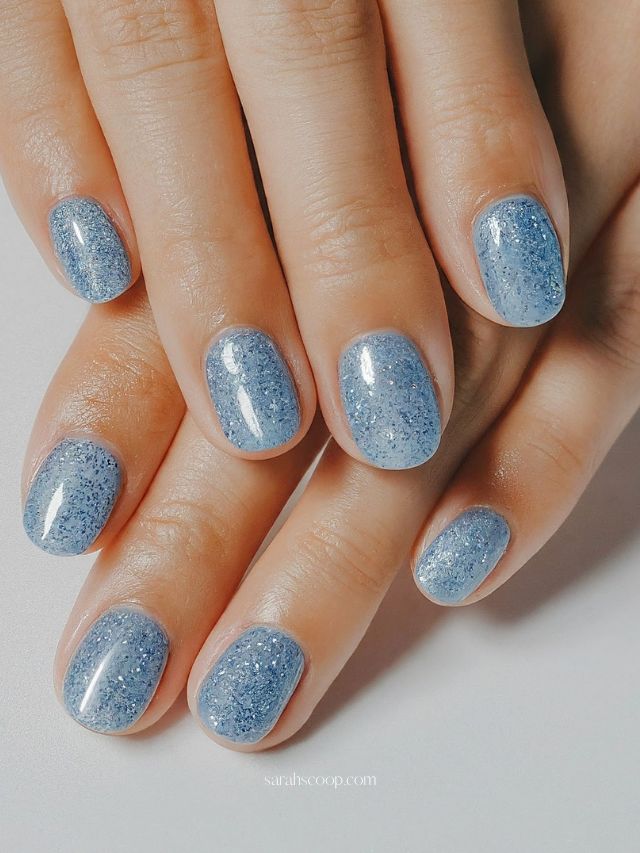
Start with a rubber base coat to smooth the nail plate. Apply the light blue glitter nails polish in even strokes from cuticle to tip. Roll the bottle instead of shaking to prevent bubbles. The fine silver glitter needs three thin coats, each cured in the lamp for the full time. Cap the free edge with each coat to prevent chipping. Let each layer dry fully before the next to avoid streaks and lift. Use a clean-up brush dipped in acetone around the cuticles before each cure for a tidy finish. Finish with a thick no-wipe top coat for that glossy, wet-look surface.
For upkeep, keep tweezers to handle any peeling glitter edges and a nourishing cuticle oil for dry winter skin. A glass file at your desk catches rough edges before they snag on sweaters. The short oval shape is easy to maintain between fills with a careful hand. This is a project for a free afternoon, not a full salon booking. The high-gloss finish stays reflective for about two weeks with good care. It is an understated shimmer that gets noticed.
Pale Pink Snowflake Wavy Glitter Square Nails
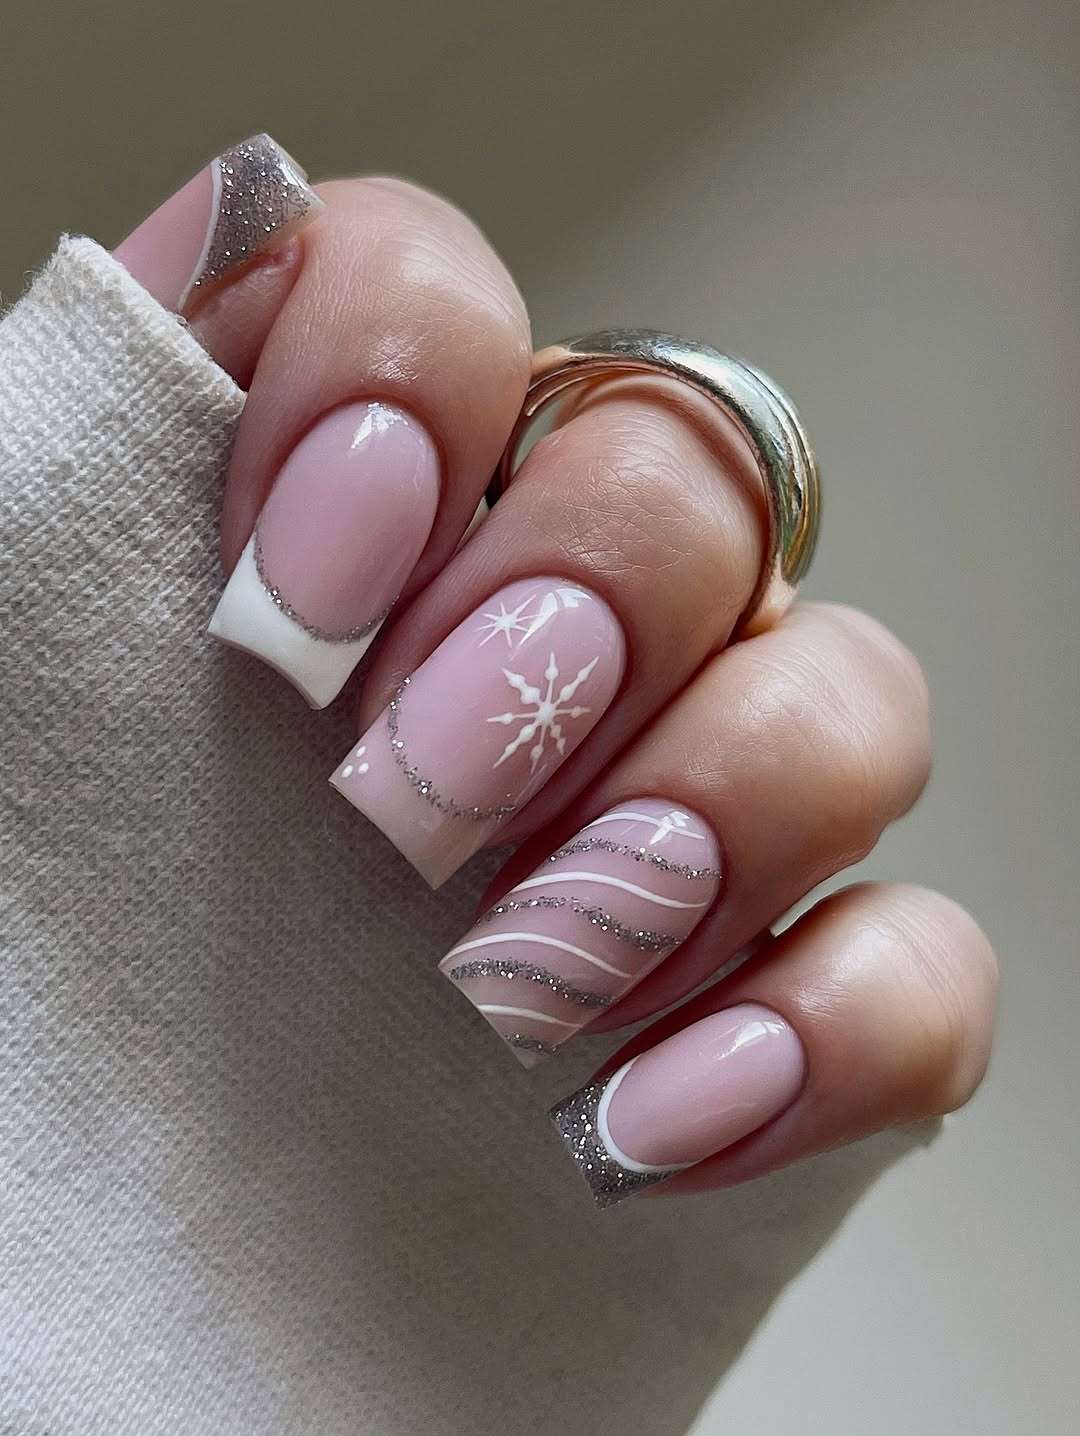
These look delicate, but that is the problem. The pale pink snowflake glitter nails combine a pale pink base, white French tips, and silver glitter wavy lines that are hand-painted with precision. The snowflake on the accent nail is intricate, but all that detail comes at a cost.
- Medium square shape
- Pale pink base with white French tips
- Silver glitter wavy lines
- Hand-painted snowflake accent
- Glossy top coat
The honest downside: those wavy glitter lines lift at the edges within a week. The French tips are prone to chipping if you type or use your hands. This is a look for special events, not daily life. I would hesitate to book this unless you plan to wear gloves through the week.
Off-White Glitter Tip Stilettos
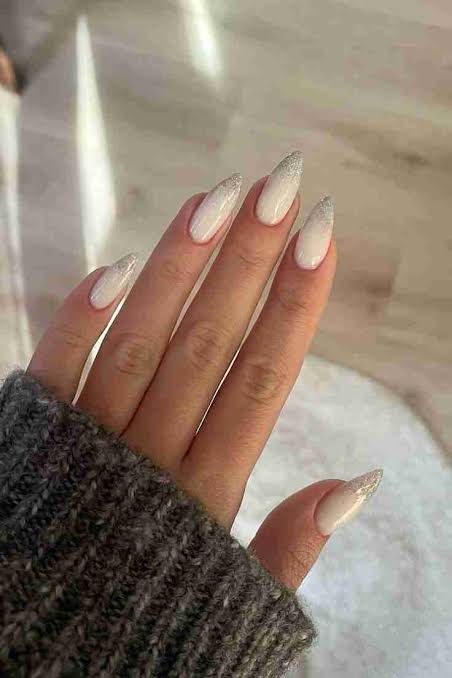
Are you someone who wants glitter but not full coverage? The silver glitter tip nails on a medium stiletto shape give you the sparkle without the commitment. The off-white shade keeps it light and bright. This look suits those who prefer a subtle statement on long nails. The stiletto shape adds edge, but the off-white base keeps it wearable. It is a half-step toward full glitter, and that is the appeal. If you want to dip a toe into glitter, this is where you start.
Light Blue Ombre Glitter Snowflake Ovals
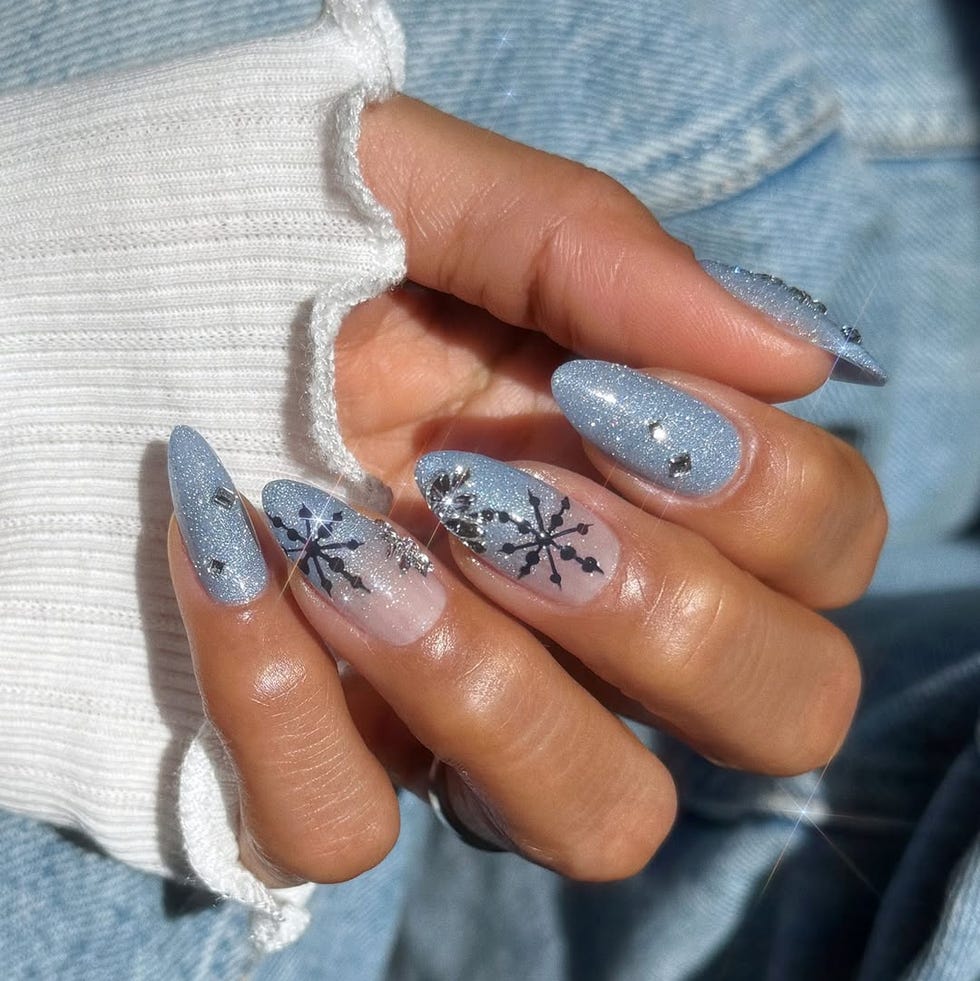
The balance between decal and gradient here is exacting. The light blue ombre fades to clear at a precise point, and the silver glitter particles are fine enough to avoid texture. Every snowflake decal sits at the same height on each nail, and the rhinestones are placed at the same angle. That level of consistency is what you pay for: at home, one nail will look perfect and the rest will drift. The glitter will clump where you applied it in a rush, and the decals will lift after two days.
- Shape: long oval
- Color: light blue ombre to clear
- Finish: silver glitter gradient
- Technique: decal placement with rhinestone accents
- Accent: snowflake decals
Skip the DIY on this one. A tech with steady hands will get the ombre even and the decals sealed. Your time is better spent on simpler glitter concepts.
Intense Purple Glitter Almonds
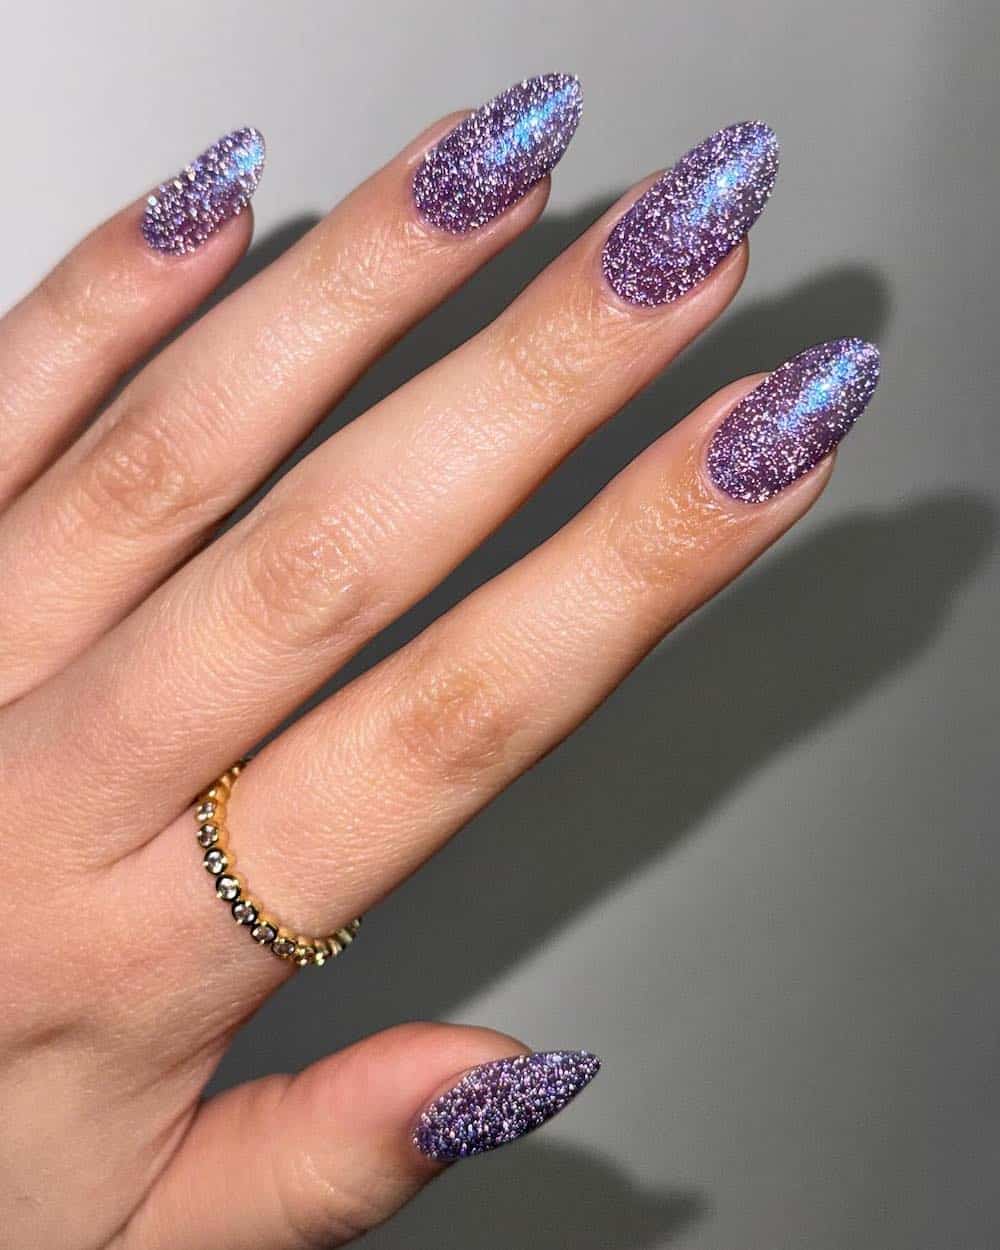
That much purple glitter on a single nail is almost too much. Almost. The dense reflective glitter catches light from every angle, turning the medium almond shape into a polished gemstone. No gradient, no accent, just pure sparkle. It works because the glitter particles are fine enough to feel smooth to the touch, not gritty. That is the difference between a good glitter polish and a truly reflective one.
Black Glitter French Snowflake Squares
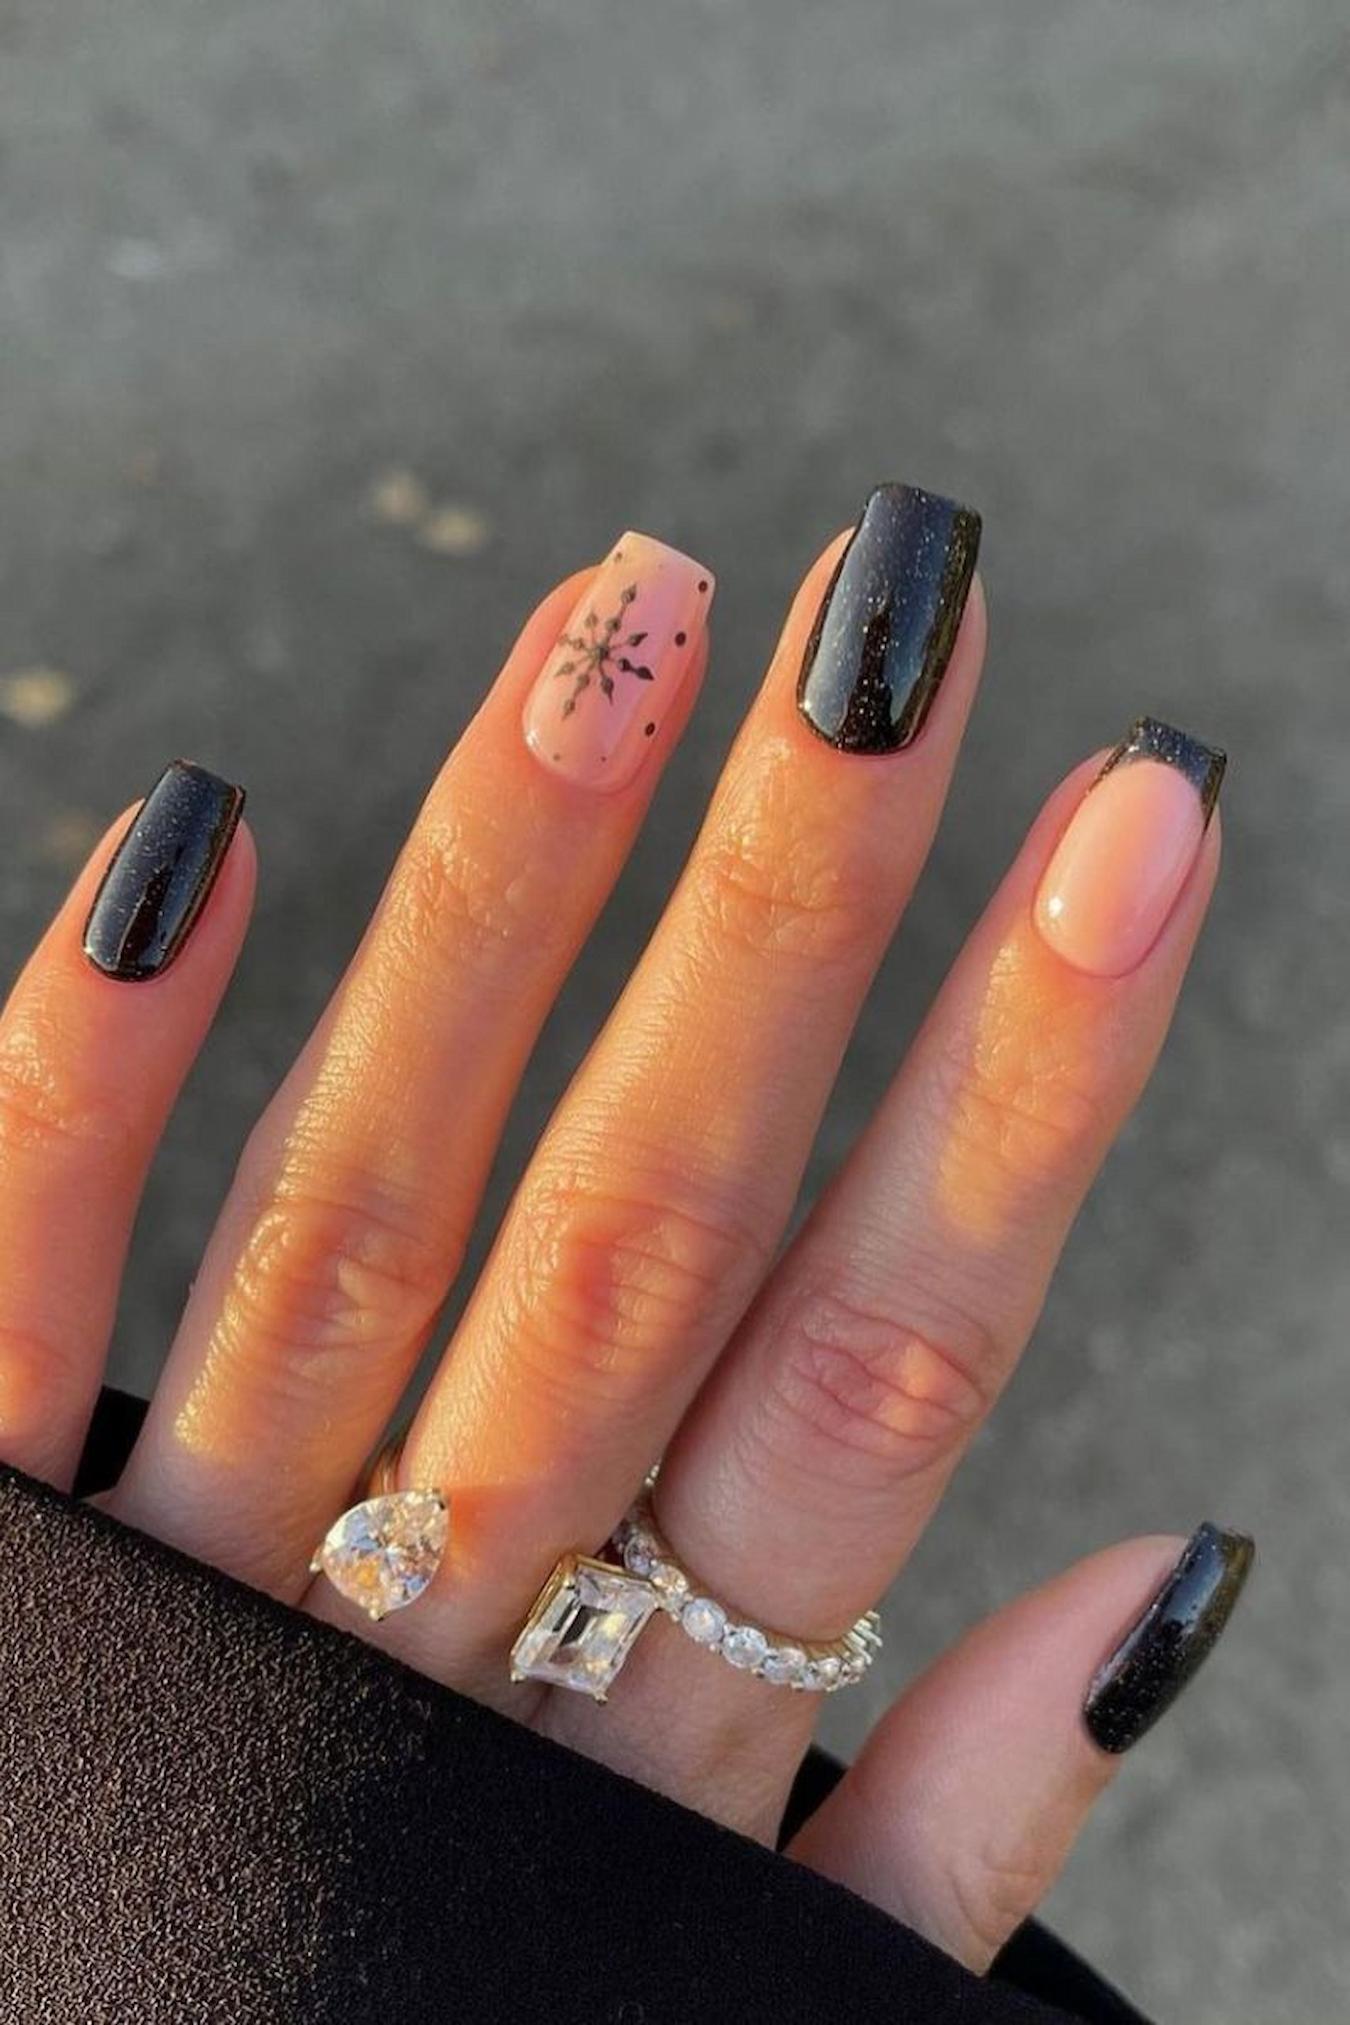
I was skeptical about maintaining glitter french tips and snowflake decals through a regular week. The black base shows every chip, and the silver glitter tip catches on sweaters. The snowflake decal on the accent nail requires a full bead of top coat to seal the edges. With a reapplied top coat every three days, the set held ten days without loss. The sheer pink base hides nail growth well.
- Shape: medium square
- Color: black base, sheer pink tip area, silver glitter
- Finish: glossy glitter
- Technique: glitter french tip painted with fine brush
- Accent: snowflake decal on ring finger
The honest downside: the glitter french tip demands precision. Any unevenness in the smile line is obvious. Expect a touch-up at day seven if you want the full two-week look. The black base can also stain nail beds if worn without a base coat.
Long Almond Snowflake Pearl Nail
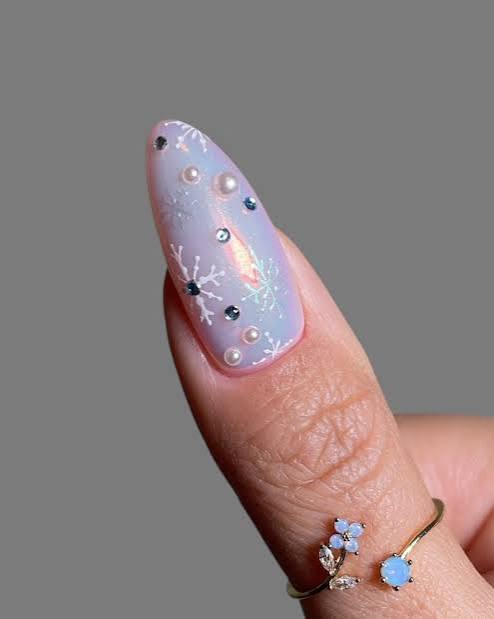
This design costs more than the sum of its parts. The long almond shape requires extensions or tips, and the pale blue iridescent polish needs multiple coats for opacity. The snowflake decals and small pearls demand steady hands and patience. You are paying for the skill to layer the delicate art without making the nail feel bumpy. The pearls are embedded in gel to stay smooth, and the shimmer finish hides imperfections. Expect at least 90 minutes in the chair for this level of detail.
White Embossed Rose Glitter Ovals
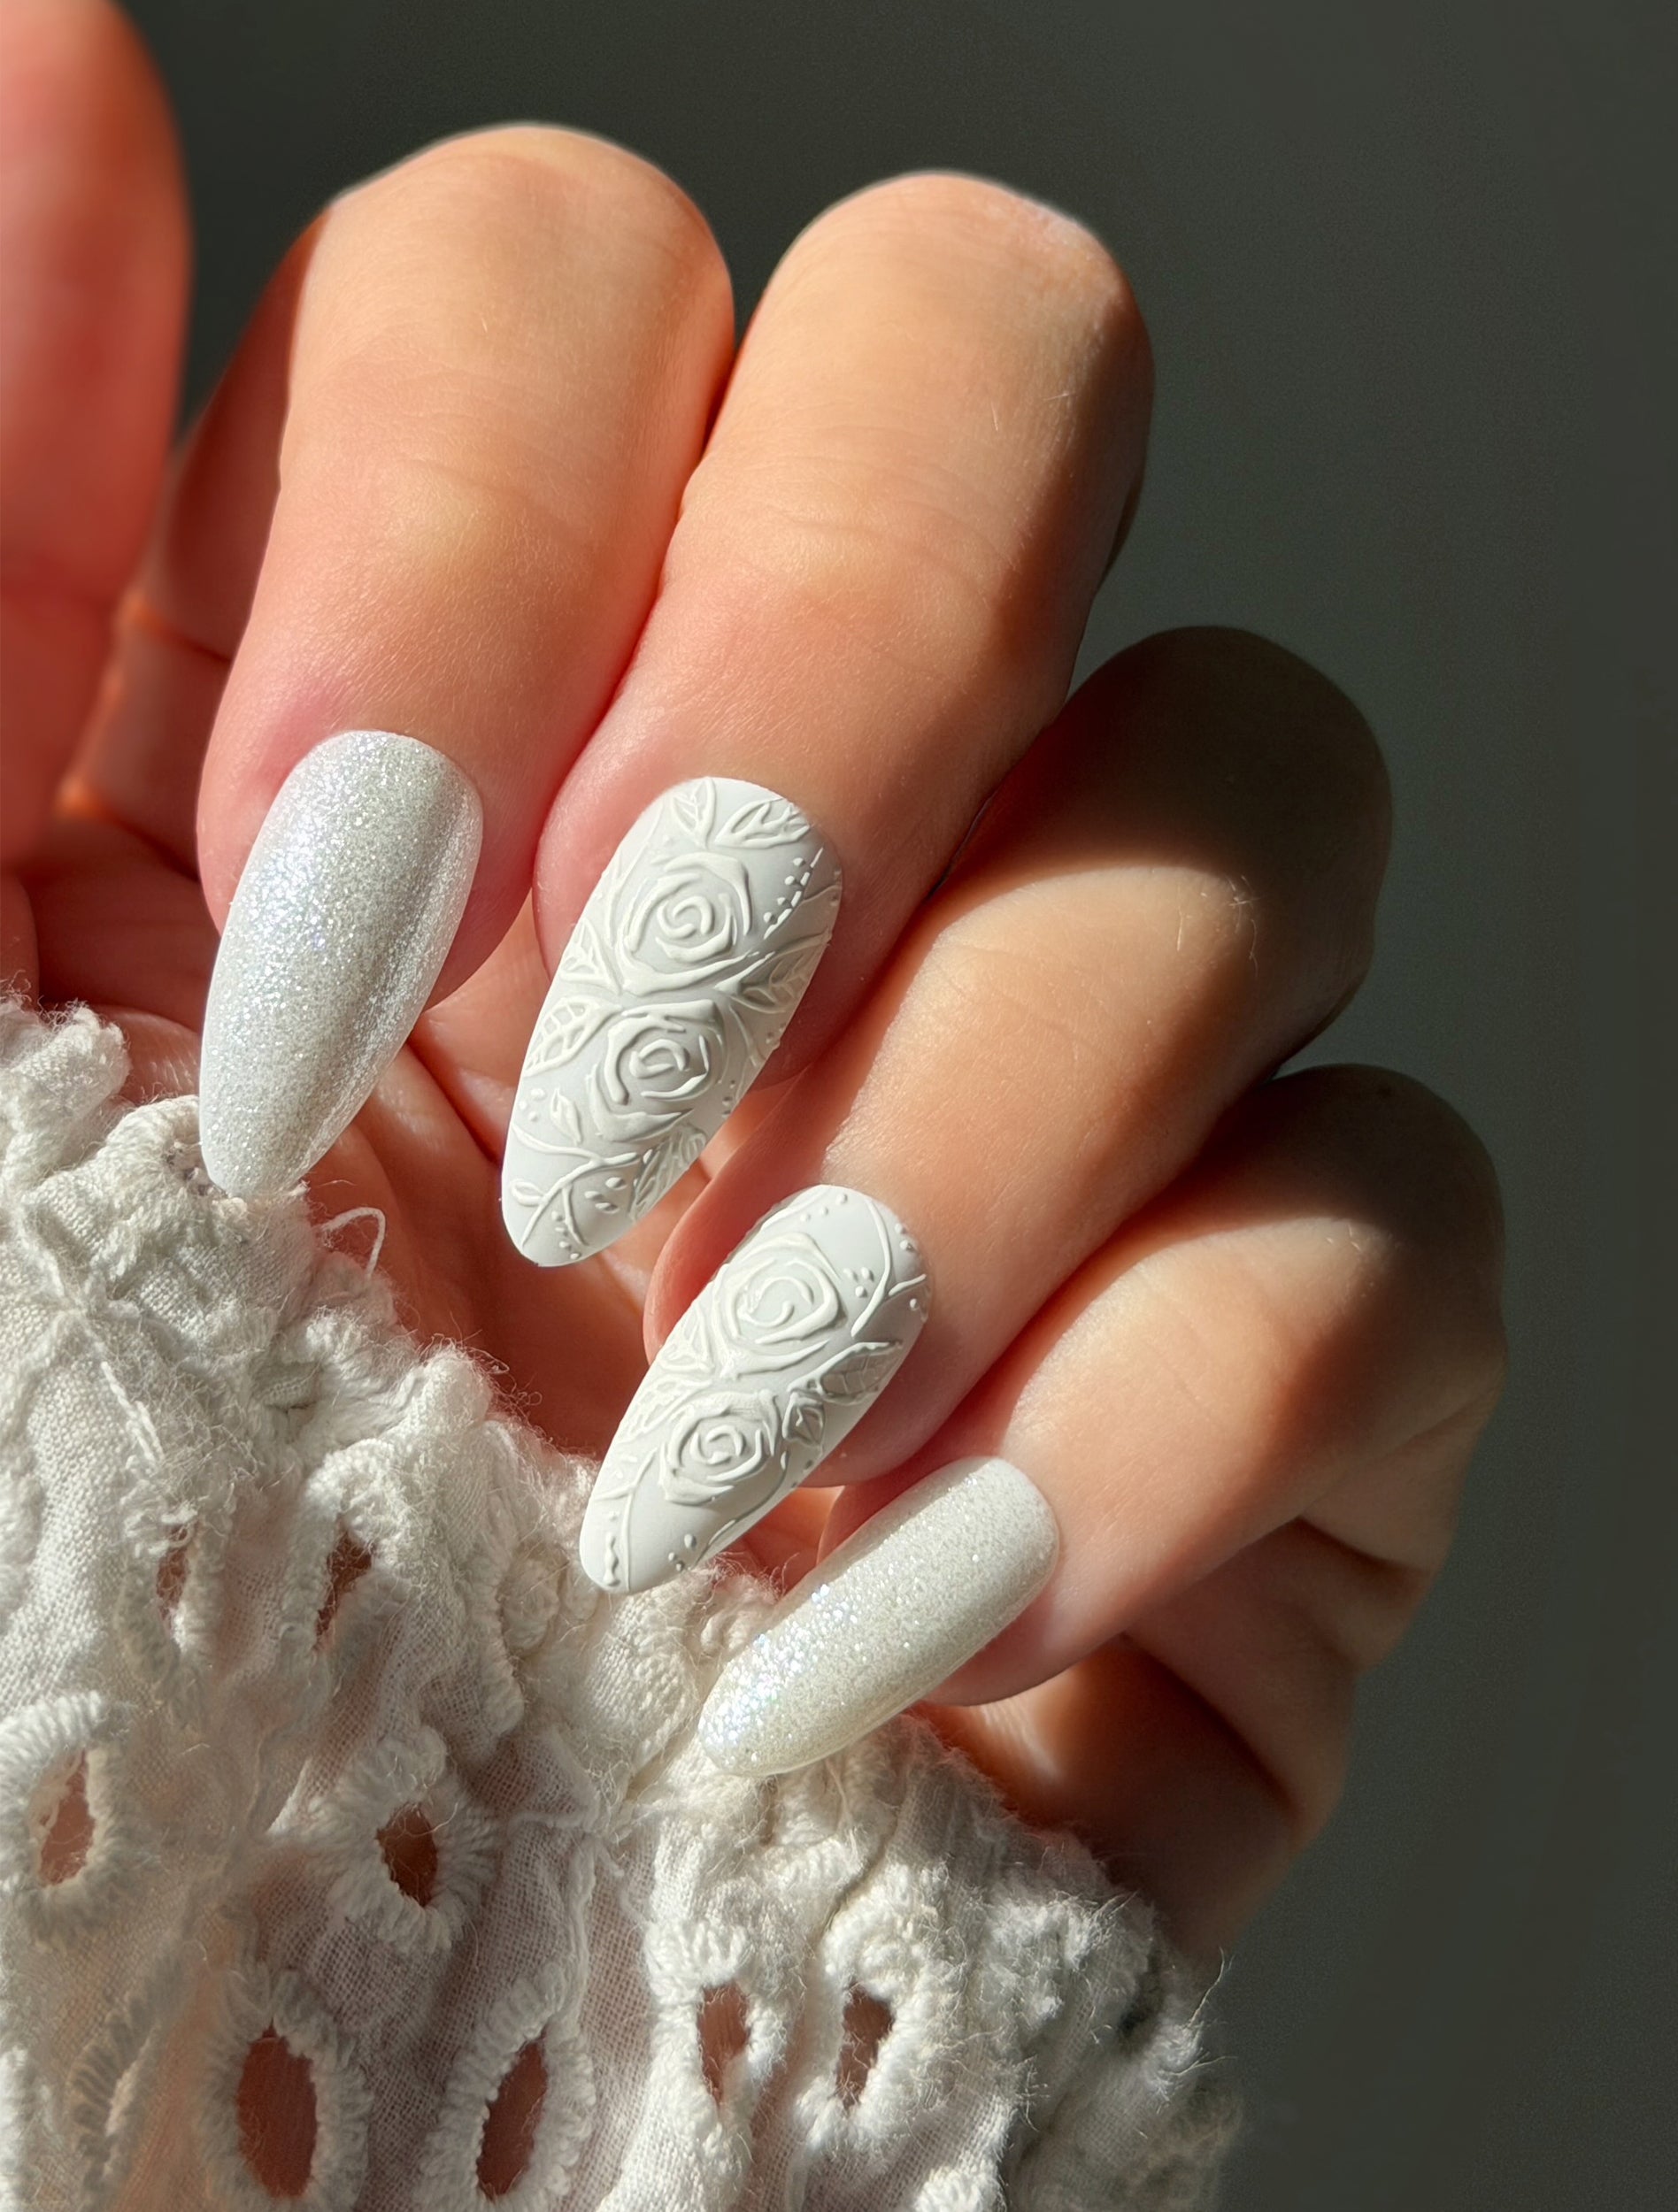
Picture yourself in the salon chair for two hours. The white embossed rose design on the middle and ring fingers is complex to execute: the rose pattern is built up with white acrylic or gel, then topped with a matte finish while the index and pinky nails get a subtle glitter finish. The glitter is fine enough to feel smooth, and the matte rose stands out without being sharp.
For a DIY close, start with a white base on all nails. Use a rose stamping plate instead of freehand embossing: it saves time and frustration. Apply a layer of clear builder gel over the stamp to add dimension, then cure. Buff lightly to smooth, then apply a matte top coat on the rose nails and a glitter top coat on the accent nails. The result is about 80 percent of the salon version in half the time.
Short Nude Glitter Cuticle Gradient
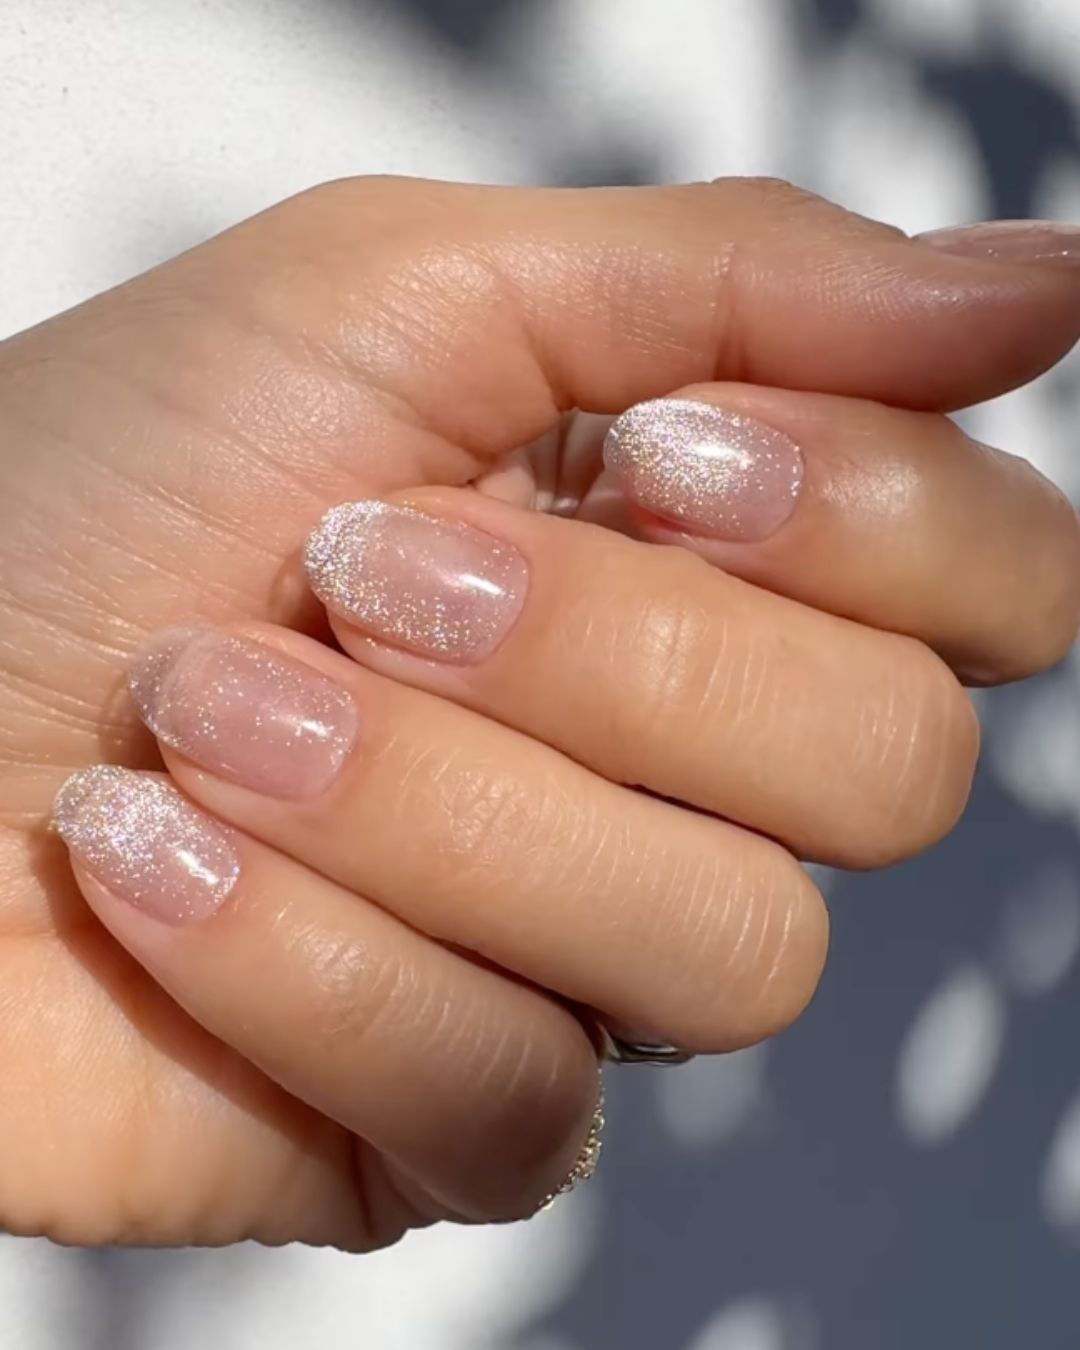
The glitter is so fine it reads like texture, not sparkle. On a sheer nude base, that concentration of silver at the cuticle and tip creates a soft frame that makes the natural nail look expensive. These subtle glitter placement nails rely entirely on precision — one uneven dusting and the effect breaks. The sheer nude base keeps grow-out invisible, which matters when you want two weeks from a manicure that barely looks like you tried.
Off-White Taupe Gold Chrome Glitter Accents
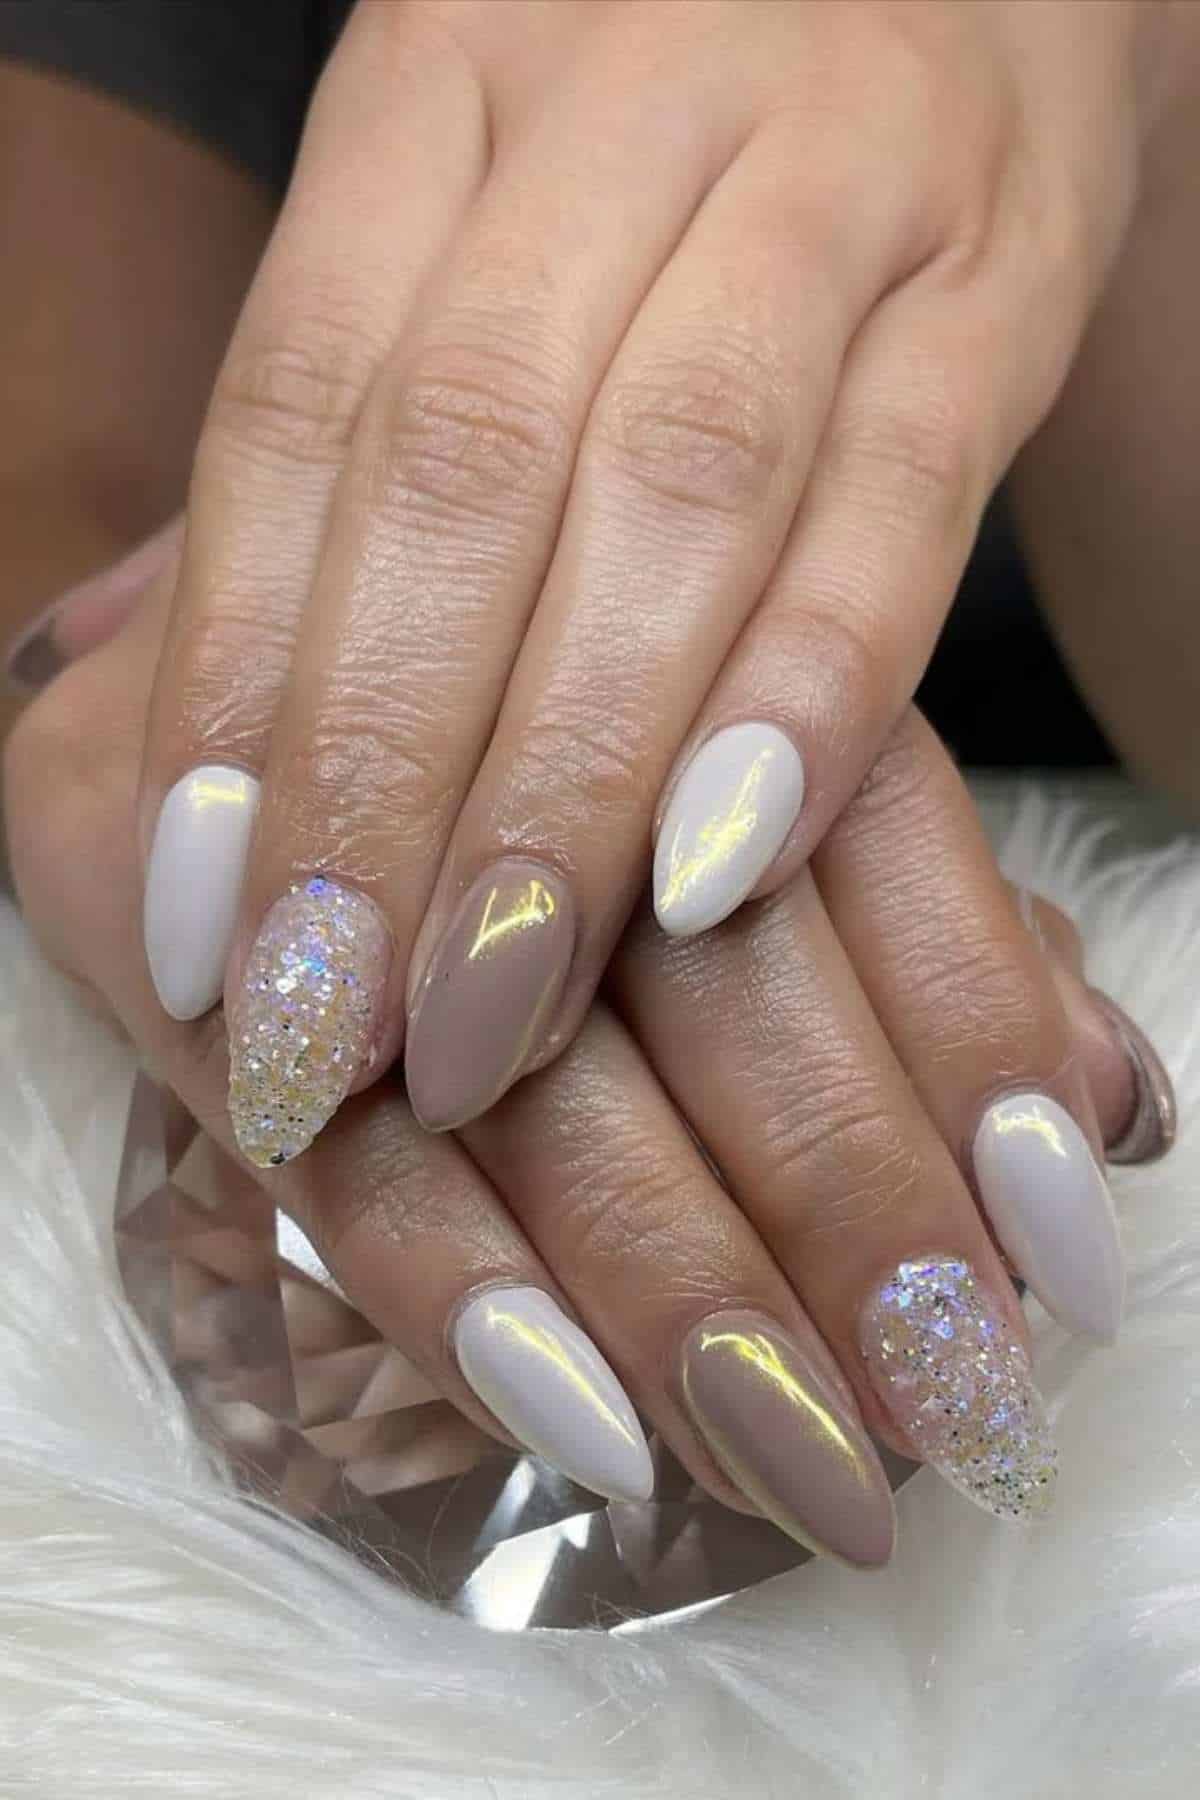
I want to love chrome glitter accent nails, but the reality is maintenance. The off-white and taupe base is forgiving, but the gold chrome on those stiletto tips shows every micro-scuff by day three. And the glitter accent on the ring and pinky? That part holds fine. The disconnect is the finish mix — chrome demands perfect top coat, glitter shrugs off abuse. Expect to baby the chrome fingers through week one or accept that they will dull before the glitter does.
Dark Blue Glitter Snowflake Ovals
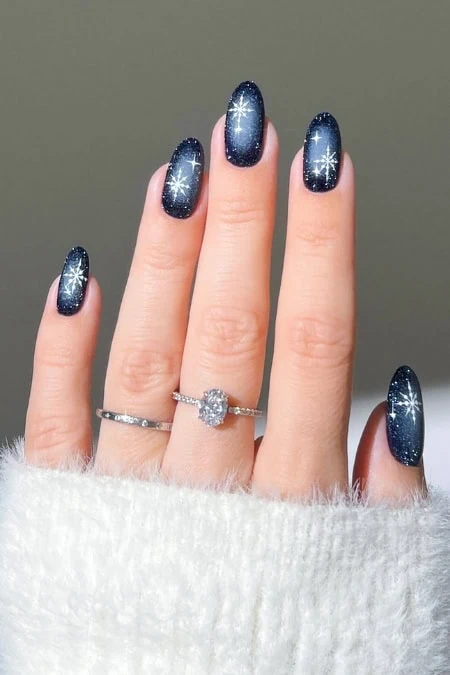
Who is this for? Someone who wants winter without the cartoon. The dark blue glitter snowflake nails use a navy base deep enough to read almost black in dim light, then the white snowflake and silver glitter gradient catch the room light. The medium oval keeps it wearable — no stiletto drama, no square corners to snag. Skip it if your daily involves typing eight hours or handling wet receipts. The glitter gradient is smooth, but the hand-painted snowflake creates a tiny ridge that catches on fabric by day four.
Pale Pink Snowflake Rose Gold Glitter Squares
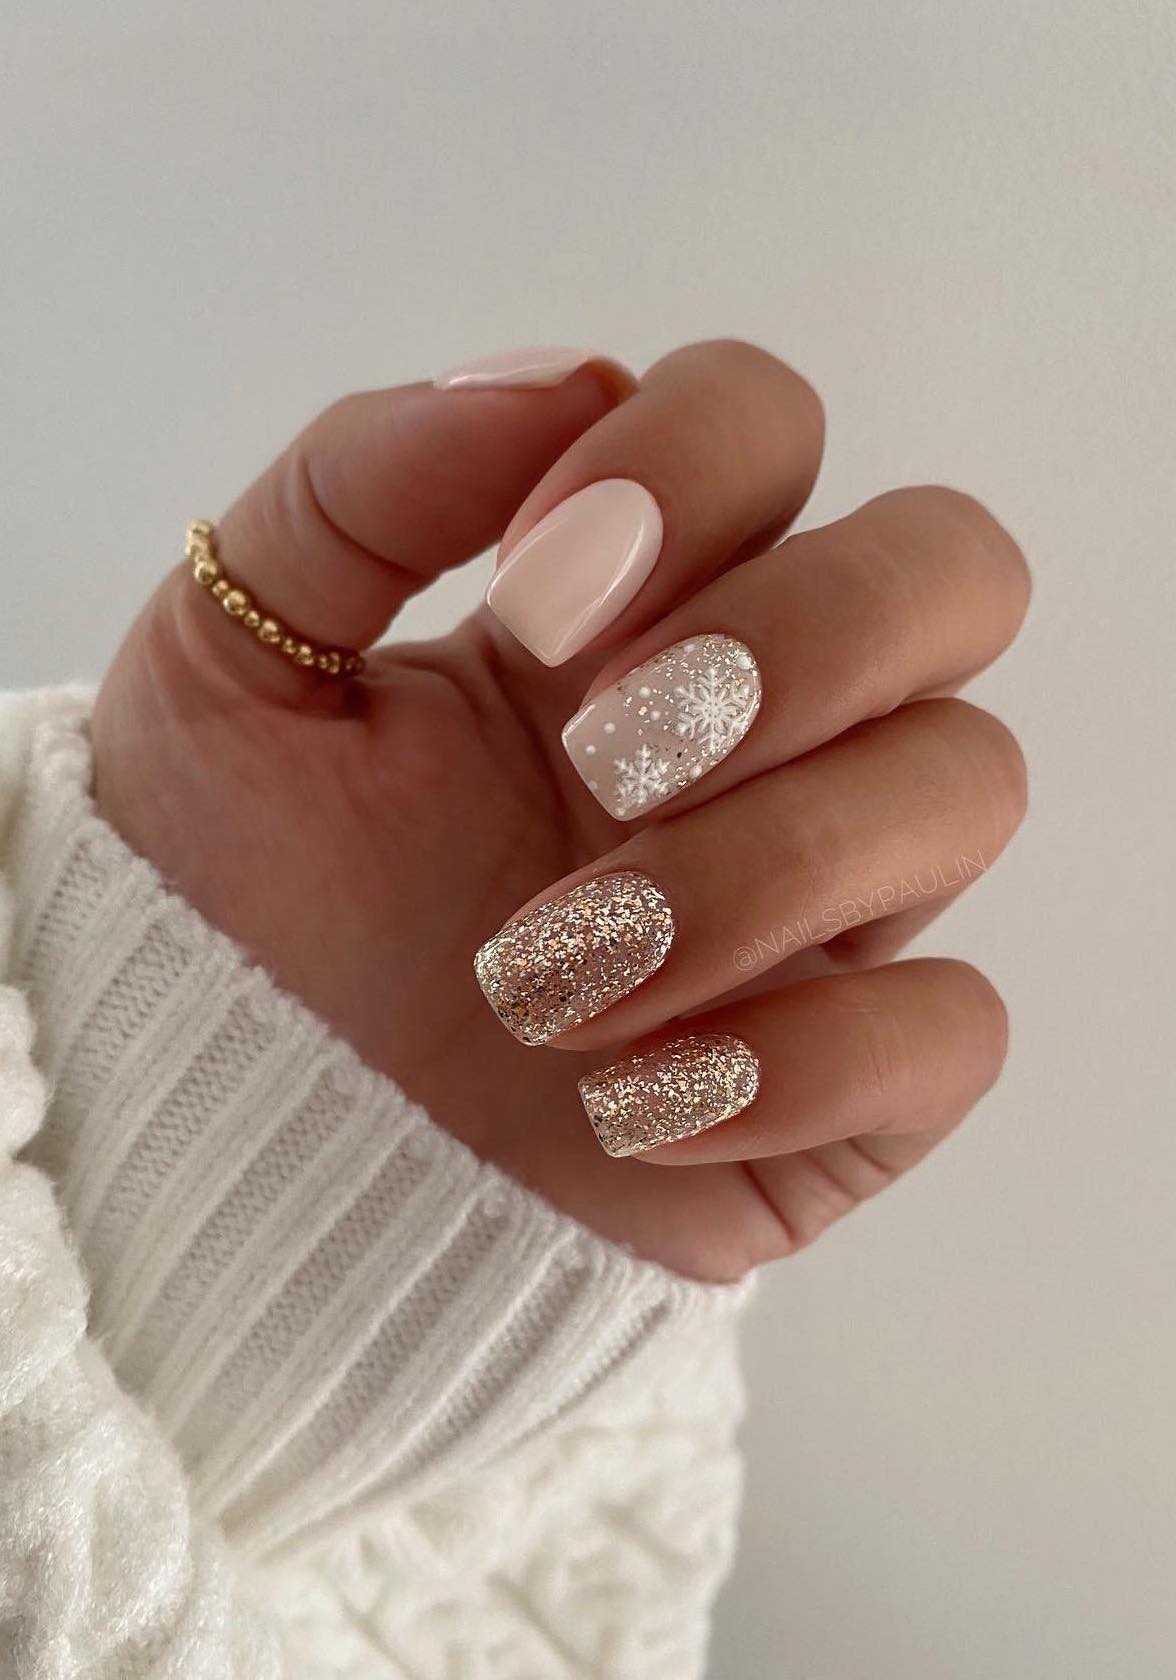
Between this and the dark blue snowflake, the choice is really about how much you want the nail to announce itself. The pale pink snowflake glitter nails whisper. The rose gold glitter on the accent nail is warm enough to read as jewelry, not craft glitter. The short square shape keeps the decal from overwhelming the nail bed. This one is salon-only — the snowflake decal needs a steady hand to lay flat without air bubbles, and the rose gold glitter needs three thin layers to avoid a gritty edge. A DIY attempt will lift by day two.
Sheer Pink Glitter Snowflake Ovals
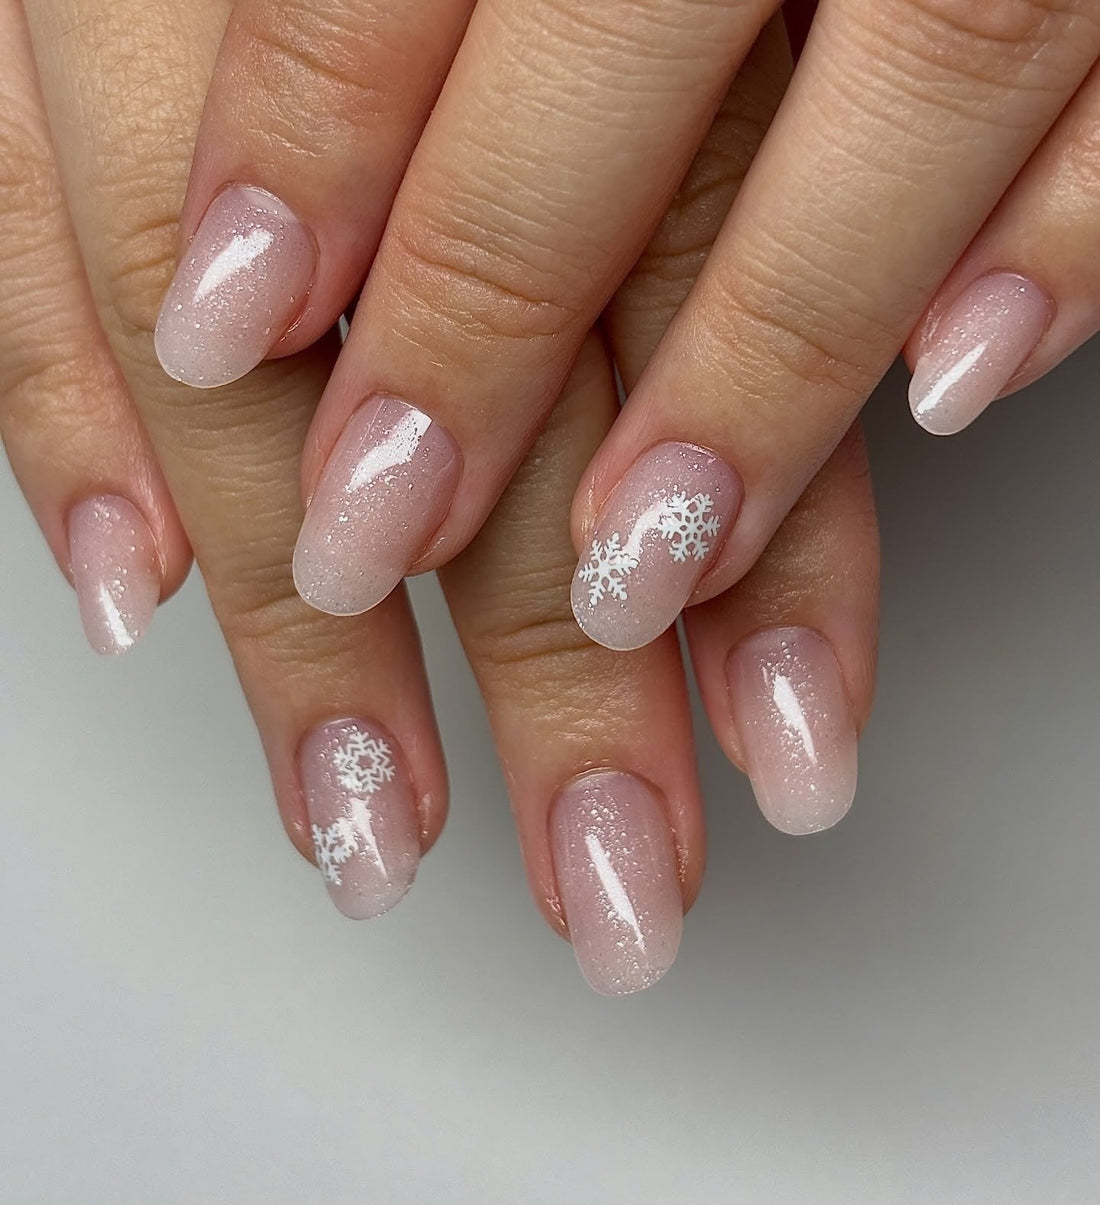
That first glance at the snowflake decal on the sheer pink base — it looks like it floated there. The sheer pink snowflake nails rely on the glitter gradient being barely there, just enough shimmer at the cuticle to suggest light, not a party. The decals are the star, and they are fragile. One wrong snag on a sweater and the snowflake tip lifts. The medium oval shape helps — fewer corners to catch than a square. But this is a look you admire more than you wear through a full work week.
White Christmas Tree Glitter Nails
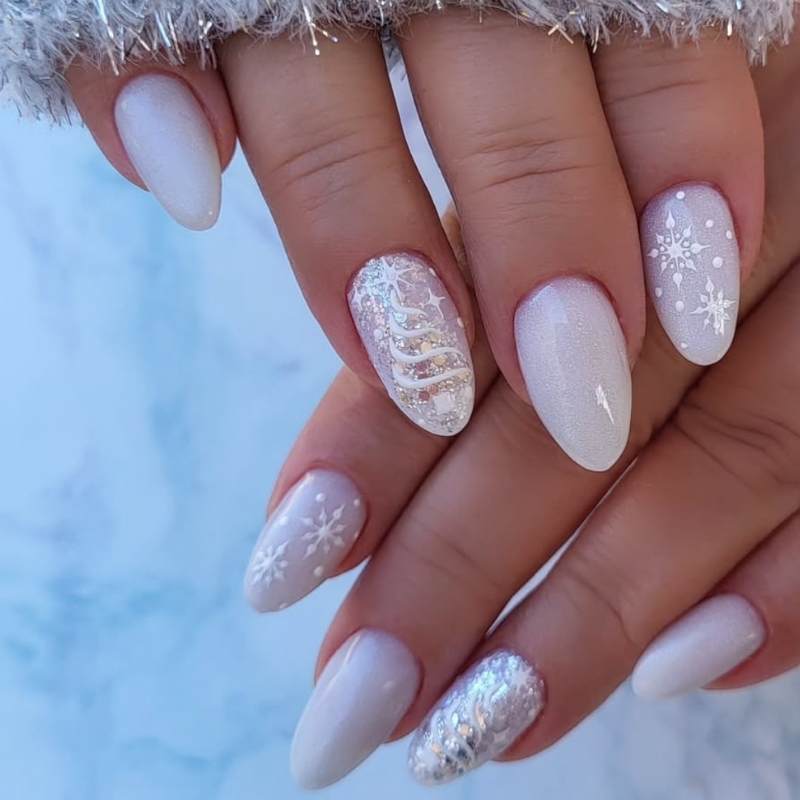
I will confess: I rolled my eyes at christmas tree glitter nails. Then I saw this set in person. The tiny tree and snowflake accents are detailed enough to work, and the iridescent glitter base keeps it from feeling like a craft project. It wears about a week before the tree starts catching on sweaters. Not a two-week manicure unless you baby it.
- Medium oval shape
- White iridescent glitter base
- Hand-painted Christmas tree on accent nail
- Snowflake accent on other nails
- Glossy top coat
The sparkling motif is delicate but festive. Perfect for holiday parties that require cocktail holding, not typing.
Final Thoughts
After writing all 29 designs, I keep coming back to one thing: glitter nails are the winter accessory that actually works with every outfit. I wasn’t planning to recommend the nude base silver glitter French almond. Then I tried it. That’s the one.