
I keep seeing the same thing on my feed: dark, moody nails that refuse to be boring. Deep blues with a wet-look shine, matte black with a single star, burgundy that reads almost black in low light. It’s the color palette I’ve been circling since October, and honestly, I’m not mad about it.
So here are 26 takes on Dark Winter Nails, from barely-there sheer bases to full-on glitter chaos. Whether you’re working with short squares or long stilettos, there’s a version that fits your week, your wardrobe, and your patience level. Some are salon-only commitments, others are a lazy Sunday afternoon.
I’ve got short nail beds and a habit of typing all day, so I know what it’s like to fall for a long almond design and then spend a week bumping into everything. That’s why I’m picky about which of these I’d actually book, and which I’d skip.
Dark Blue Glitter Stiletto Stars
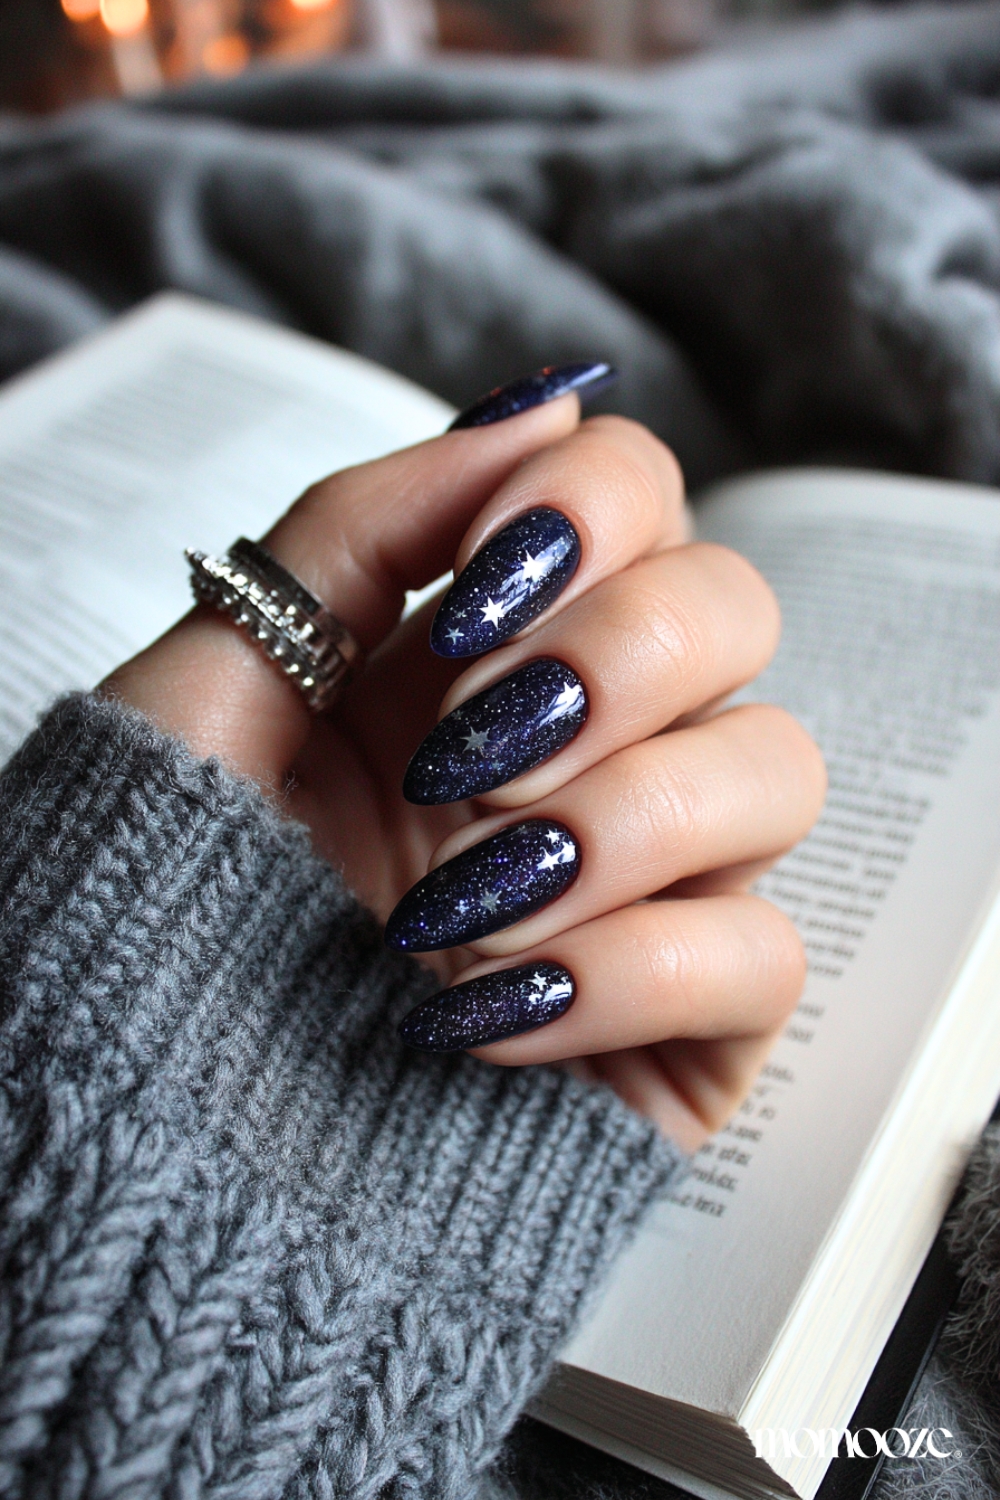
I was skeptical about stars on stiletto nails. Then I saw these. The dark blue glitter nails catch light from every angle, and the white stars are placed sparingly, not clustered. The long stiletto shape gives them room to breathe. The glitter is fine, not chunky, so it reads as shimmer, not craft glitter. The contrast is sharp without being harsh. Each star is a single decal, not a hand-painted mess. That matters.
Navy Cat-Eye Effect Oval Nails
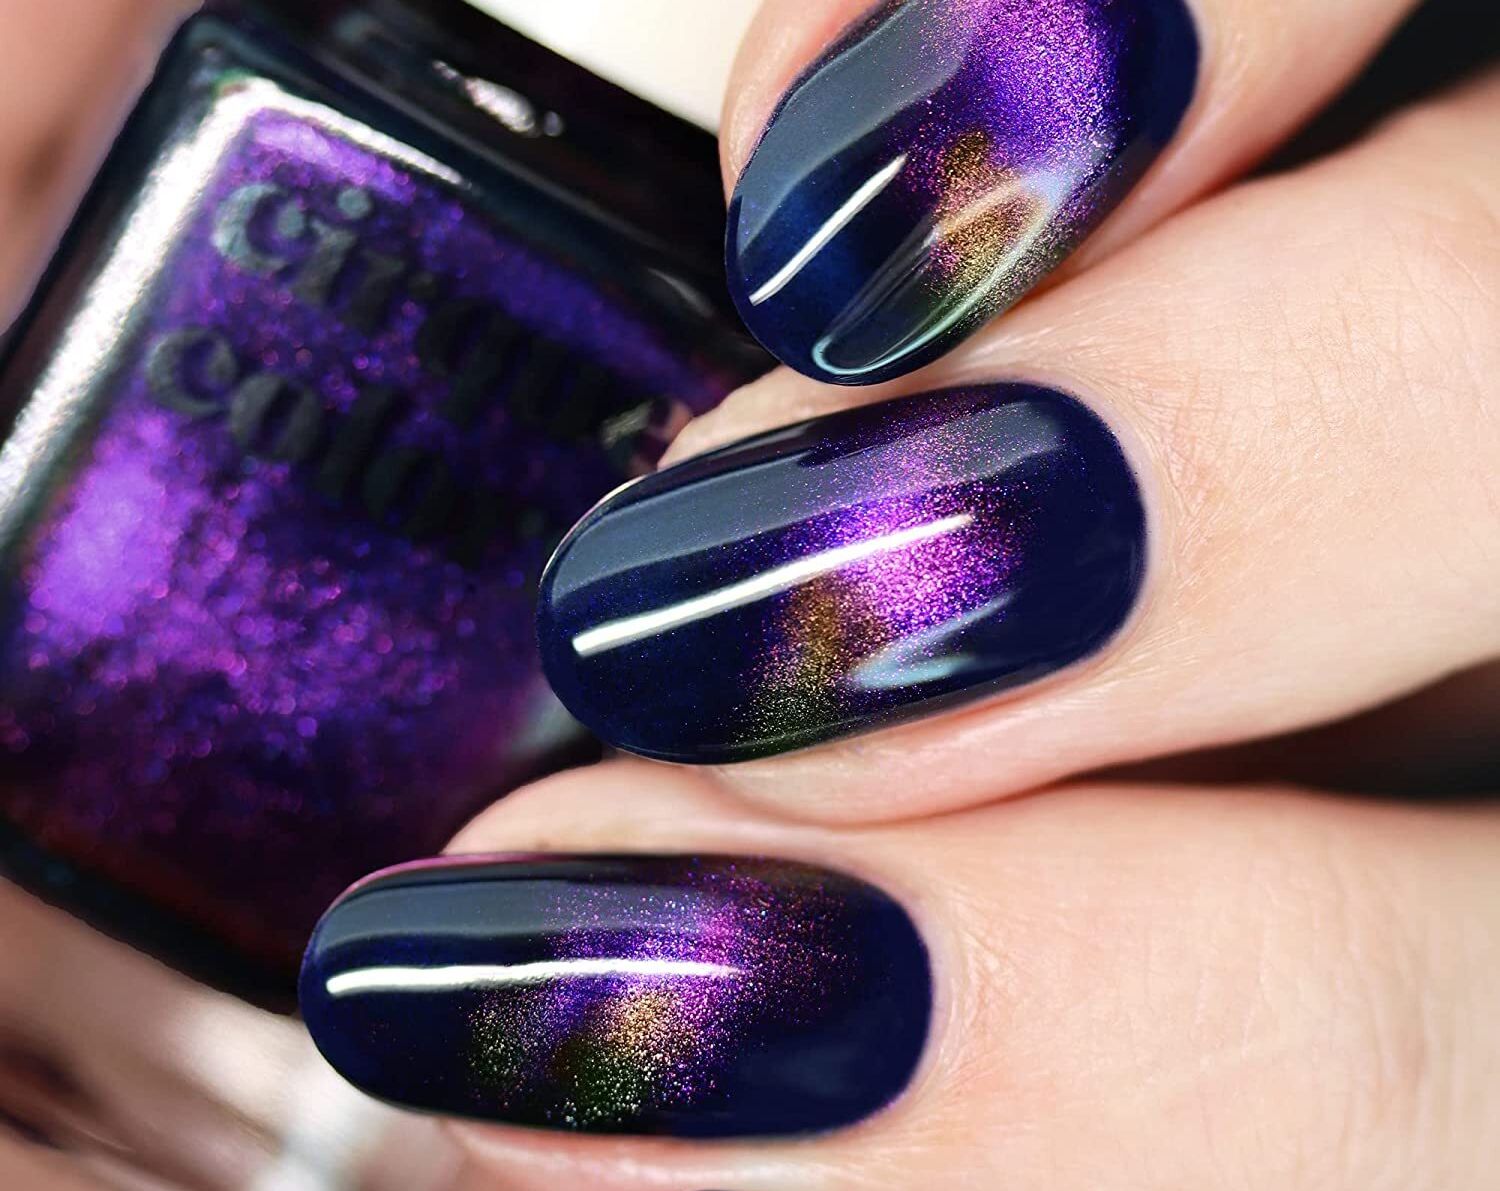
The navy cat eye nails deliver shifting highlights that change with every angle. I caught myself tilting my hand under the office fluorescent just to watch the green flash appear. The deep navy base is almost black in low light, then the magnetic pigment pulls purple, green, and gold bands depending on how you hold it. It’s not a uniform shimmer; it’s a real cat-eye stripe that moves. The oval shape helps the stripe read clearly, not cut off at the sides. This is the kind of polish that makes people ask if they’re magnetic.
Short Square Glossy Burgundy
The mistake most people make with glossy burgundy nails is treating them like any red. They skip the prep, apply thick coats, and end up with a streaky, uneven finish that looks more Halloween than holiday.
The trick is thin layers and patience. A rubber base coat evens out the nail plate, then two thin coats of burgundy, each fully dried, then a fresh top coat every three days to maintain the gloss. Short square nails need clean edges; any flooding at the cuticle ruins the clean line. Use a brush dipped in acetone to clean up before curing. The deep burgundy shade is rich enough to read as dark winter, not just dark. But if the application is sloppy, it reads as cheap. A glossy finish shows every imperfection, so the prep matters more than the color.
Matte Green Plum Celestial Motifs
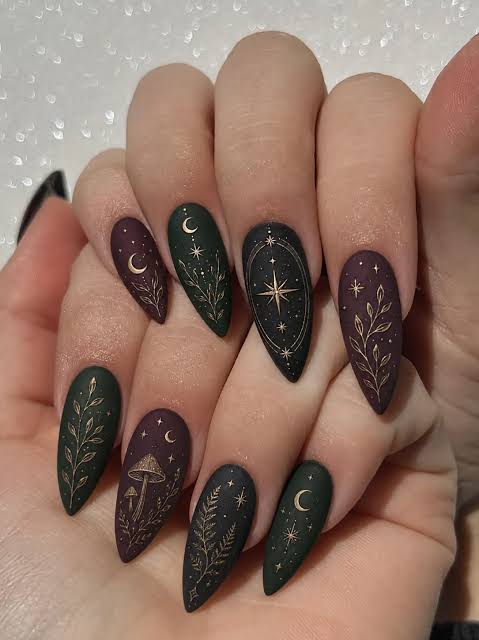
Why choose matte green plum nails over a standard dark green? The matte finish softens the depth, and the celestial motifs add a witchy, storybook feel that glossy can’t match.
- Long stiletto shape
- Matte finish
- Deep green and plum gradient
- Gold celestial motifs
- Mushroom accents
If you want your nails to look like a tarot card, this is the one. The matte green plum nails with celestial motifs feel intentional, not costume.
Shimmering Plum Glitter Almond
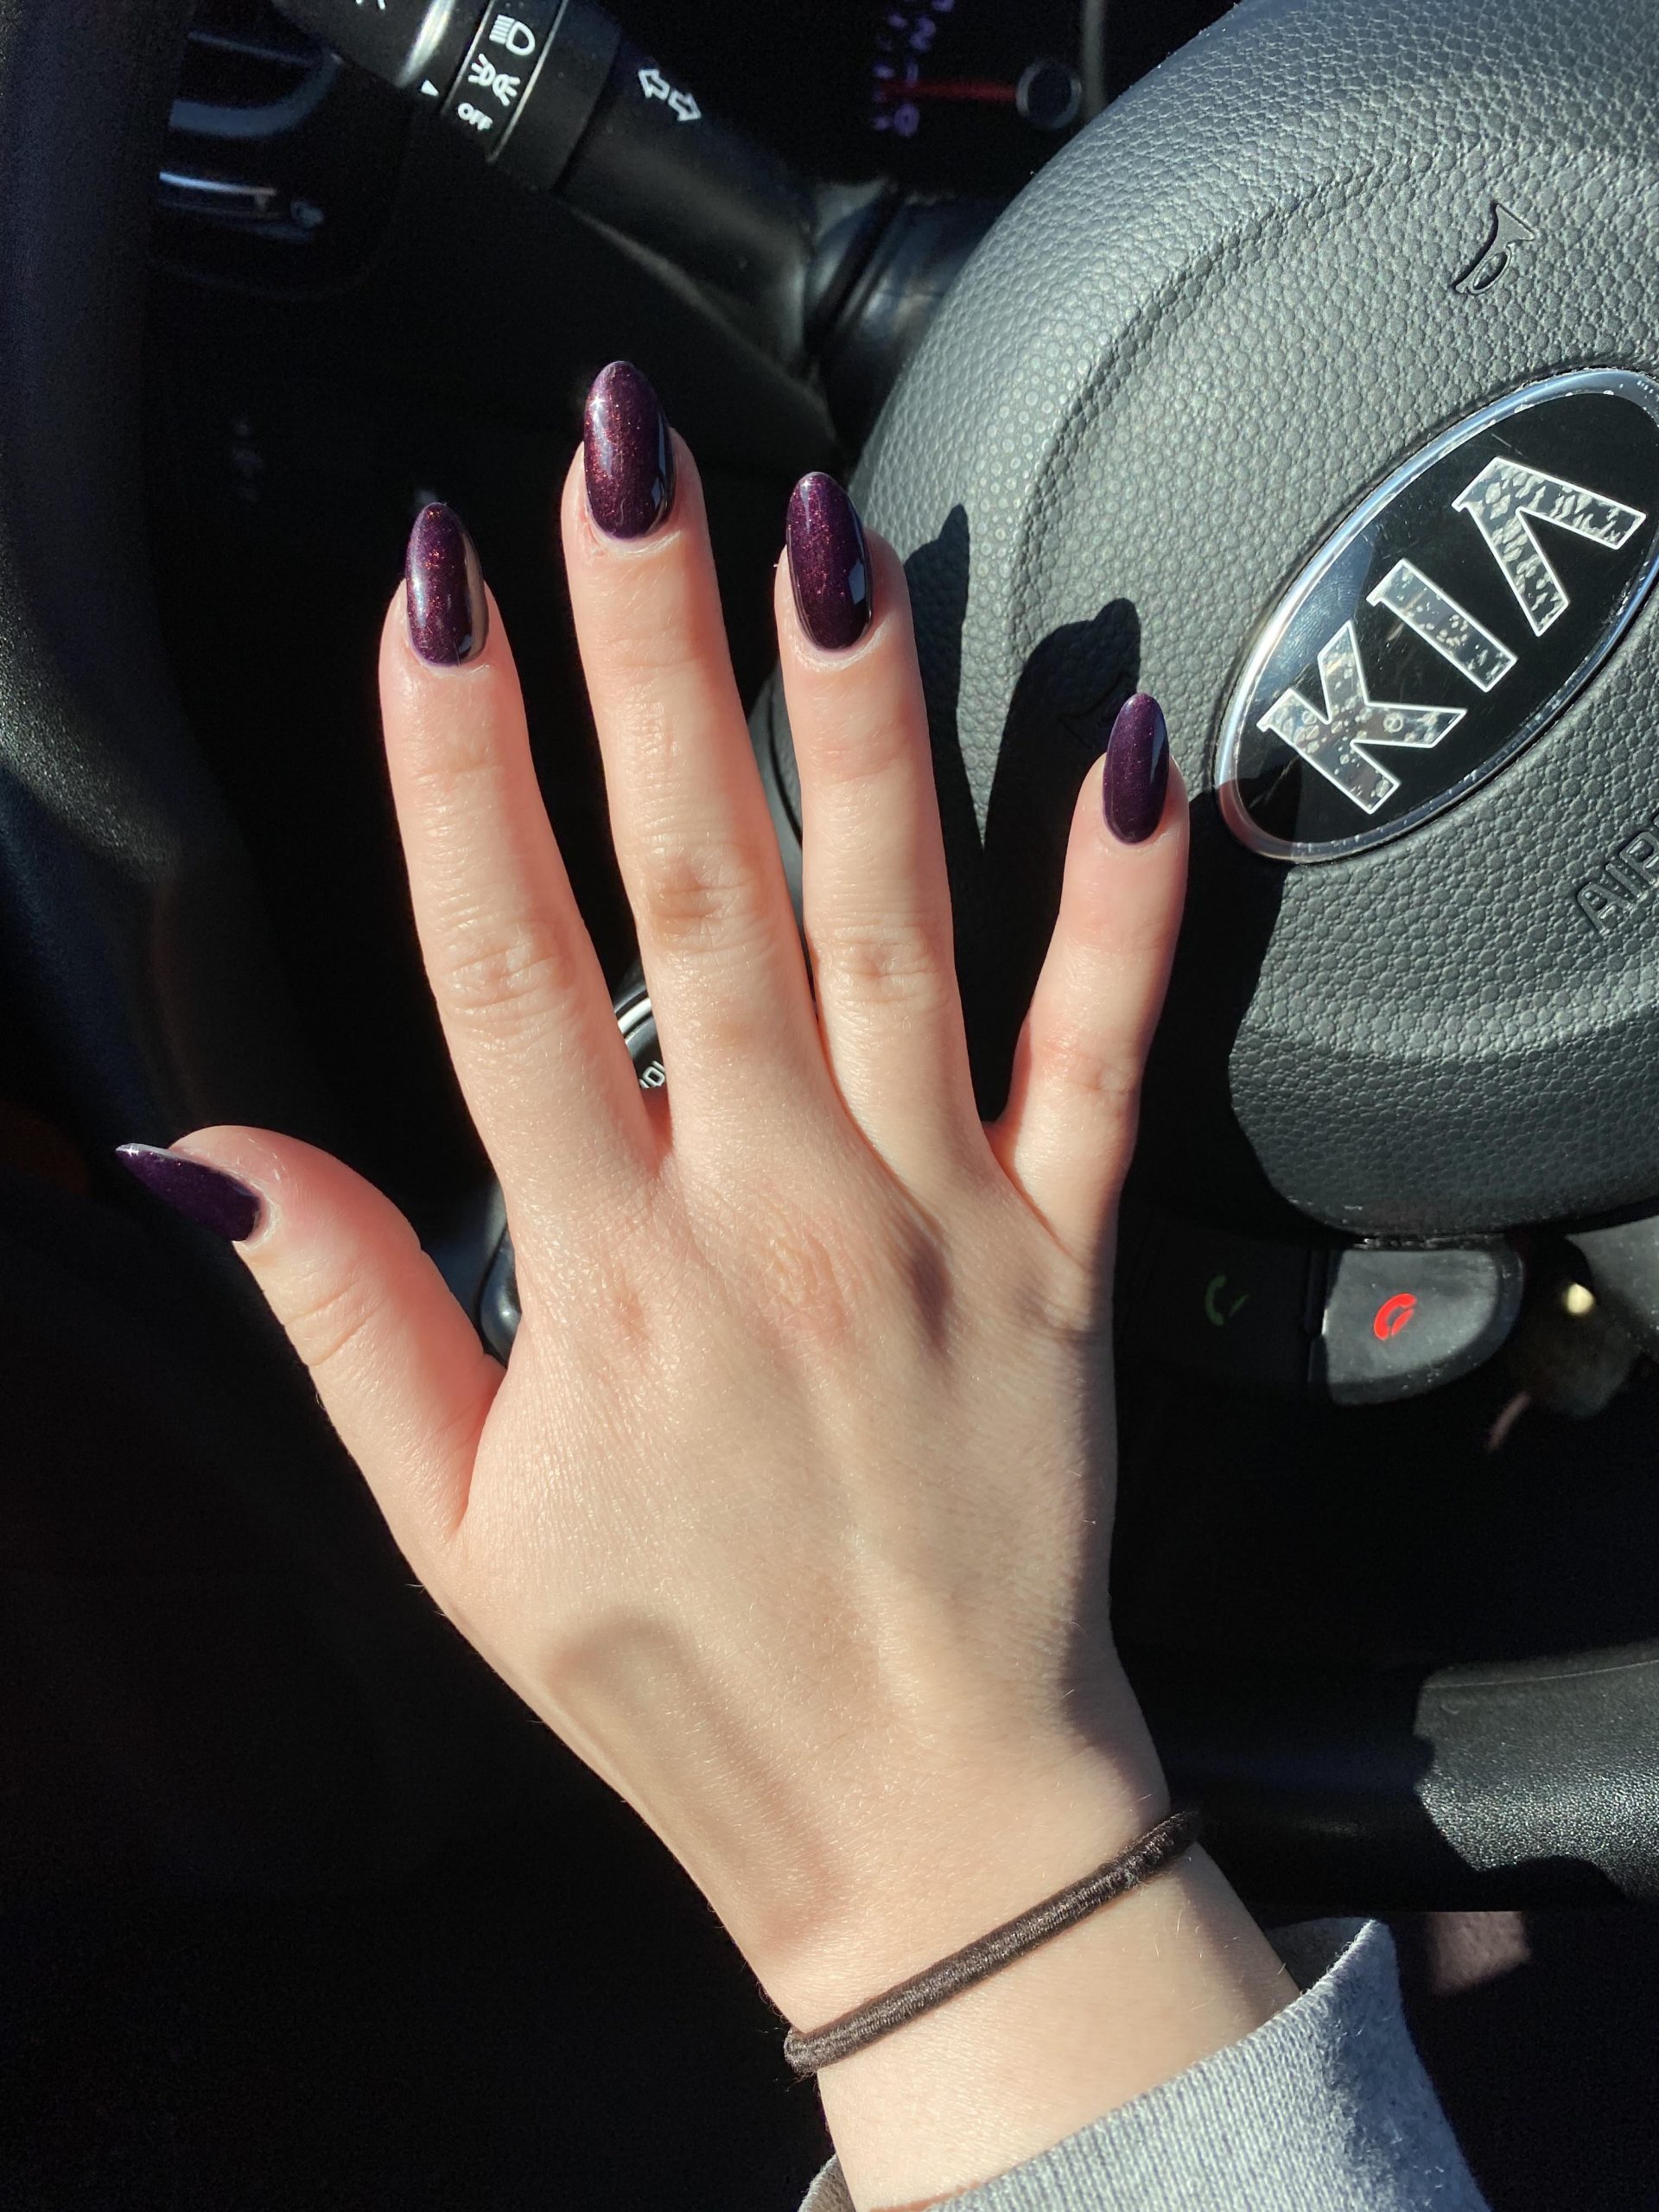
I’ll admit I was hesitant about plum glitter nails. Too many turn out looking like a child’s craft project. This works best on medium almond nails with a glossy top coat that seals the fine glitter flat. The subtle shimmer catches light without overwhelming. It flatters olive and warm undertones because the plum has enough blue to balance. Who should pass? Anyone who hates glitter removal. Fine glitter is easier than chunky, but it still requires patience. The key is the fine particle size — it reads as a sheen, not a crust. The plum shade is deep enough to read as dark winter, not bright berry.
Dark Brown Tortoiseshell Accent
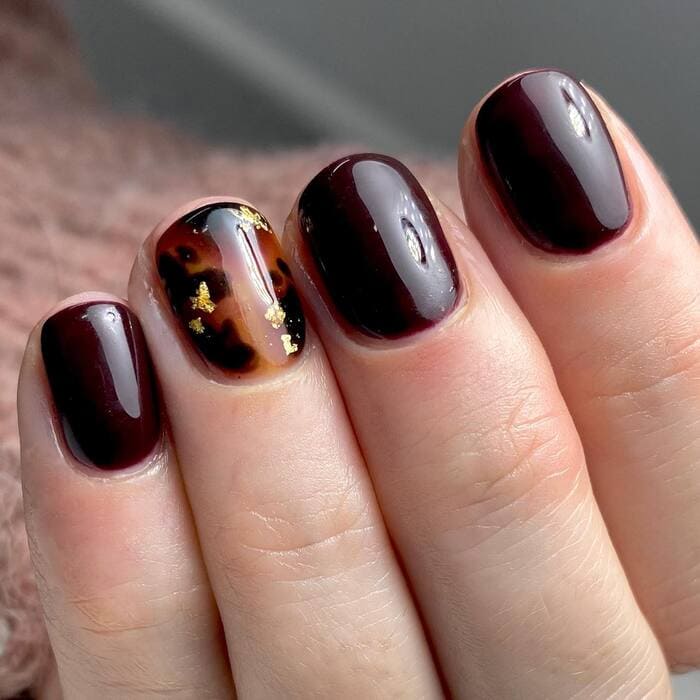
I was ready to write off cat-eye as a 2016 leftover, but this navy version made me eat my words. The oval shape keeps the magnetic shimmer from looking like a teenager’s first metallic phase, and the deep blue base reads almost black in low light, which is exactly the kind of trick I want from a dark winter nail. The magnet gives you that liquid metal stripe down the center, but here’s the thing: it moves when you move, so you get a living finish instead of a static foil. I wore these for a full week of typing and meal prep, and the edges held their line without any of that telltale tip wear until day nine. The shine stayed glossy because the magnetic layer sits under the top coat, so my usual dulling problem never showed up. If you’re fair or medium with cool undertones, this shade will make your hands look like they’ve been dipped in cold water, in a good way. The upkeep is kinder than you’d think: no chrome powder to oxidize, no foil to peel, just a fill at week three if you want to keep the shape. I’d book this one, not because it’s hard, but because the magnet needs a steady hand and a patient tech who doesn’t rush the cure. One honest warning: don’t let them layer the magnetic polish too thick or the effect turns muddy instead of dimensional. Ask for a thin first coat, cure it, then the magnetic second coat, and hold the magnet for a full ten seconds longer than feels necessary. That’s the whole secret, and it’s the difference between a nail that looks expensive and one that looks like a craft fail.
Rich Chocolate Brown High Gloss
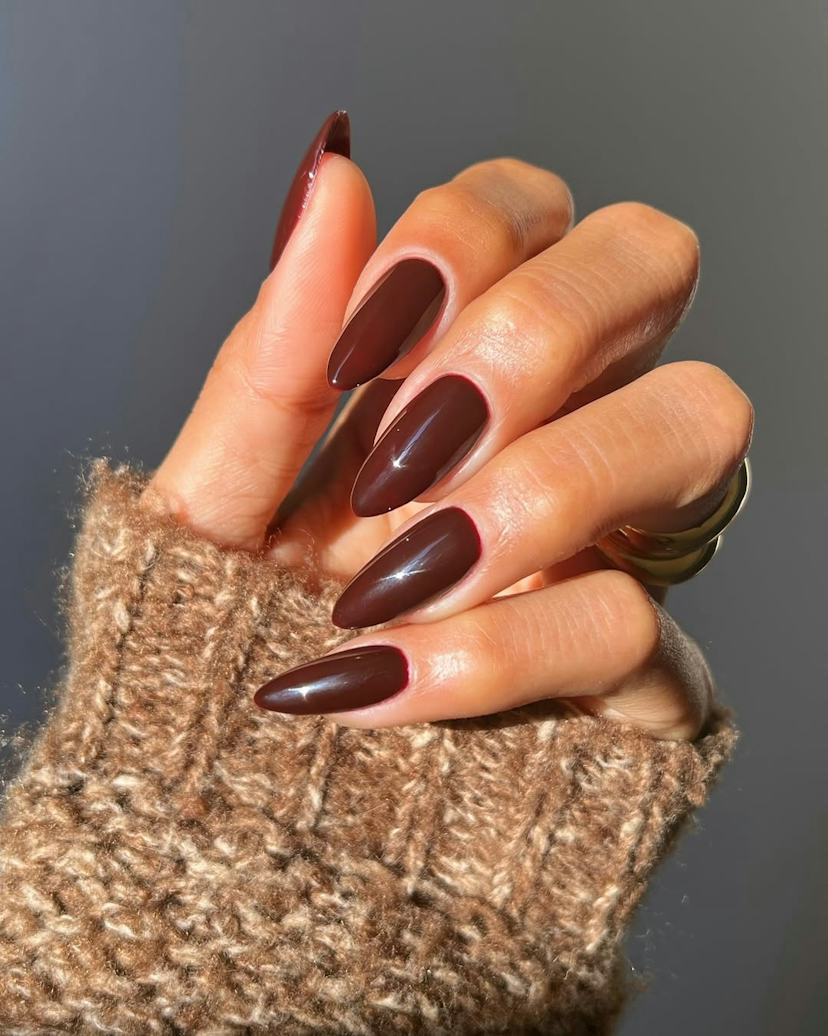
Matte green with plum celestial details sounds like a contradiction, but it’s the quietest loud nail I’ve worn all season. The base is a deep forest that’s almost black at the cuticle, and the plum stars and moons sit on top in a way that catches the light only when you turn your hand. The matte finish is the real workhorse here: it hides the little dents and dings that glossy nails show by day three, and it makes the plum accents pop like they’re floating. I was skeptical about the color combo until I saw it against my skin, and the warm plum against the cool green actually flatters both warm and neutral undertones without trying too hard. The wear is decent, but matte is a commitment: you’ll see every bit of regrowth at the cuticle by week two, and the matte top coat will start to look patchy if you’re rough with your hands. I made it ten days before the stars started to chip at the tips, which is about what I’d expect from hand-painted details on a matte base. The trick is to keep the matte coat thin and top with a matte sealer, not a glossy one, or you’ll lose the whole effect. If you’re a DIY person, this one is doable but not quick: plan for 90 minutes and a steady hand for the celestial bits. I’d rather book it, mostly because the matte finish needs even application or you get shiny patches that look like a mistake. One thing I learned the hard way: don’t use a quick-dry top coat over matte, it turns glossy in patches and ruins the whole mood. Stick with a matte top coat and a patient attitude, and you’ll get a nail that looks like it cost a fortune.
Shimmering Burgundy Almond Nails
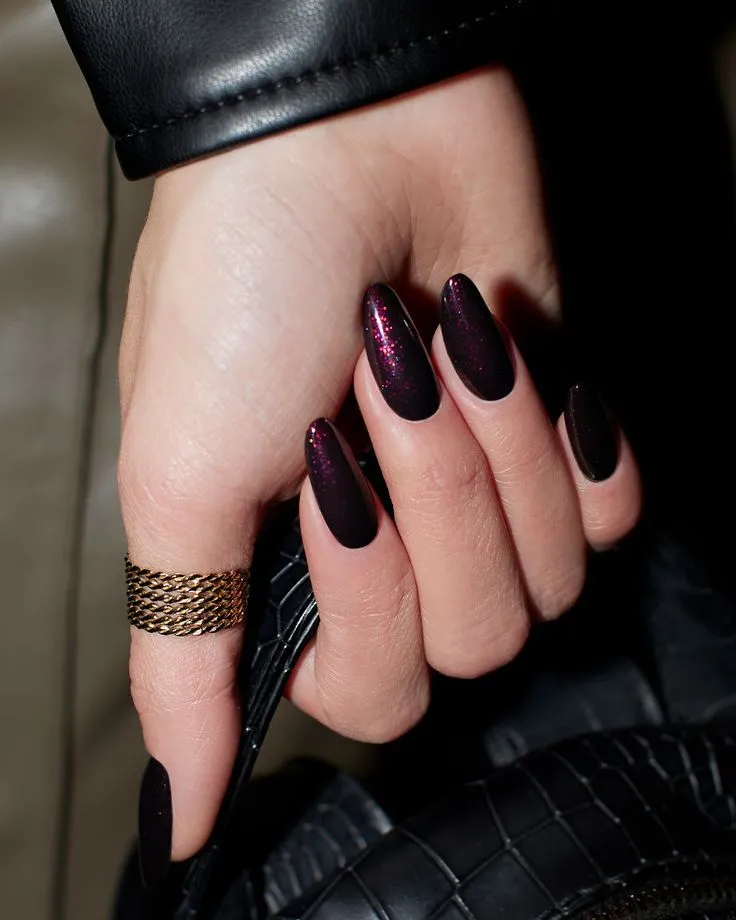
Glitter purple with a star and stripe accent is the kind of nail that makes me feel like I’m wearing jewelry, not just polish. The coffin shape gives you that long, dramatic canvas, and the glitter is fine enough to look expensive rather than chunky and crafty. The star accent on the ring finger is the hero piece, but the stripe keeps it from tipping into full-on party mode, which is exactly the balance I want for a dark winter nail. I wore these through a week of gym sessions and typing, and the glitter did double duty: it hid the wear at the tips, and it made the regrowth look intentional by week two. The downside is that glitter is a pain to remove, so budget for extra soak time or a peel-off base if you’re doing it at home. I’d say this is a salon job, not because the design is hard, but because the glitter needs to be packed evenly or you get bald spots that look like a mistake. Ask for a thin base coat, then two coats of the glitter polish, and finish with a top coat that has a bit of thickness to it, that’s what gives you that smooth, glass-like finish. The star and stripe combo works best on medium to long lengths, so if you’re a short-nail person, this might not be the one for you. I’ve had mine on for a week and a half, and the only real wear is a tiny chip on my dominant thumb, which is honestly better than I expected from a glitter that catches on everything. If you’re debating between this and something more minimal, go with the glitter, it’s the one that gets the compliments without trying too hard.
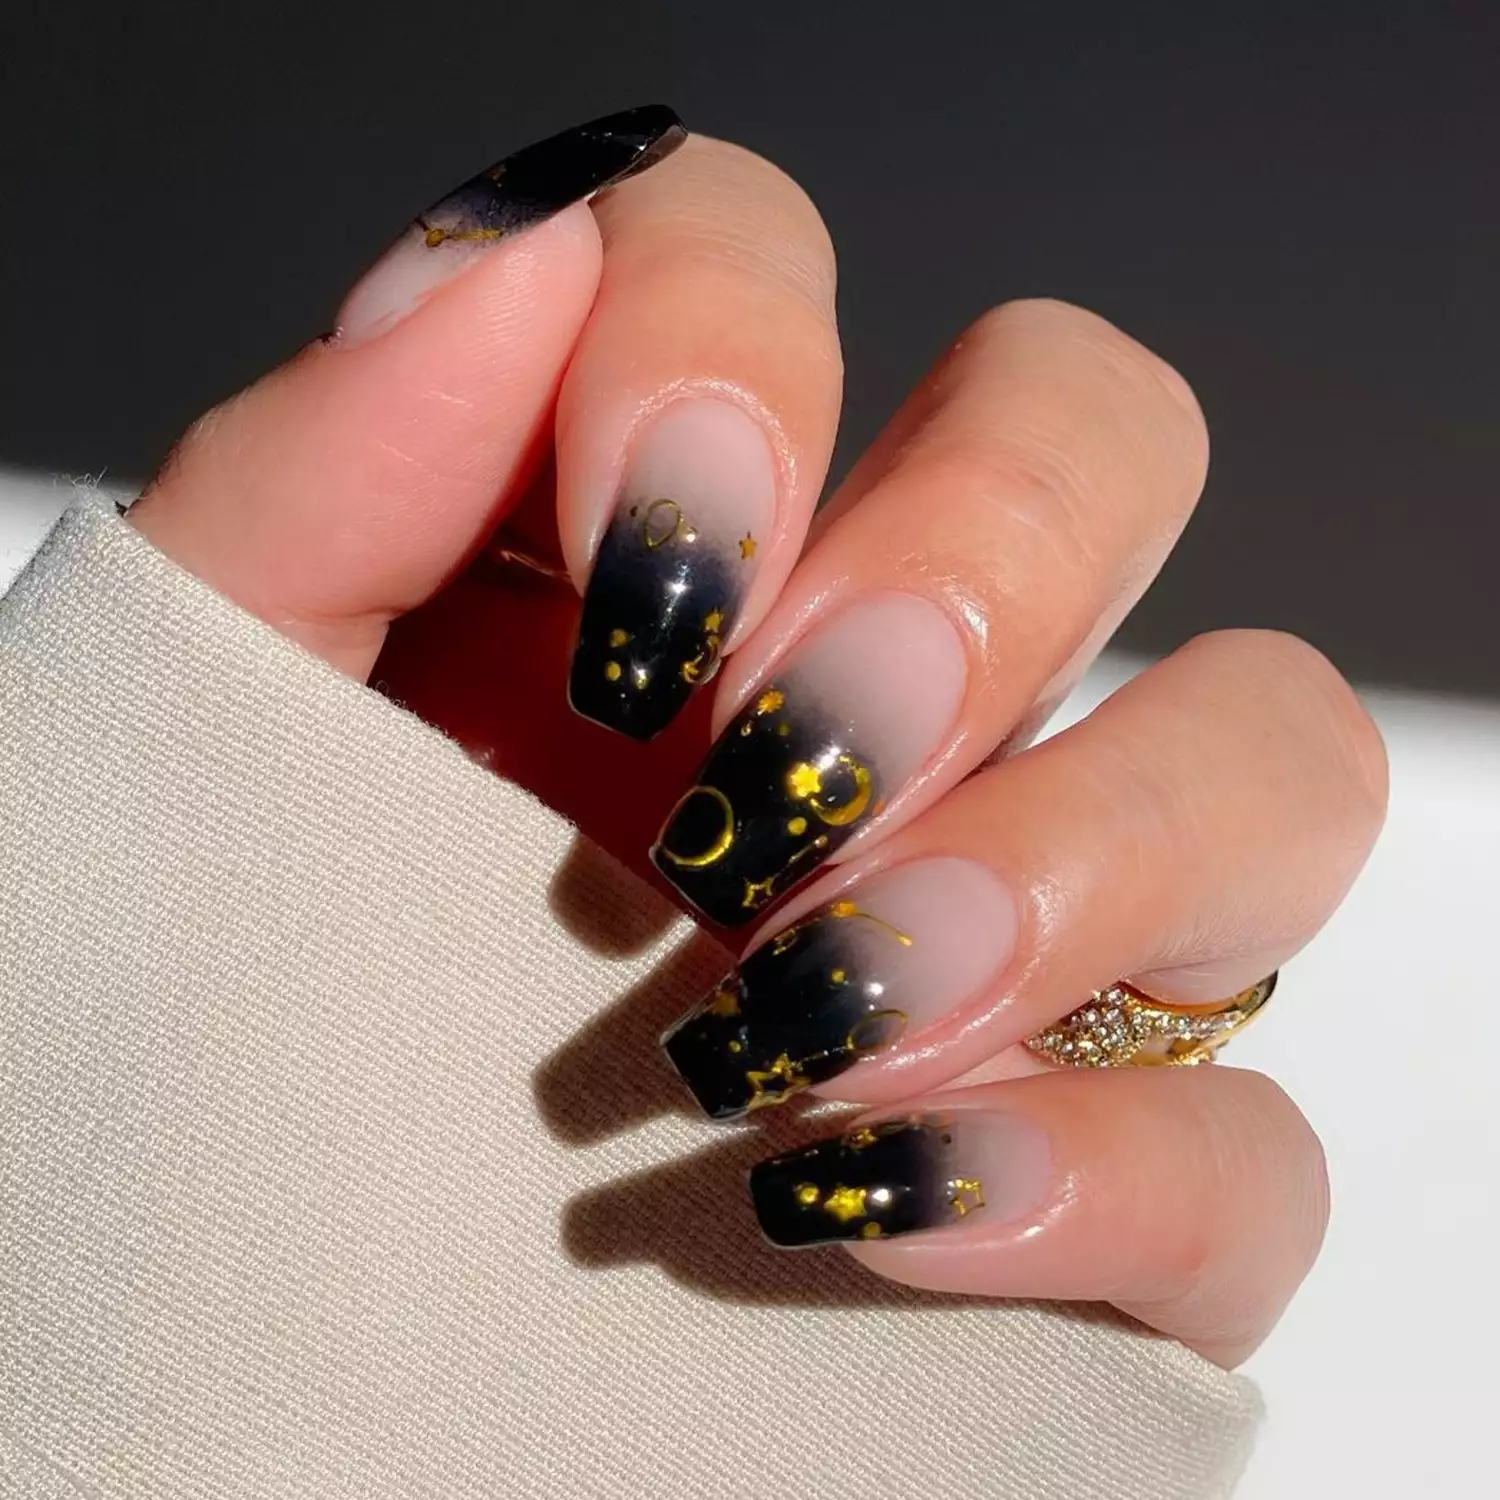
Matte Gradient Black to Purple with Stars
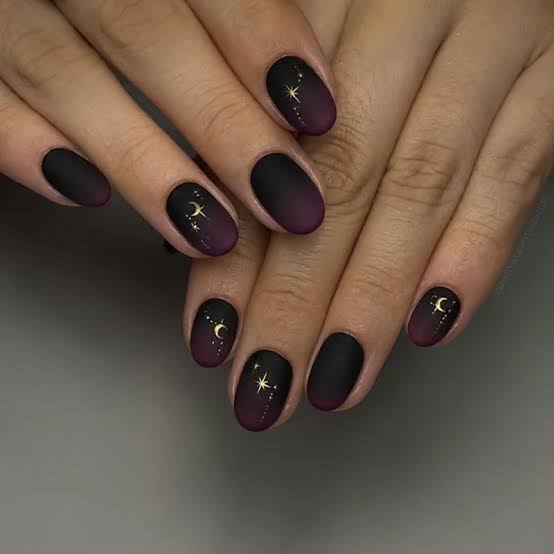
The matte gradient nails in this set start with a black base at the cuticle that fades into deep purple at the tip, and the transition is soft because the sponge was dabbed in three passes. Gold stars and moons are placed on the purple side, not the black, so they catch the eye. The matte finish is the key: it makes the gradient look like velvet and keeps the gold from reflecting too much light, which would wash out the shapes. The stars are placed asymmetrically, some clustered, some alone, which keeps the design from looking like a stamp sheet.
- Short oval shape
- Matte black to deep purple gradient
- Matte finish
- Gold celestial decals
- Thin matte top coat over decals
The technique demands patience. The gradient needs to be built in thin layers, each one dried before the next, or the black and purple bleed into a muddy brown. The decals go on after the gradient is fully dry, then sealed with a light matte top coat that does not flood the edges. That is the difference between a design that stays crisp and one that blurs by day two.
Black Pink Purple Chunky Glitter
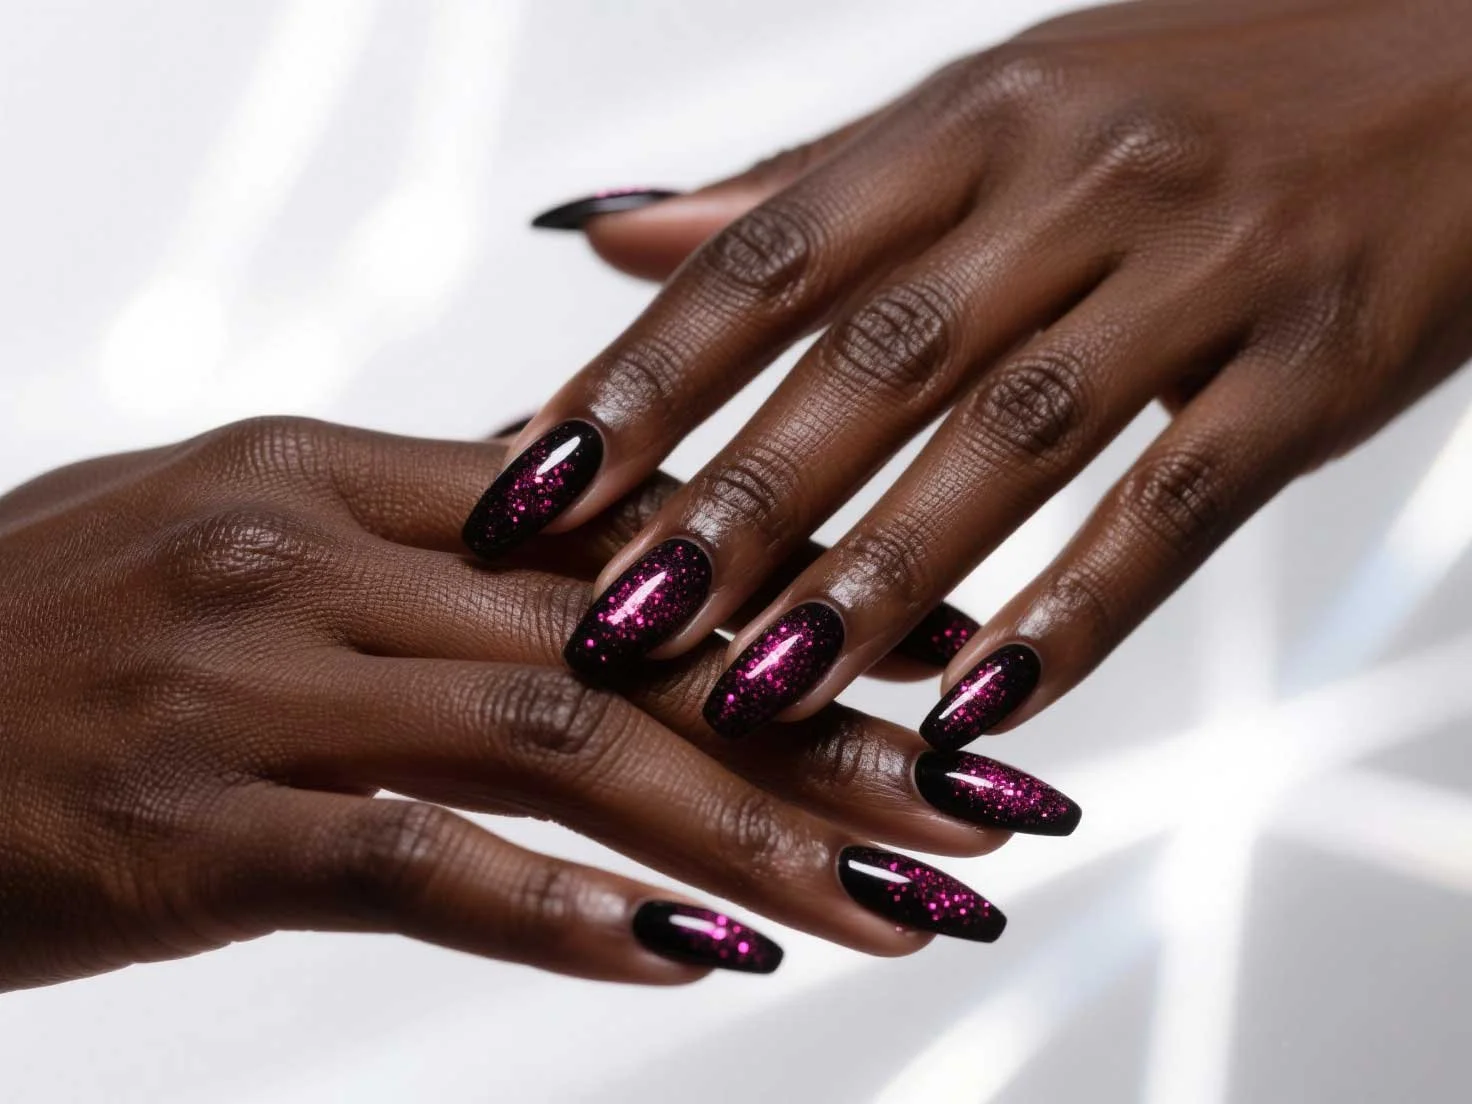
Ever tried to get chunky glitter nails to lie flat without a thick top coat? The trick is to press the glitter into the tacky color layer before curing, then add a thin top coat that you level by wiping the brush across the tip. For this black base with pink and purple glitter, use a dense glitter mix and dab it on with a sponge rather than a brush. That keeps the coverage even and prevents bald spots. The pointed medium length helps the glitter catch light from every angle.
Deep Navy Blue High Gloss
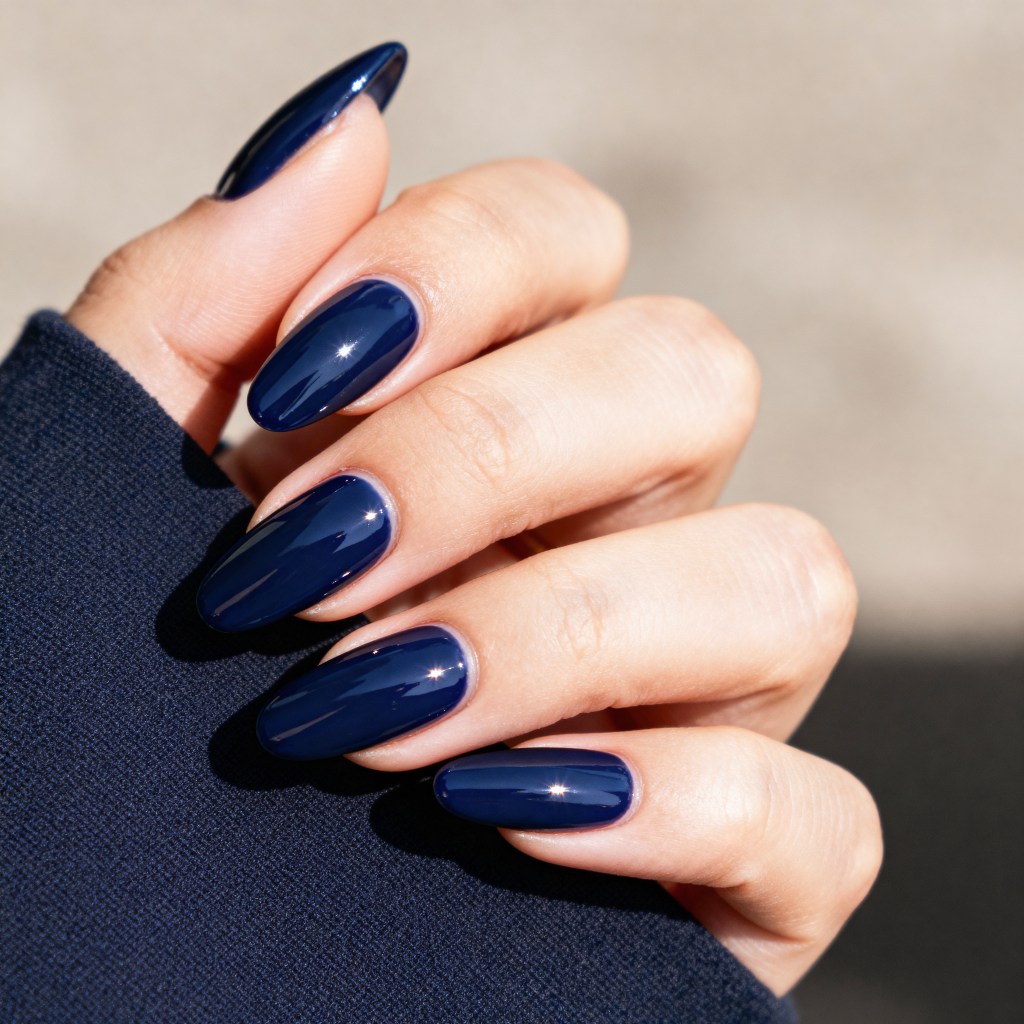
I have a confession: I usually find high-gloss solids boring. Then I saw this deep navy blue nails set and had to eat my words. The high gloss finish on a medium almond shape catches light like wet ink, not like a basic creme. It reads warm on olive skin and even cooler on fair tones, which is rare for a navy. The execution is everything here: clean cuticles, zero streaks, that mirror shine. Two weeks of wear before tip wear shows, which is solid for a dark solid. Not a trend, just a fact.
Glitter Purple Star and Stripe Coffin
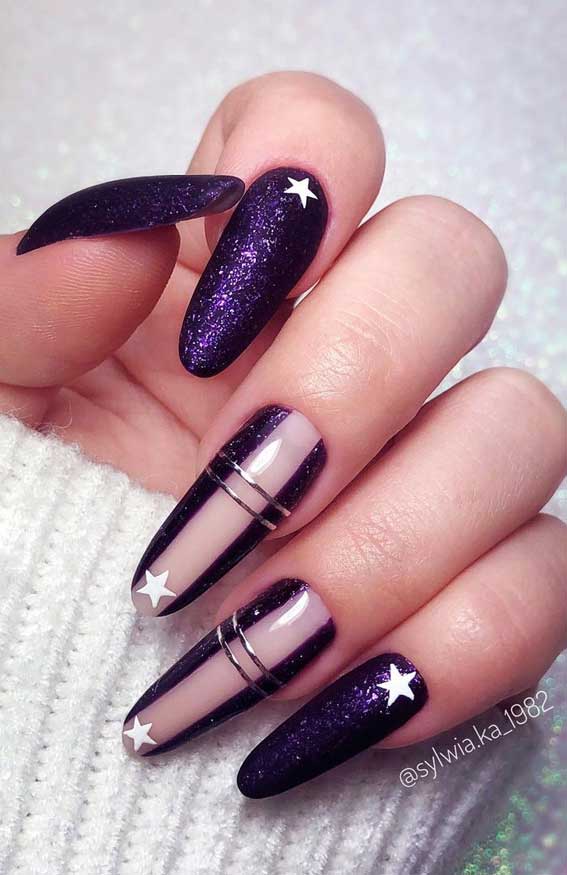
The purple glitter coffin nails are the main event here, but the star decals are what make it work. Without them, this is just a sparkly purple set. With them, it reads playful and festive, not costume. The silver stripes add a graphic edge that keeps the whole thing from tipping into child’s birthday party territory. Glitter removal is a pain, expect foil wraps and patience. The stripes need a good seal or they lift by day 5. Two weeks of wear if you baby them.
Burgundy Gold Leaf Oval
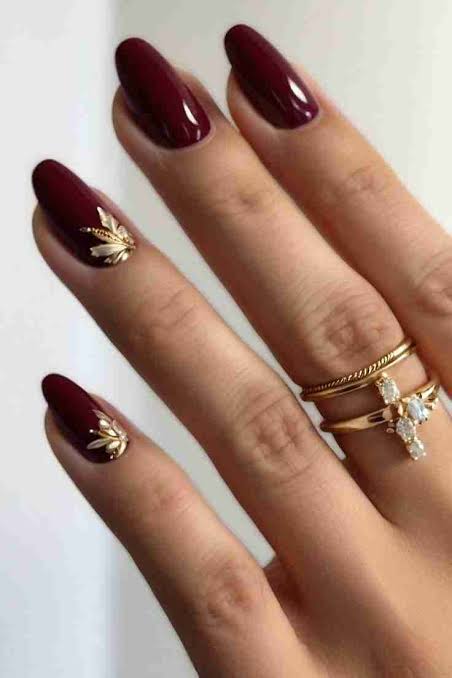
My gut said gold leaf on burgundy would look like a holiday catalog. My gut was wrong. These burgundy gold leaf nails on medium oval are restrained, almost architectural. The deep red base is glossy and even, and the gold leaf accents sit on two accent nails like tiny, irregular patches of light. No full coverage, no glitter overload. The leaf is delicate: expect it to lift at the edges by day 10 if you’re not careful with top coat. Two weeks of wear, max, but every day is a good one.
Sheer Nude Burgundy Glitter French
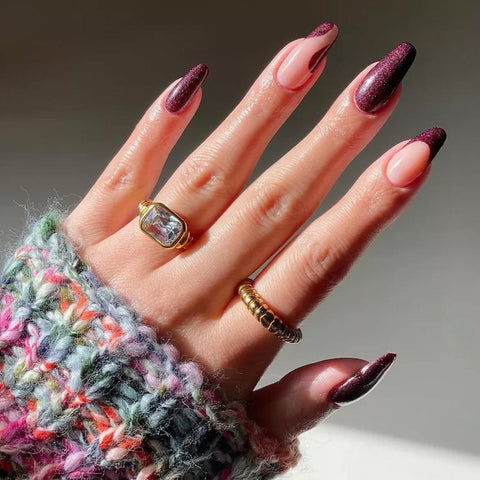
The mistake people make with burgundy glitter french nails is thinking they can wing the curved outline. You can’t. The glitter tips on these extra long stilettos are precise, a deep burgundy curve against a sheer nude base, and any wobble in that line ruins the whole effect. This is a salon job, no question. The glitter is dense enough to hide imperfections but sheer enough to show the natural nail underneath. Two weeks of wear before the tips start chipping, which is standard for glitter placement. Skip the DIY unless you have a steady hand and a lot of time.
Glossy Black French with Sheer Dots
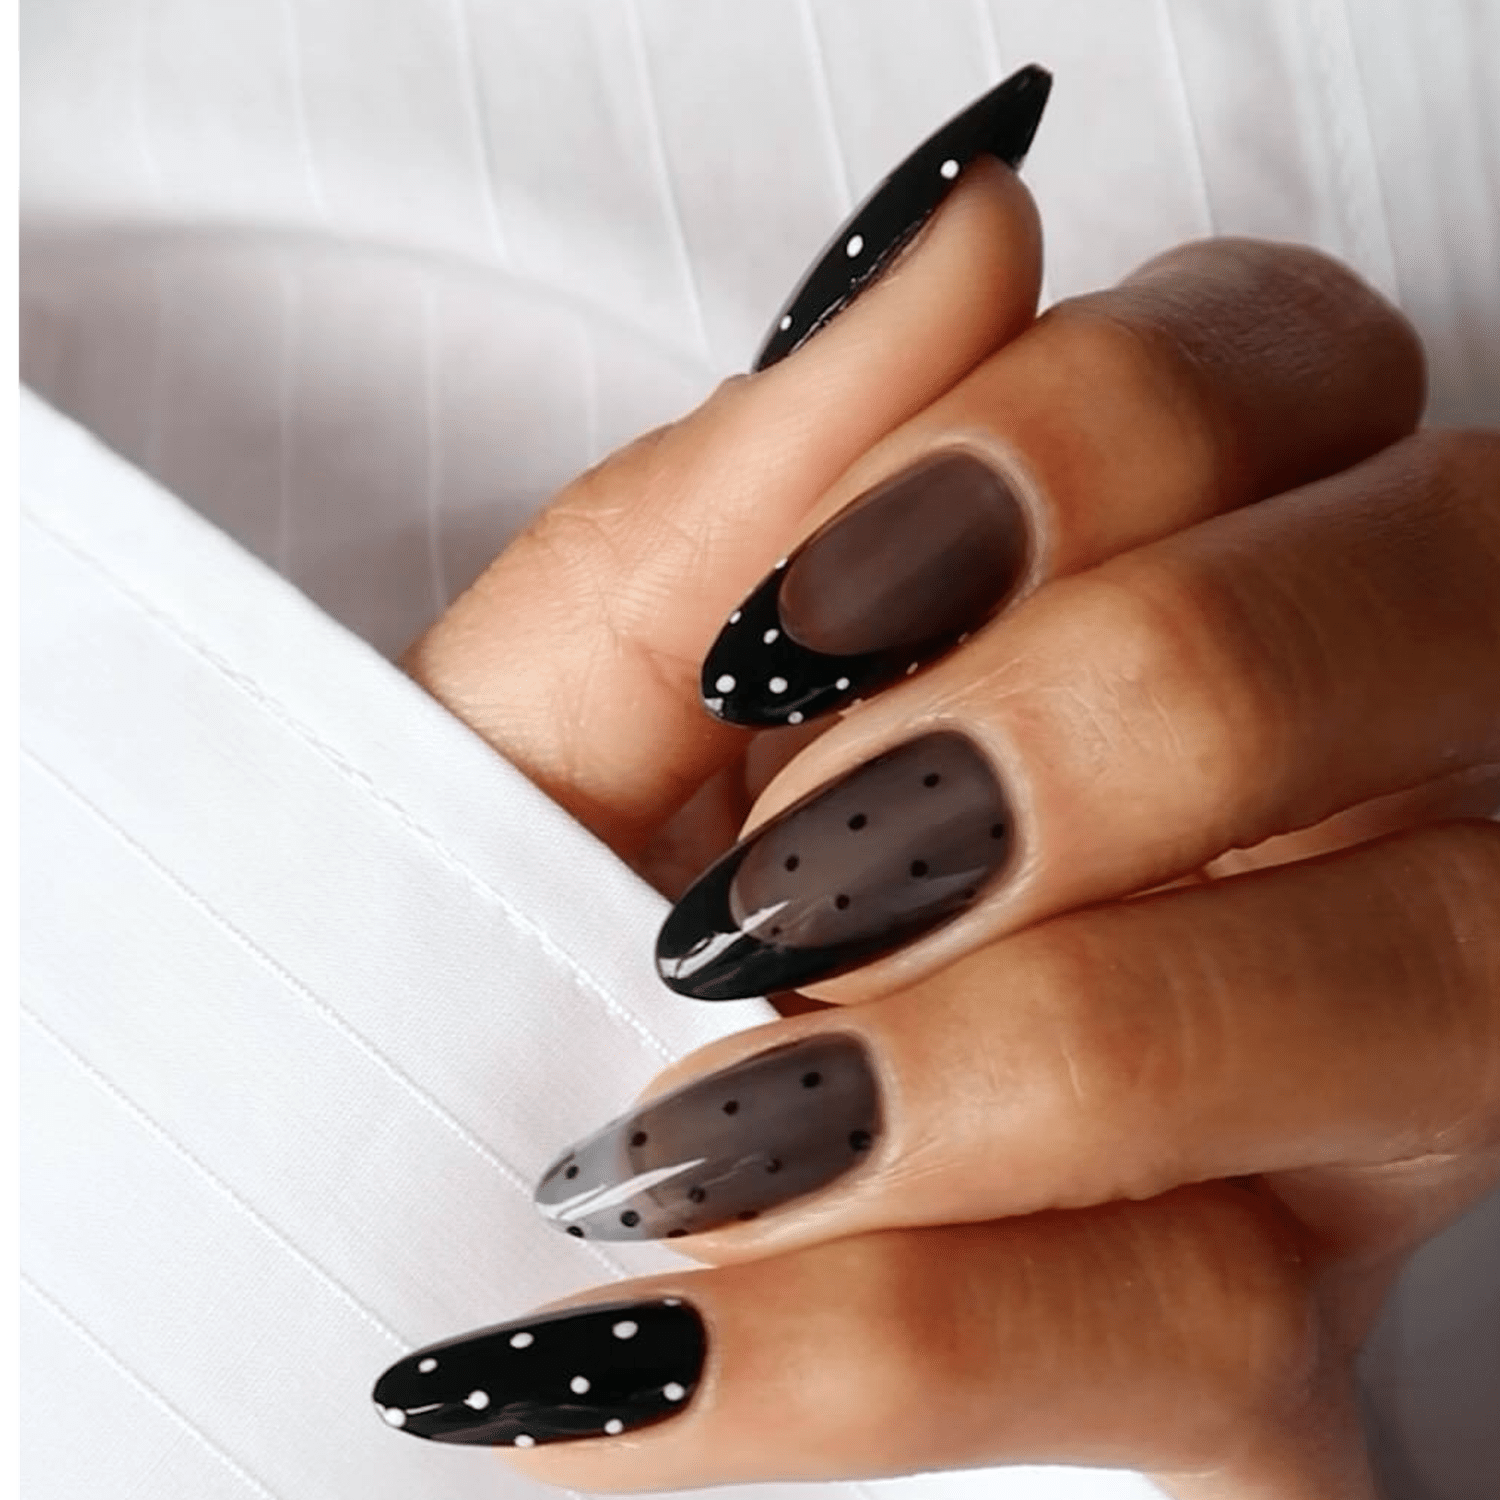
Here is the comparison: a classic black french tip versus this sheer polka dot nails version. The classic is clean, reliable, a little predictable. This one is that plus a conversation starter. The base is a sheer black and sheer grey panel, and the white polka dots sit on top like tiny punctuation marks. The black french tips ground it, the dots keep it playful. The sheer panels show every imperfection in the nail bed, so prep is non-negotiable. Two weeks of wear, the dot art holds up well because it’s sealed under top coat. Classic wins for versatility. This wins for personality.
Short Oval Glossy Dark Navy
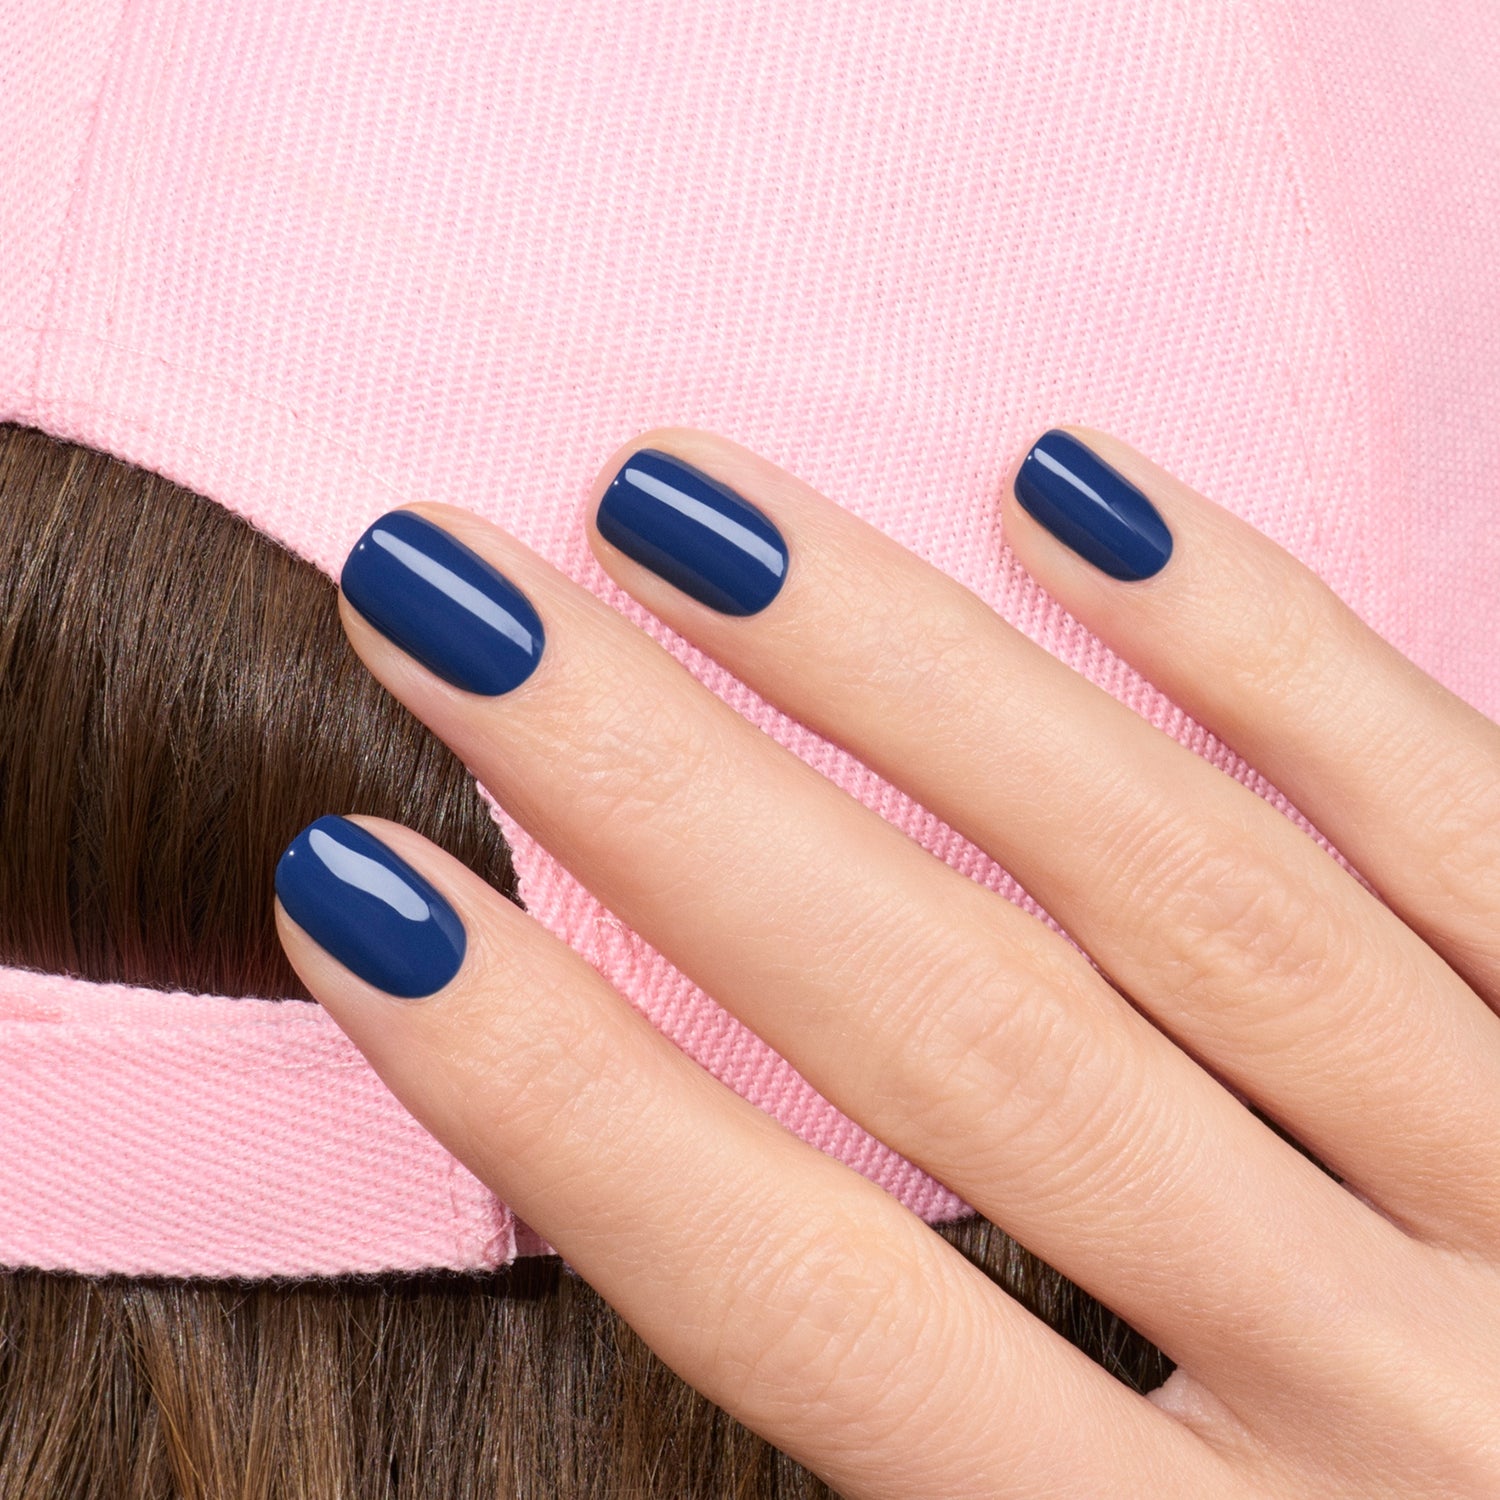
Who actually pulls off a solid dark navy without it reading as black? The short oval shape keeps it from feeling heavy, and the high shine of glossy dark navy nails gives it that depth that catches light. This is for anyone with cool undertones who wants a dark winter shade that still reads as blue, not black. The clean cuticle line and smooth application make it look deliberate, not like you ran out of time.
Glossy Black Snowflake Silver Accents
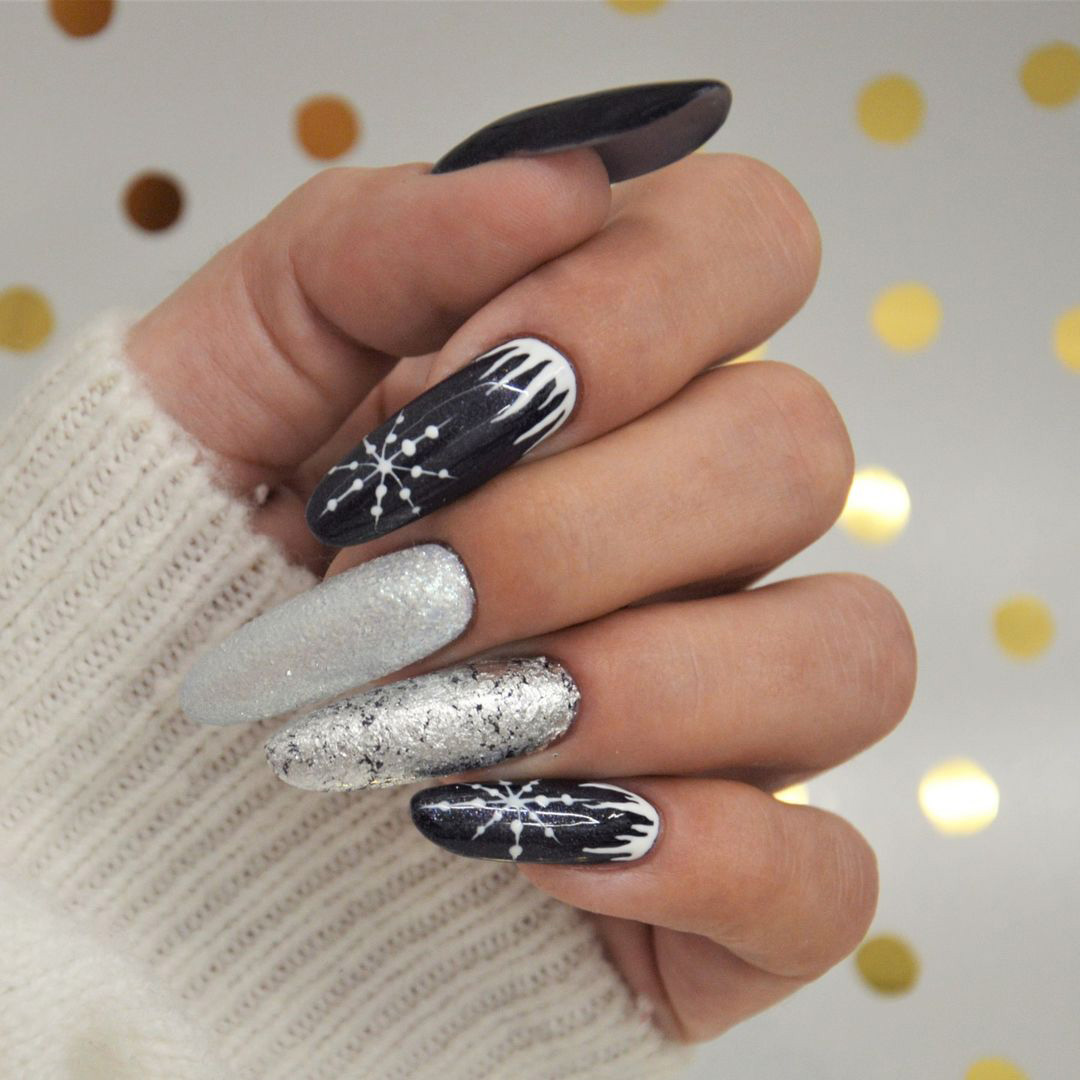
I’ll admit it: I assumed intricate snowflake nail art would chip by day three. But on these long stilettos, the white snowflakes stayed crisp through a full week of typing and sweater sleeves. The key is the silver glitter base on the accent nails — it hides any minor tip wear, and the glossy top coat seals the thin lines. By day ten, one snowflake had softened at the edges, but the overall look still read as intentional. If you want winter nail art that actually earns its keep past the holiday party, this is it.
Burgundy Gradient Gold Star Accents
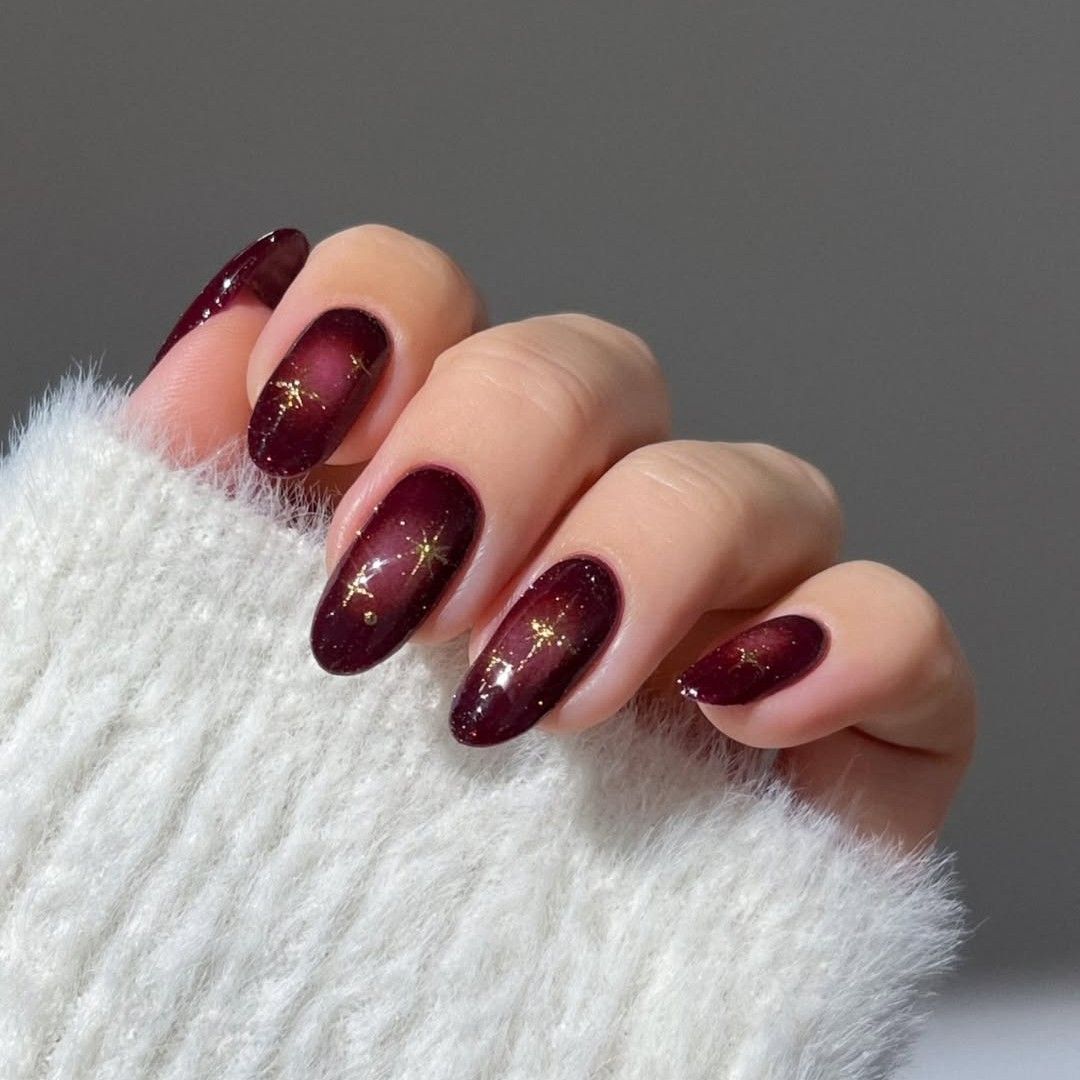
The nail tech spent 45 minutes on the gradient alone, blending from deep burgundy to a sheer red-purple at the tips. Then came the gold star accents — each one placed with tweezers and sealed under foil. This is not a lunch-break manicure.
Burgundy gradient nails demand patience: the ombré needs three or four thin layers to avoid streaks, and the stars require steady hands. Expect at least 90 minutes in the chair. The payoff is a dimensional look that shifts in every light, but if you’re short on time, skip the stars and keep the gradient alone. That still reads as intentional. And when regrowth shows, the gradient means a full redo — no quick fill.
Dark Blue Yin-Yang Glitter Nails
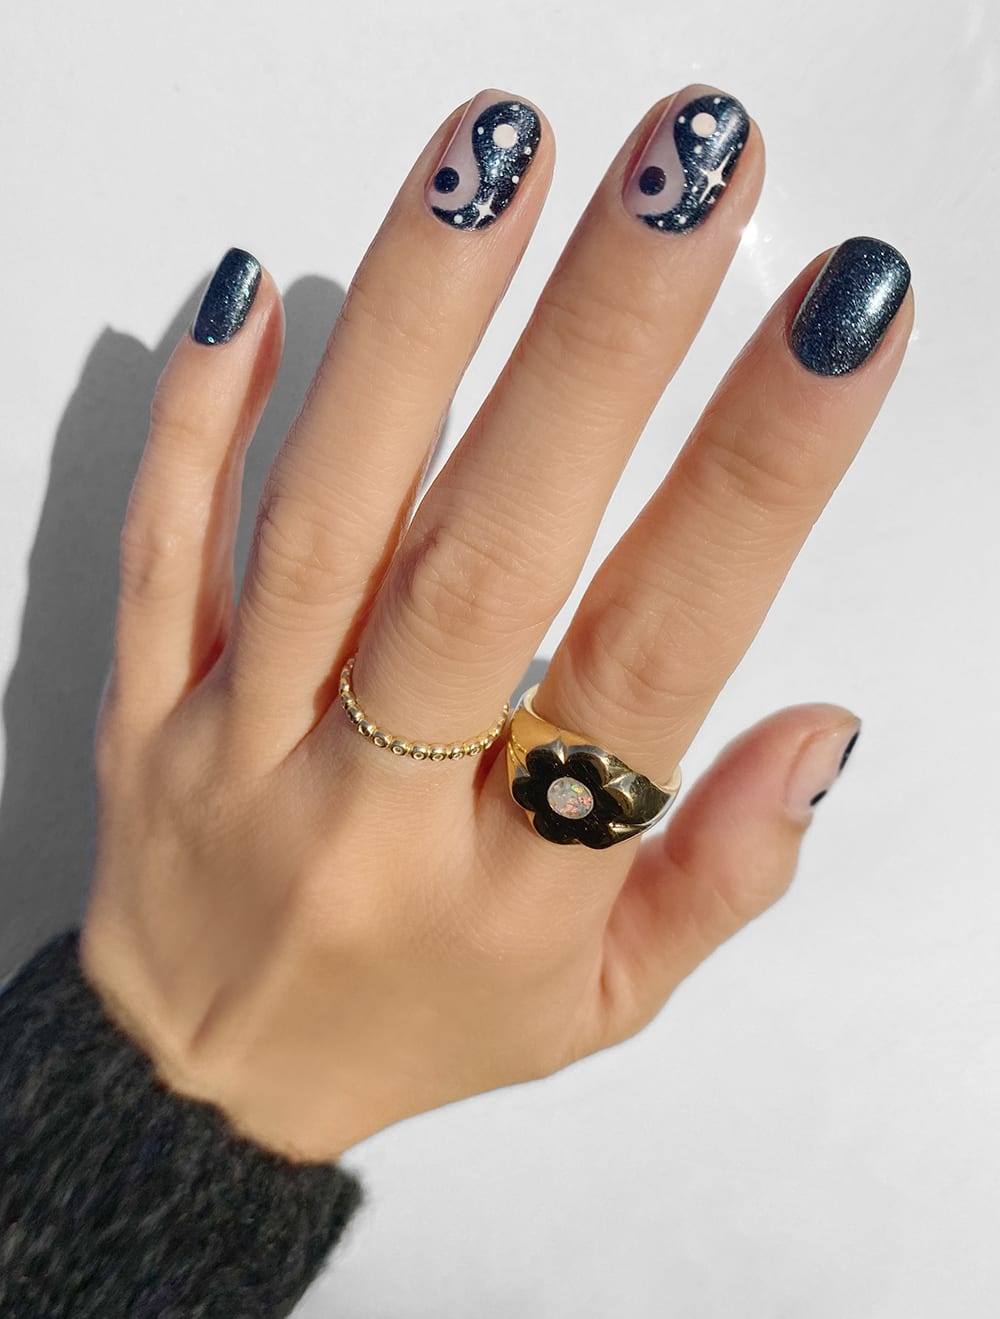
My first thought: yin-yang on nails? Then I saw the dark blue base with yin yang nail art in silver glitter, and it clicked. This is winter without the holiday clichés. The short square shape keeps it practical, and the silver glitter adds just enough sparkle for dark evenings. It lands in January because it’s reflective without being loud — a quiet nod to balance when the year is still settling in.
Deep Purple Chrome Swirl Accent
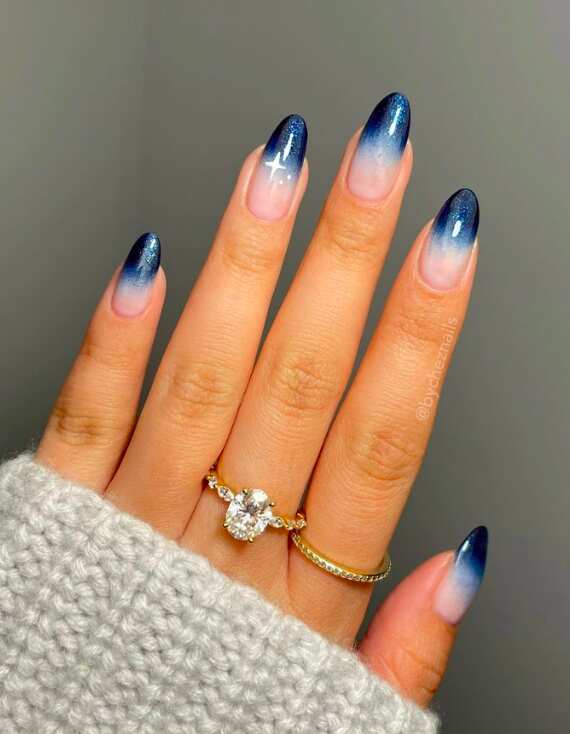
Verdict: this is the most technically demanding design in the roundup. The deep purple base gets a thin layer of chrome powder rubbed in, then a swirl accent in silver and nude is painted freehand over it. The chrome accent nails need a no-wipe top coat to keep the mirror finish from dulling, and the chrome powder itself must be applied over a black or dark base to read as metallic instead of dusty. The long stiletto shape shows off every detail, but the chrome can scratch if you’re not careful with the final seal. This is one for the salon, not your kitchen table.
Black Star Decals Short Square
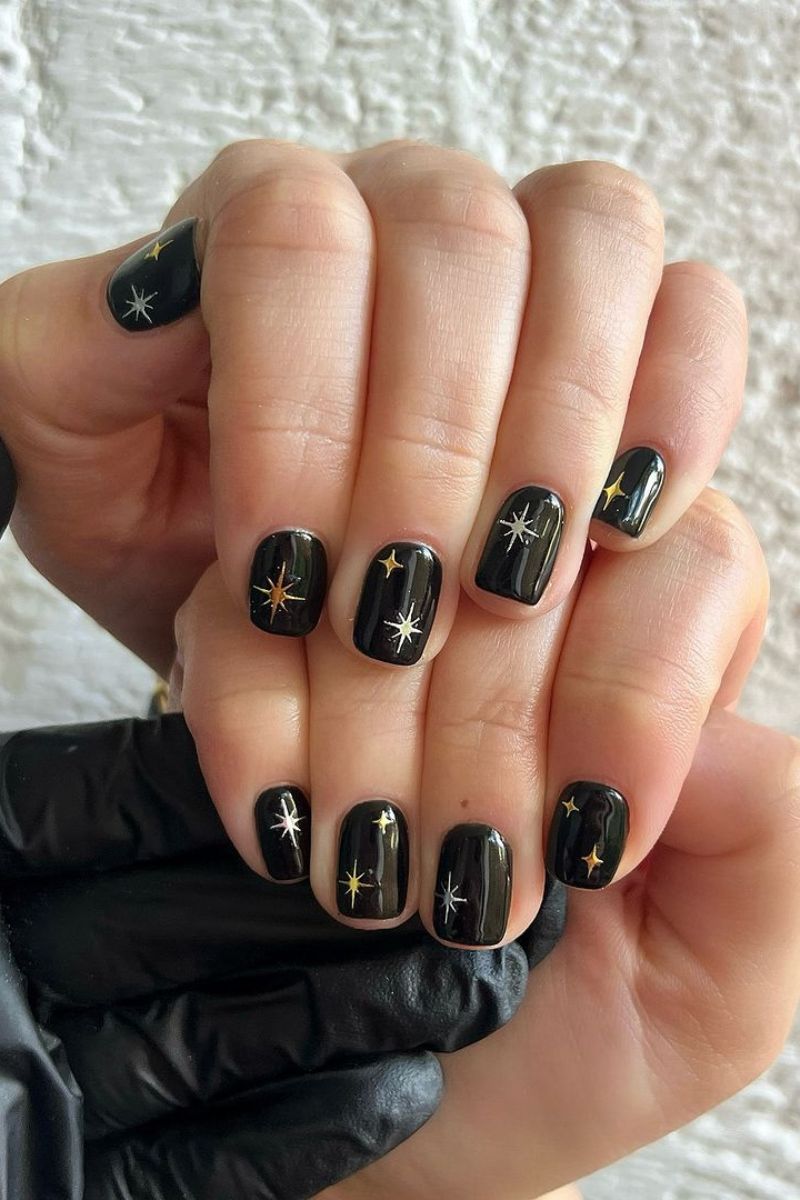
There is something satisfying about placing a star decal exactly where you want it. On a short square nail painted glossy black, gold and silver stars sit like a night sky you arranged yourself. No shaky freehand lines, no waiting for stamping plates to warm up. Just tweezers, patience, and a steady hand. The short square shape is forgiving — decals align easily along the straight edge, and there is less curve for them to wrinkle over.
The trick is timing. Paint your black base and let it dry completely, then apply a thin layer of top coat. While it is still tacky, press each decal on with tweezers and smooth it flat. Start with the larger stars, then fill in with the smaller ones. Work from the center of the nail outward. Finish with another top coat, making sure to cap the edges. Those exposed decal edges are the first to lift. This is not a 15-minute job, but it is doable on a Sunday afternoon if you are patient.
Navy Blue Swirls and Glitter
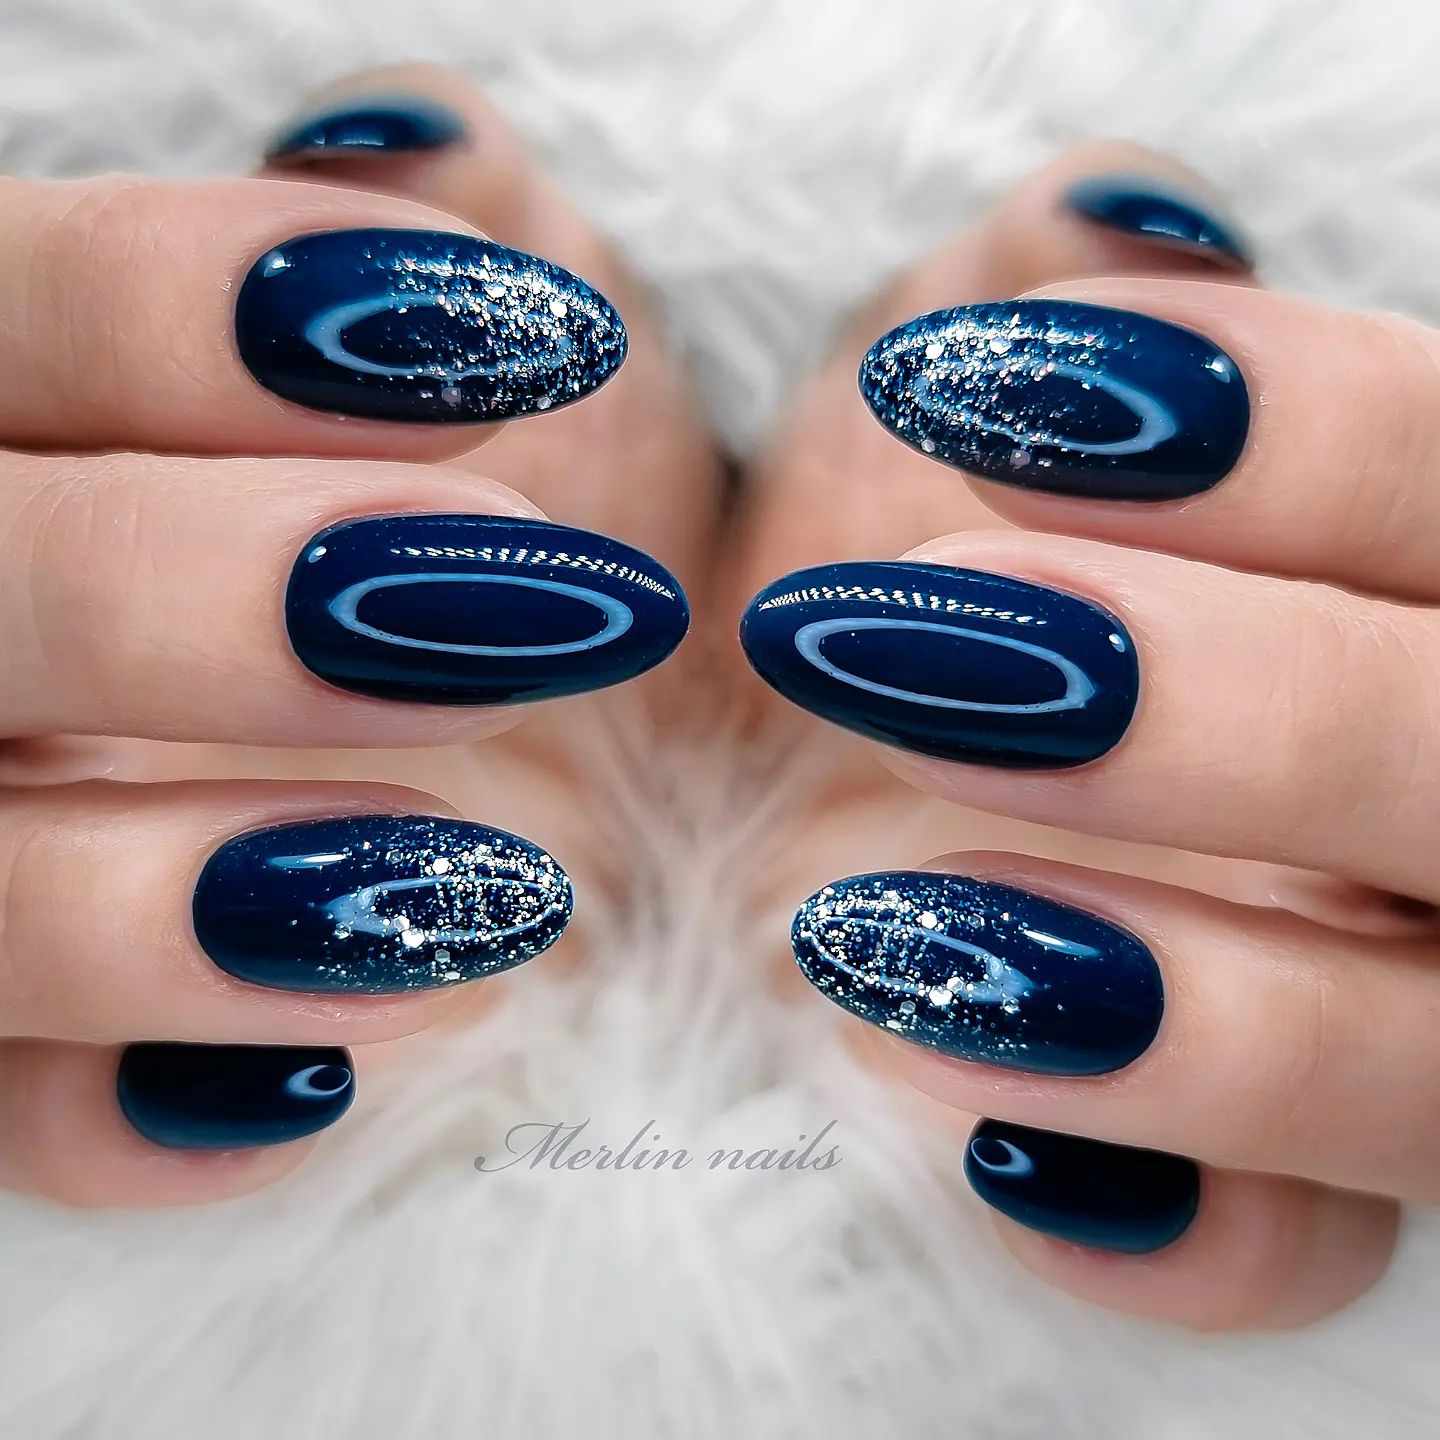
Does navy blue really need white swirls and silver glitter? In theory, it sounds like too much. But on medium oval nails, the white swirl is kept thin and placed off-center, and the silver glitter is sparse, just a few flecks near the swirl. It reads as deliberate rather than chaotic. The glossy finish helps tie it together. Still, I wonder if a single accent nail would have been cleaner.
Navy Star Glitter Stiletto
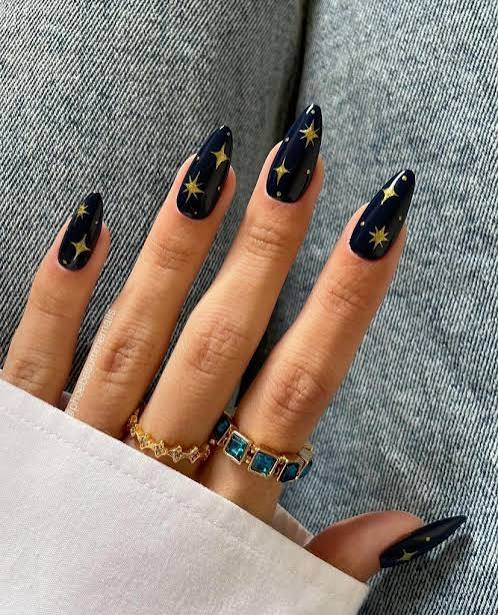
I was ready to dismiss stiletto nails as too dramatic for daily wear. But this navy star glitter version changed my mind. The long stiletto shape in deep navy blue is already striking, and the gold star glitter is not scattered everywhere — it is concentrated near the base and tips, leaving the center mostly clean. The glossy finish reflects light, making the stars look like they are floating. The execution is precise: the cuticles are clean, the lines are sharp, and the stars are evenly placed. It feels festive without being overwhelming, and the shape surprisingly does not snag on everything.
Navy Starburst Firework Accent
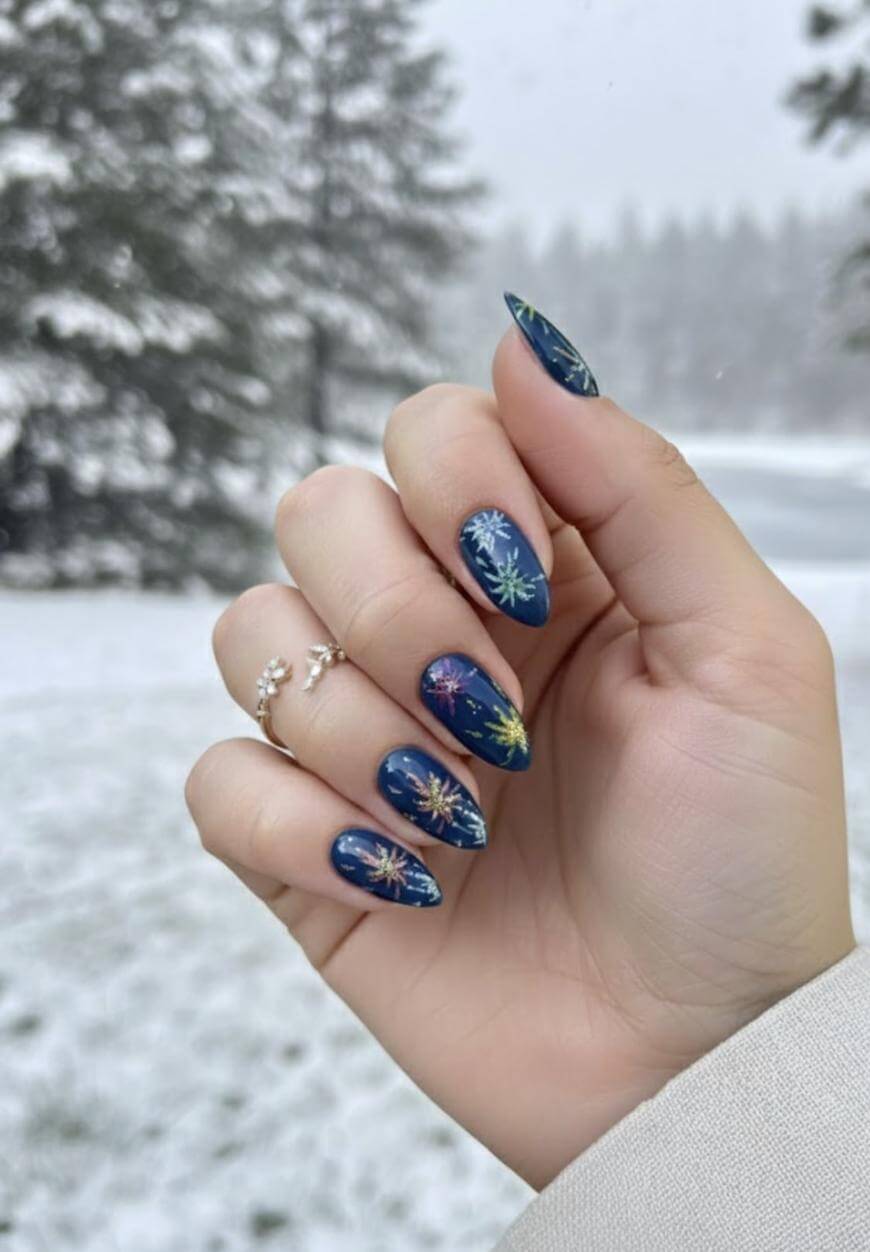
Midnight on New Year’s Eve, and my nails are doing the fireworks.
This is a medium almond in dark navy, glossy and packed with glitter. The accent nails carry colorful starbursts that actually look like they’re exploding outward. I wore these through a week of typing and gift unwrapping, and the art held. The glitter base hides chips better than you’d think. If you want a celebratory manicure that doesn’t scream “I’m wearing a party hat,” this is it. The starburst nail art is detailed enough to get compliments from strangers but not so precious you’ll cry when a corner lifts. It will lift eventually, but that’s the price of looking like a firework display on your fingertips.
Deep Blue Snowflake Glitter
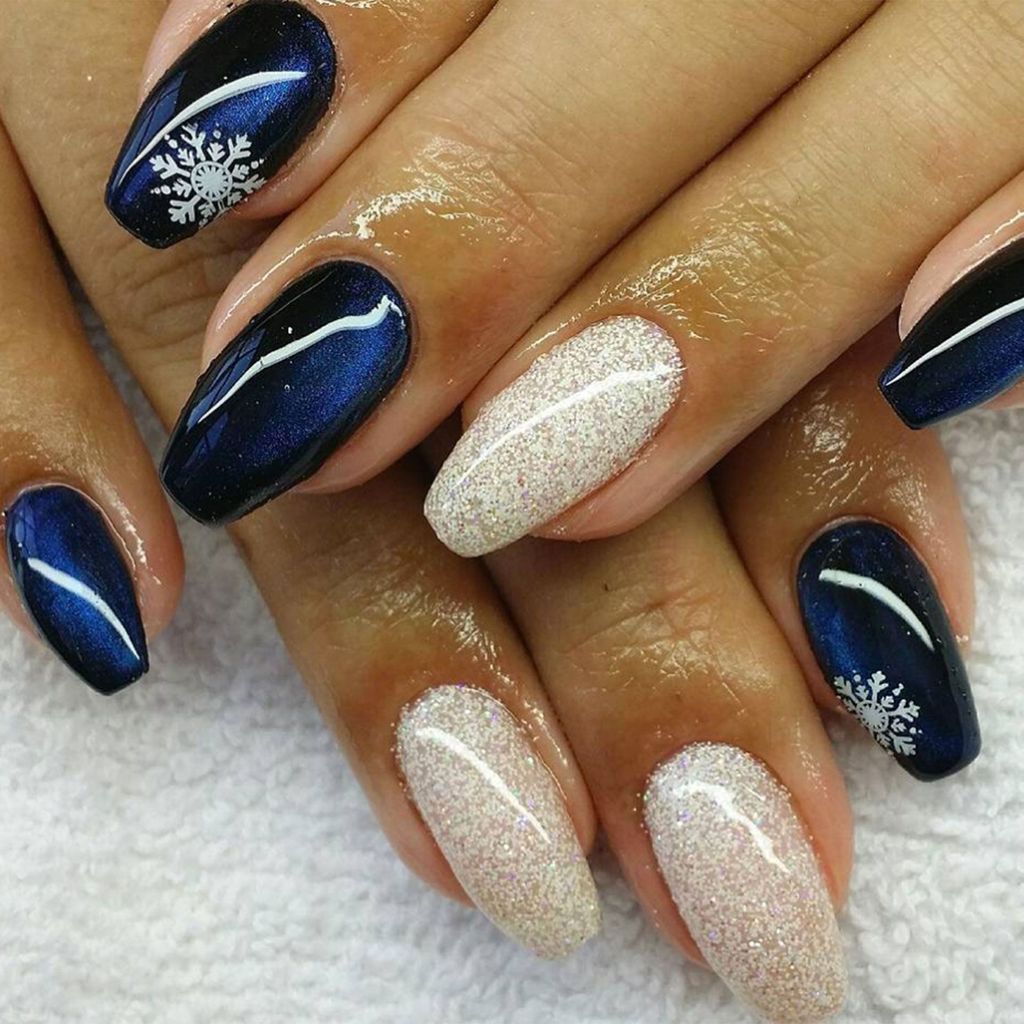
The gut reaction is always “pretty,” but the mistake is thinking you can DIY this in an hour. You can’t. The deep blue snowflake nails need a steady hand for the white snowflake decals, and the glitter accent nails require careful sealing or they’ll shed glitter everywhere. I’ve seen friends try with regular polish and end up with snowflakes that look like blobs. The trick is gel, a thin top coat layer between decals and glitter, and patience. Book this one.
- Medium oval shape
- Deep blue base
- White snowflake decals on two nails
- White glitter accent on two nails
- Glossy top coat
The result is a winter classic that actually lasts two weeks.
Teal Abstract Swirl Glitter
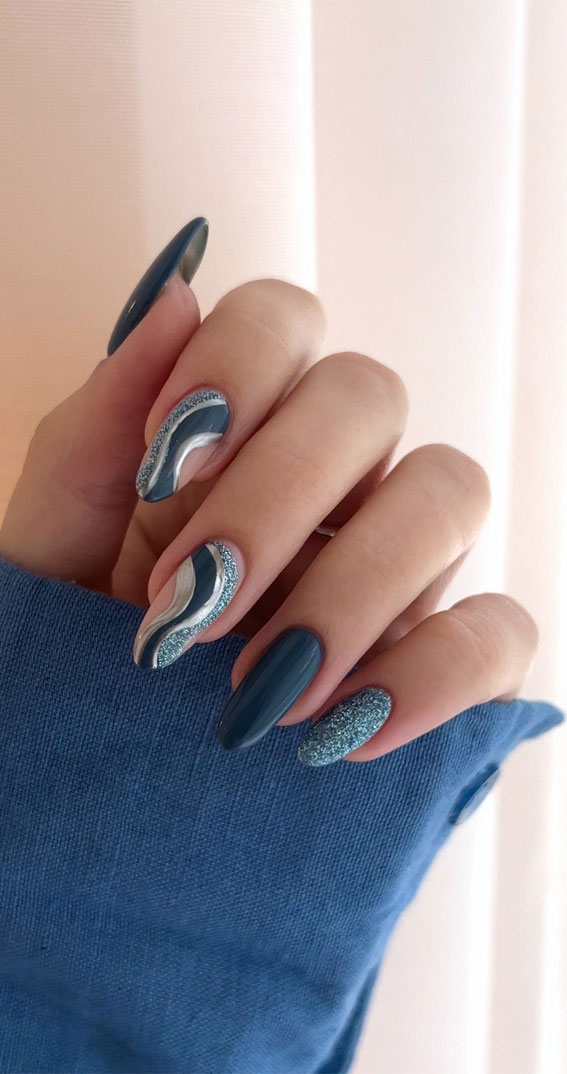
Teal abstract swirl nails beat navy swirls for winter because the silver and light blue accents keep it from reading as a dark block. The long almond shape gives the swirls room to curve without crowding, and the glitter on the accent nails adds texture without competing. If you are choosing between a solid dark winter color and an abstract design, the swirls win: they forgive minor imperfections and look intentional even when the lines are loose. Navy swirls can look flat under indoor light, but teal with silver has a brightness that works for day and night. The abstract lines mean you do not need a steady hand, which is rare for a design that looks this deliberate. The glossy finish ties the teal and silver together.
Final Thoughts
Writing this made me realize I’m less of a glitter person than I thought. I kept circling back to the glossy dark navy and the burgundy gold leaf, the ones that look expensive without trying hard. That’s the whole point of this palette, it doesn’t need to shout.
If I’m being honest, I’m booking the burgundy gold leaf next. It’s the one I’d wear to a holiday party and then not want to take off for two weeks. The rest are fun, but that one’s a keeper.