
This season, I kept seeing round nails everywhere. Not the standard dark winter shades I expected, but a whole range from minimal gold lines to elaborate snowflake art. The mix of soft pastels and bold accents on structured silhouettes? Surprisingly wearable.
This roundup has 22 designs for Winter Round Nails — from sheer nude to deep teal, short to medium length, salon-only to DIY-friendly. Whether your nail beds are short like mine or you just want a shape that doesn’t snag on sweaters, there’s something here.
I’ve tested half of these through typing, gym sessions, and contact lens removal. The round shape holds up. The art? That depends on the artist and your patience.
Pale Pink Glitter French Tips with Stars
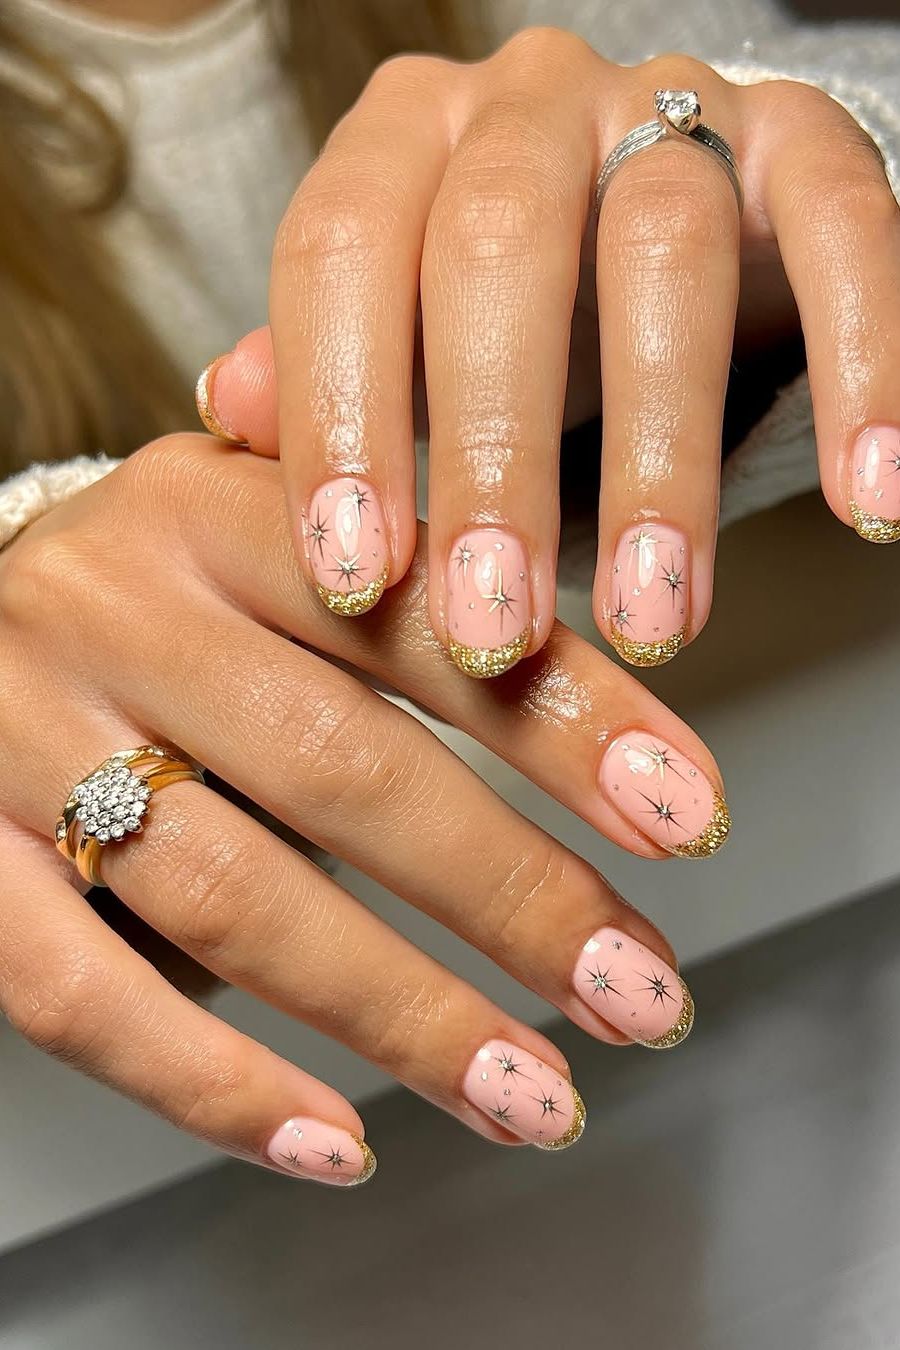
I rolled my eyes at the idea of glitter French tips. Then I saw these and immediately texted my nail tech. The pale pink base keeps the glitter French tip from screaming — it’s more like a happy whisper. Tiny gold starbursts and dots scatter across the nails like confetti you never have to sweep up. Ask for a sheer pink jelly as the base and a fine gold glitter for the tips. This is the design that makes holiday party nails feel personal, not uniform.
Light Pink Snowflake and Stripe Nails
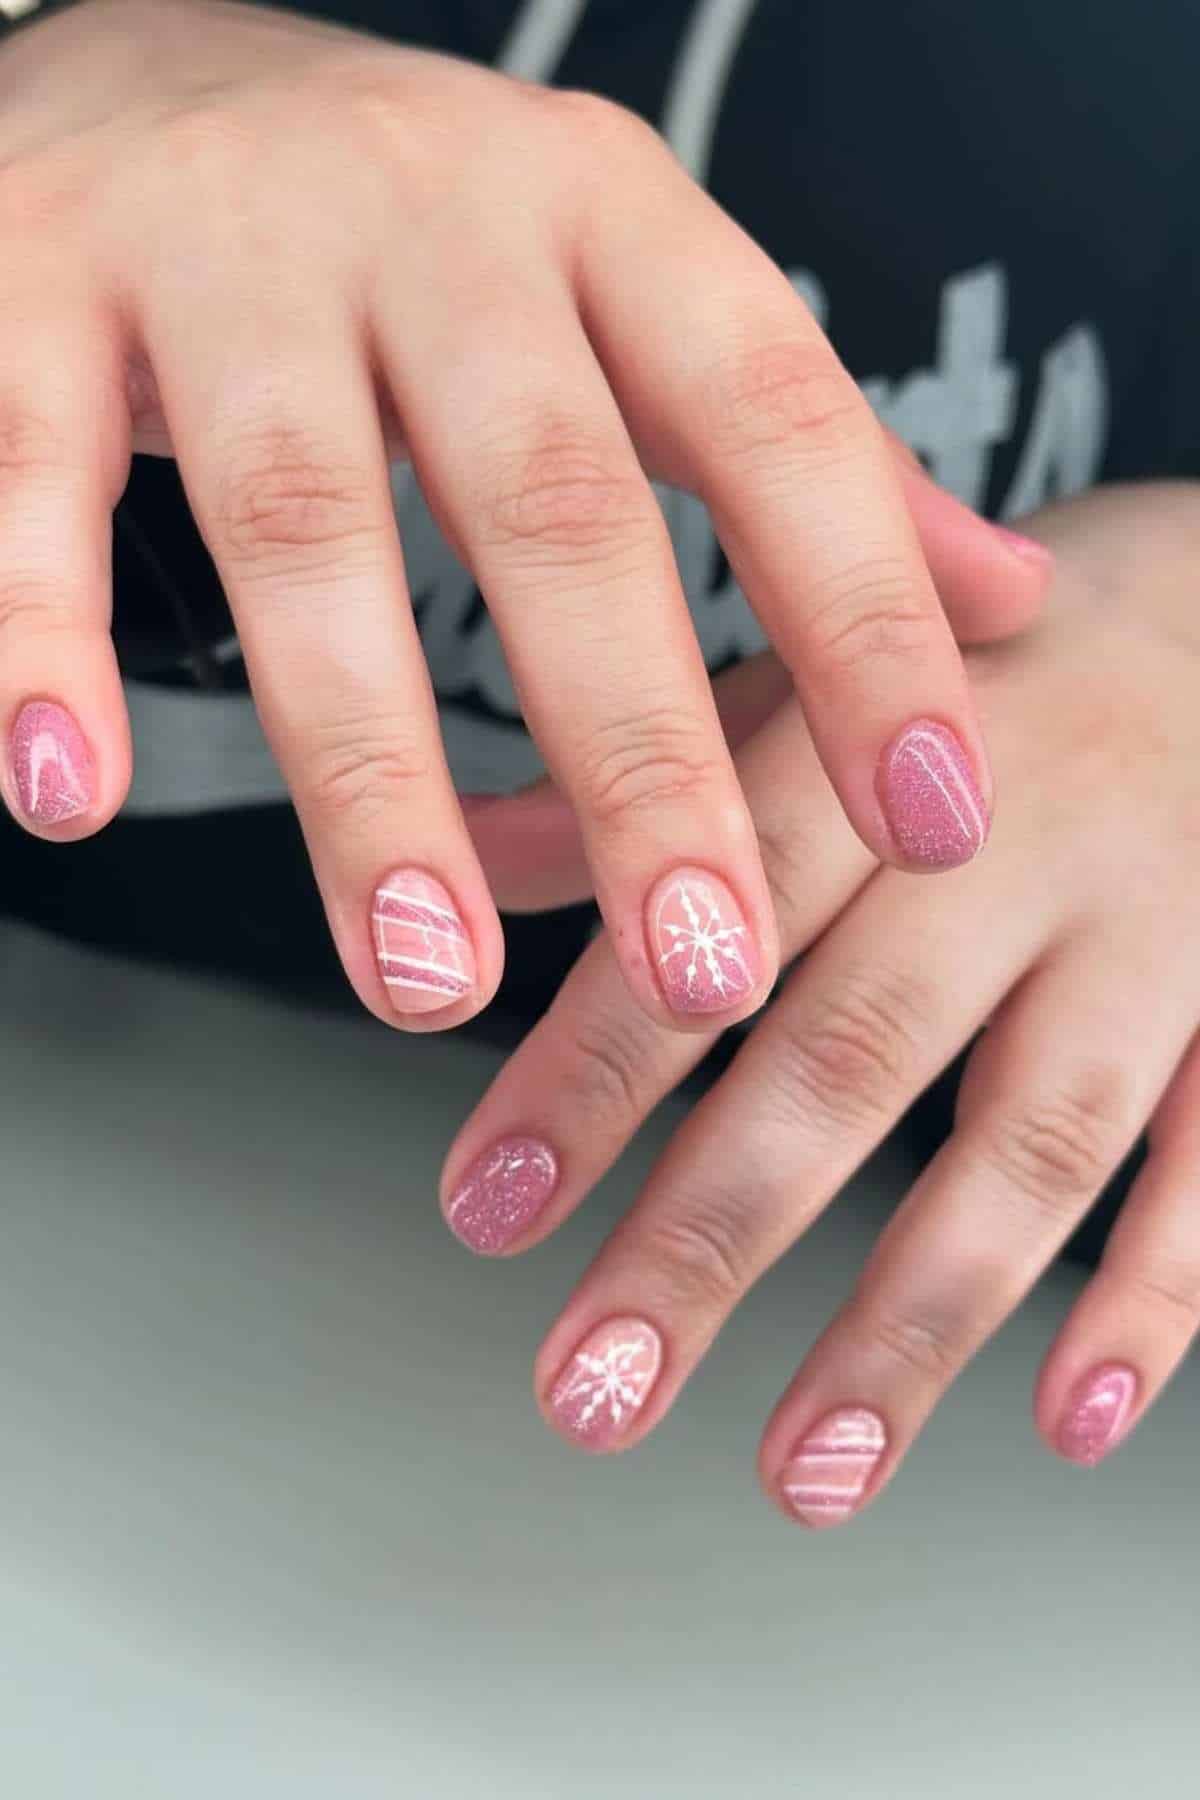
Who actually looks good in snowflake nails? If your winter wardrobe runs more cozy sweater than tailored coat, this is for you. The light pink base softens the snowflake and stripes, so they read as charming instead of kitsch. The white and glitter pink accents match that slightly whimsical mood — like a mug of hot cocoa you actually want to Instagram. Skip this if your style leans minimal or sharp; the pattern needs a playful hand to pull it off.
Pale Pink Snowflake and Candy Cane Nails
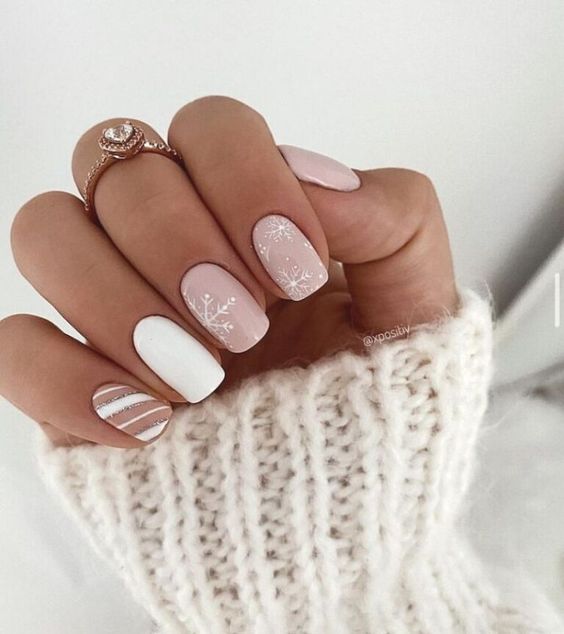
A single snowflake is elegant. Add candy cane stripes and you’re committing to a whole holiday mood. This design mixes both on a pale pink base — white decal snowflake on one nail, diagonal red-and-white candy cane stripes on another. It’s the difference between a winter scene and a Christmas card.
I prefer the mix. It says holiday without being a sweater print. And for a party, that’s exactly the right note.
Deep Forest Green Glossy Round Nails
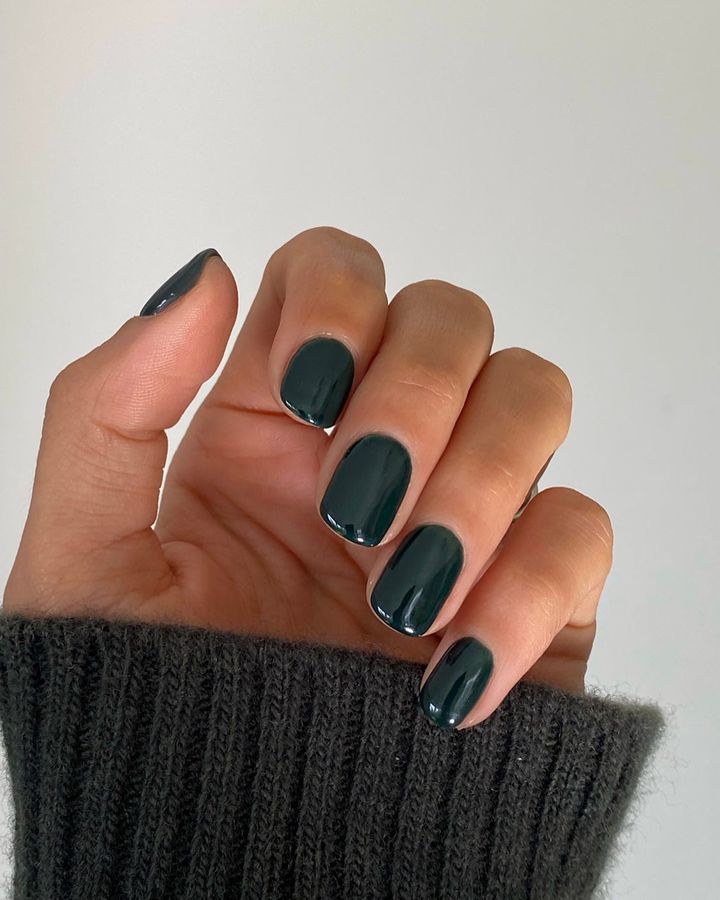
I was skeptical about dark green on short nails. Then I saw this high-gloss deep forest green and understood — it feels grounded, not gloomy. The glossy round nails catch light like glass, so the color shifts between pine and almost black. Two weeks in, the depth hasn’t budged. Upkeep is minimal: just keep cuticle oil handy and avoid turmeric-heavy food if you value your base coat.
Deep Teal Glossy Short Square Nails
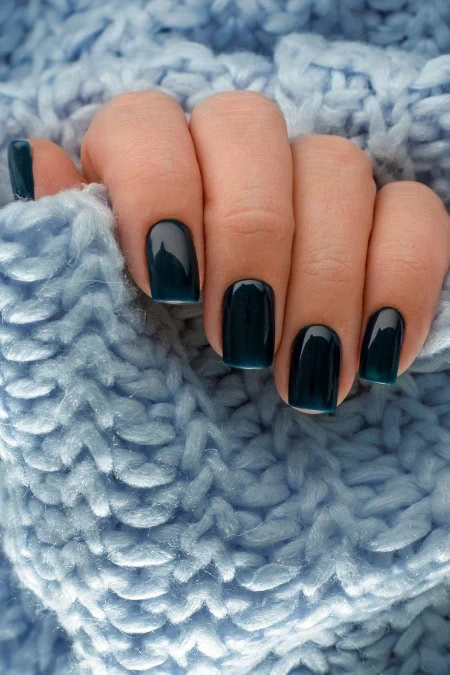
This one is easier than it looks. I’ve done it at home twice now, and the trick is patience with thin layers. Deep teal is opaque in two coats if you let each dry fully, three if you rush like I did the first time. The glossy finish hides brush strokes better than matte, so that’s a win. Start with a rubber base to prevent staining, then apply your first coat from the cuticle outward, not back and forth. For short square nails, keep the brush parallel to the sidewall. A no-wipe top coat seals it. Salon quality is possible, but it takes 90 minutes, not 30.
Navy Blue Shimmer Glossy Oval Nails
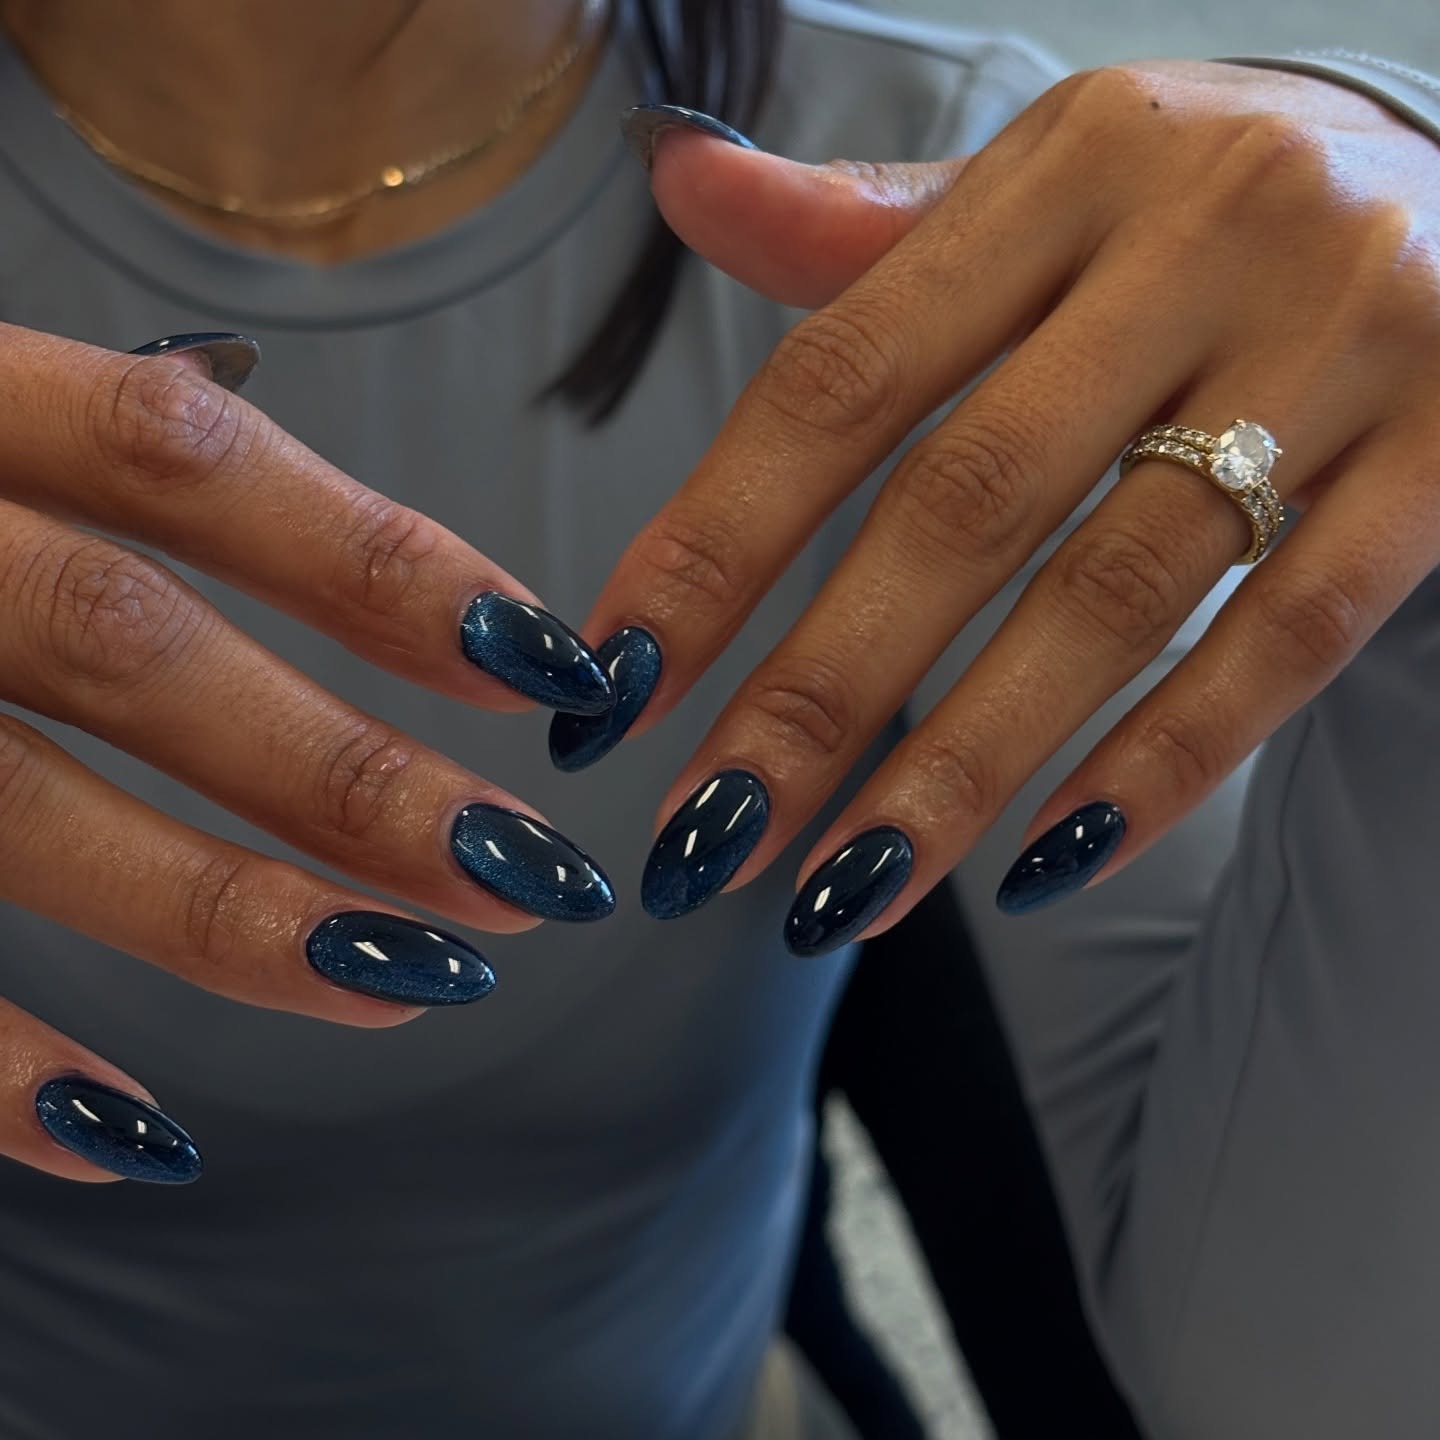
Is the shimmer subtle enough to justify a salon trip? I’ve seen navy blue shimmer look almost flat under office lighting, then catch in direct sun and suddenly it’s worth every minute. On these glossy oval nails, the shimmer reads as a soft pearl, not a sparkle. The downside: it shows every ridge and uneven layer. If your base coat isn’t perfect, the shimmer settles into the texture. I’d only book this if you’ve got steady hands or a patient tech.
Vibrant Red Marbled Jelly Nails
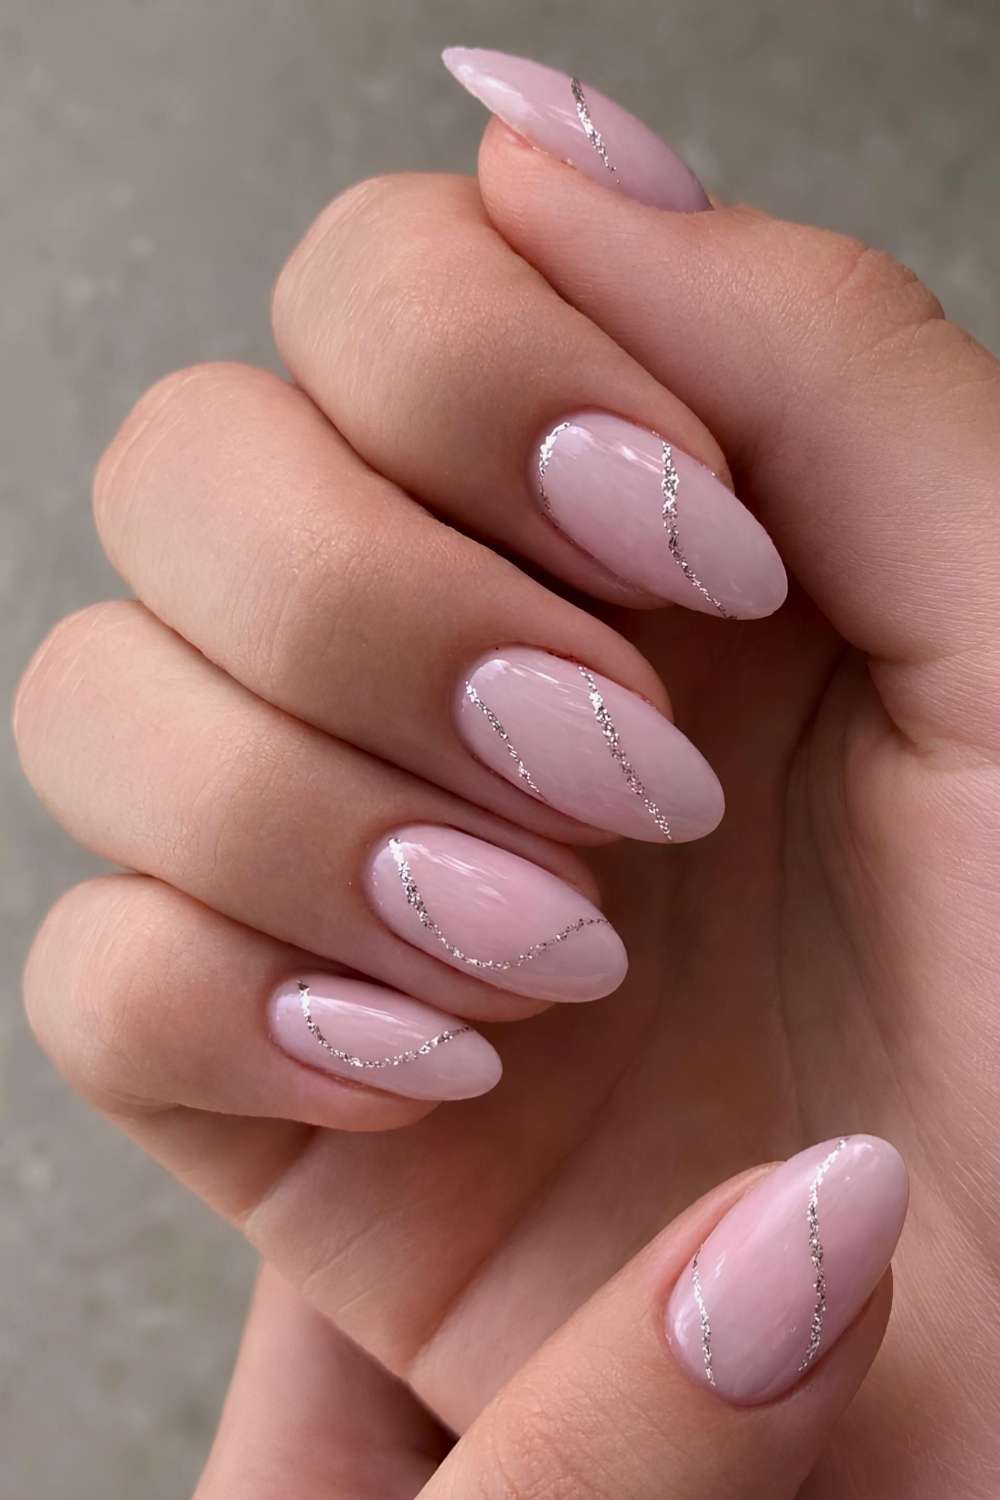
This technique is harder than it looks. The vibrant red base needs to be opaque but still jelly-like, which means mixing a clear jelly with a pigmented red in the right ratio. Too thick and the marbling sits on top. Too thin and the red veins bleed into the base. For marbled jelly nails, the trick is applying the red veins while the base is still tacky, then dragging a thin brush through them. The honest downside: it’s a two-person job unless you’ve got a non-dominant hand that doesn’t shake. Even then, expect one nail to look like a messy streak. The gloss finish saves it by blurring the edges slightly.
Emerald Green and Glitter Almond Nails
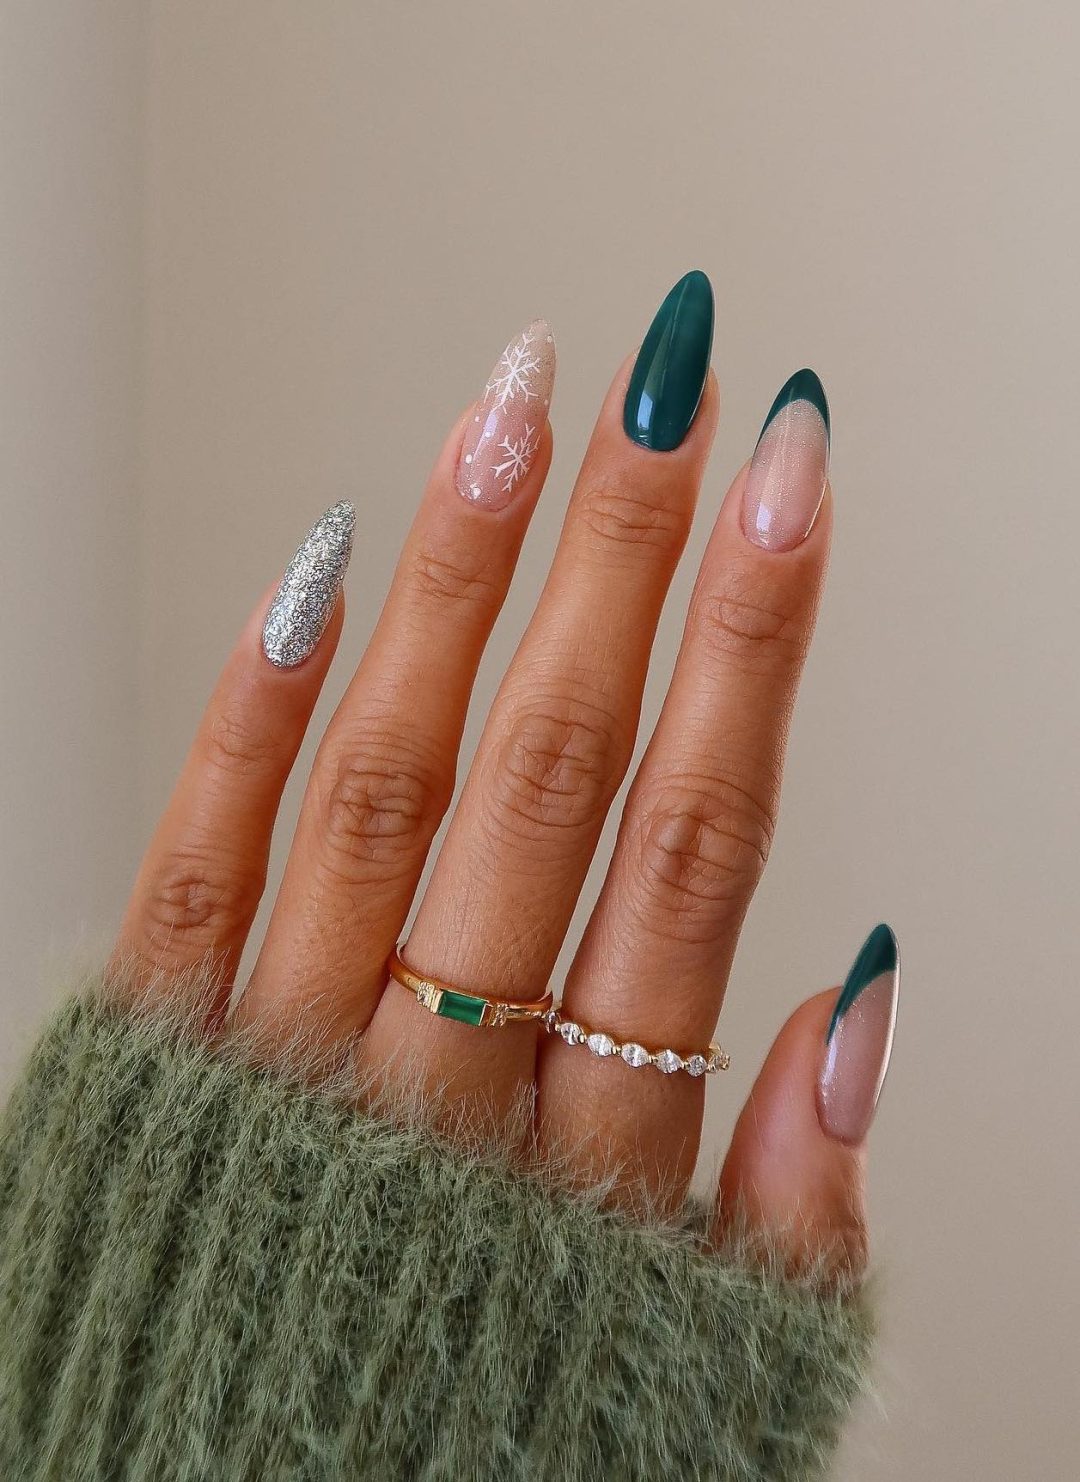
Who is this for? Someone who wants a jewel tone that doesn’t disappear into a black sweater. The emerald green base is deep enough to read as neutral, but the glitter on top gives it a pulse. Almond nails keep it elegant, not costumey. If you have warm undertones, this green will glow on you. If you’re cool-toned, it’ll still work, just with more contrast. Skip it if you hate attention, because this one gets noticed. It’s not a quiet nail.
Sheer Nude Snowflake and Candy Cane Nails
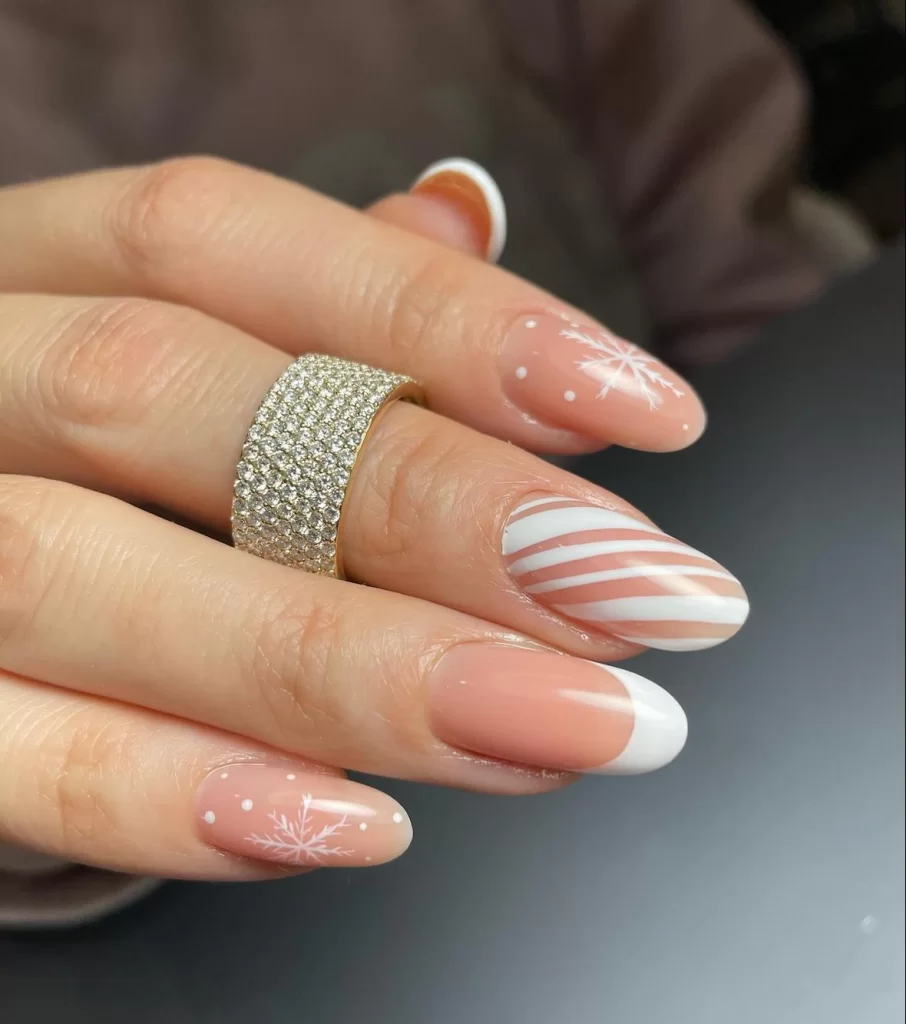
Confession: I’m a sucker for a sheer nude base because it hides my regrowth like a pro. The snowflake decals sit on some nails, and candy cane nails get the stripes on others. It’s playful, but the sheer base keeps it from feeling like a kids’ party. I wore these through a week of typing, dishwashing, and one ill-advised attempt to open a jar. The decals stayed put, the stripes didn’t smudge. By day ten, the tips started to show wear, but the base meant it wasn’t obvious. Perfect for the holidays when you want festive but not loud.
Sheer Nude Snowflake Decal Nails
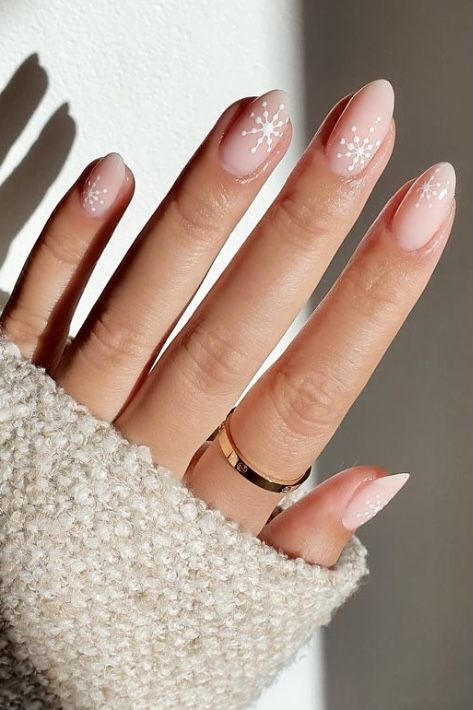
These sheer nude snowflake decals are the most wearable winter nails I’ve done. To apply at home, cut each decal close to the design and press it onto a tacky sticky layer. Seal with two coats of glossy top coat, wrapping the tip. They settle into the base better than hand-painted lines. The sheer nude base lets the white decals pop without screaming holiday. You can wear these into January without feeling seasonal.
Pale Nude Shimmer Snowflake Nails
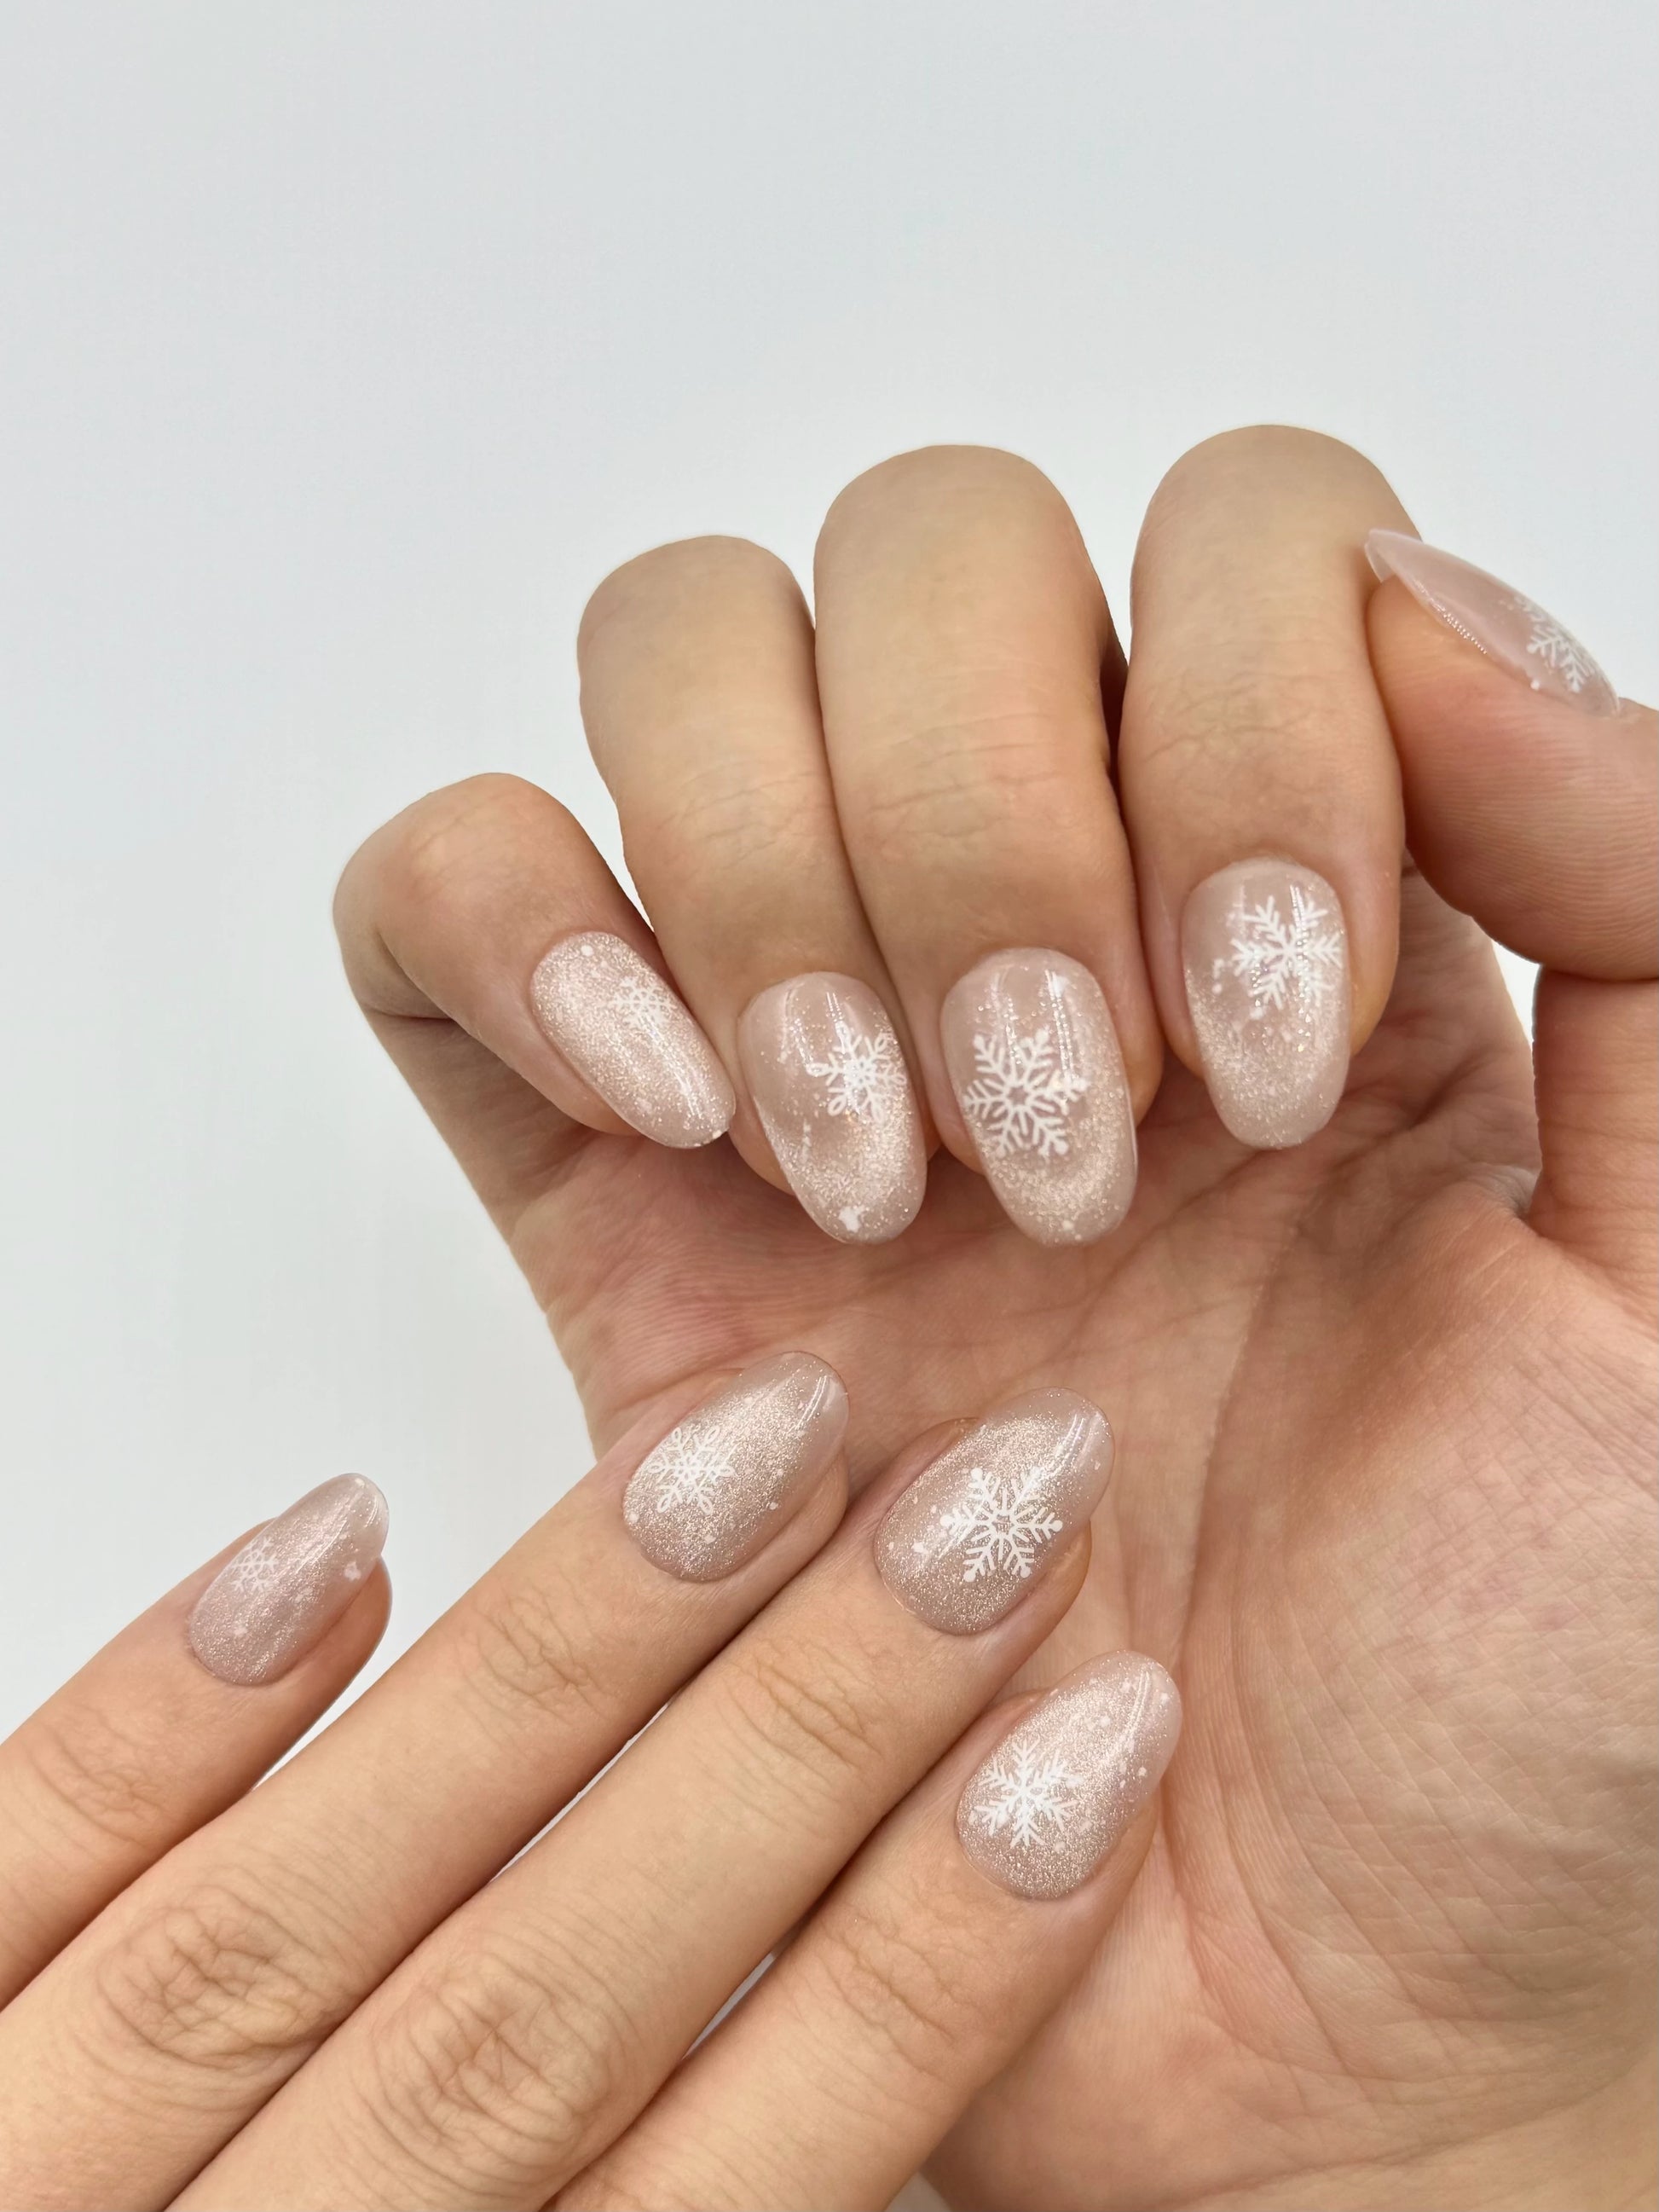
Is the pale nude shimmer worth the salon effort for a holiday look? The shimmer is so subtle you might miss it in low light. The snowflake decals add delicate detail, but they require a steady hand. For a party, you want something that reads clearly. These read as barely-there winter. That could be a plus if you need work-appropriate nails that still nod to the season. The downside: the shimmer doesn’t hide chips well, and the decals can lift if you’re rough on your hands. So ask yourself if the subtlety is worth the salon time.
Lavender Matte Snowflake and Cable Knit Nails
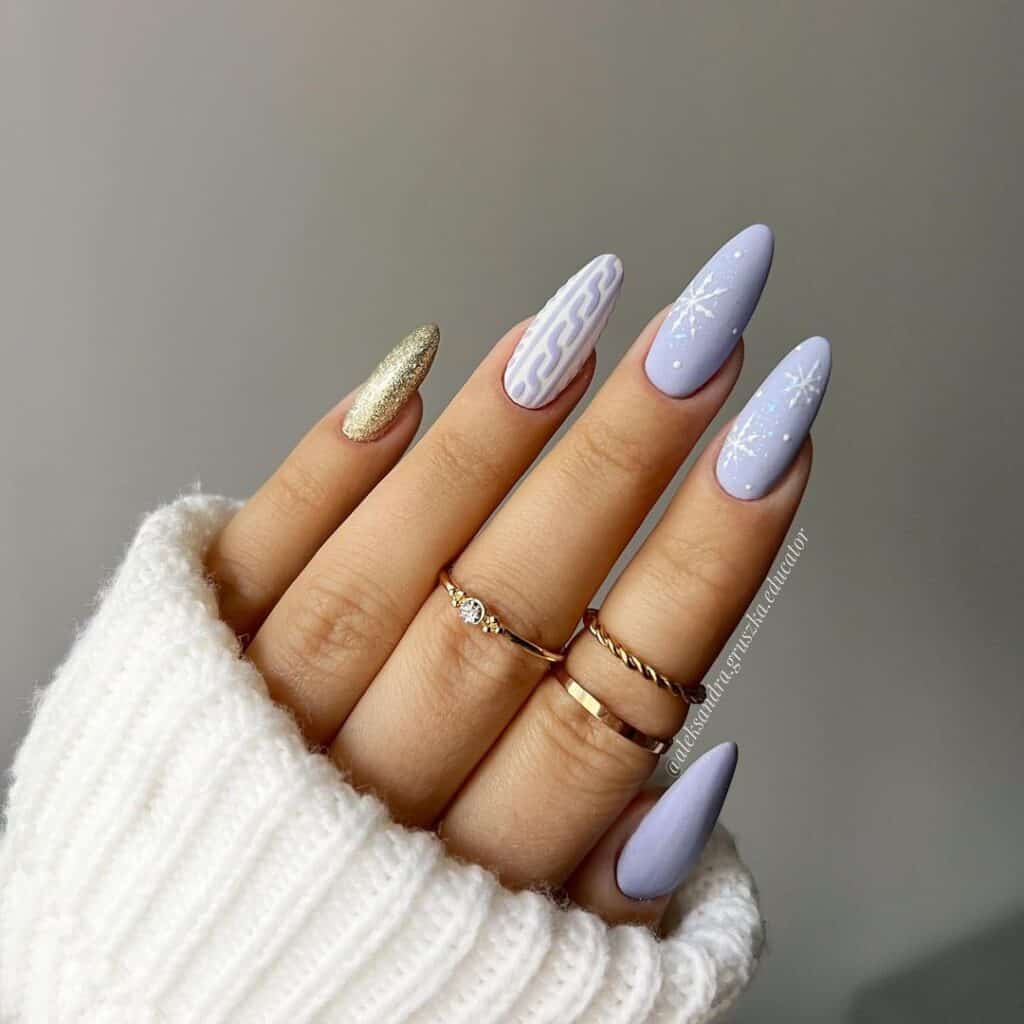
The cable knit pattern on one nail takes as long as the entire base coat on the other nine. You’re paying for the matte lavender base, the white snowflake art, and the gold glitter accent nail. That’s three distinct techniques in one set. The matte finish shows every edge, so the tech needs to be precise. Expect 90 minutes in the chair. The result is cozy and festive, but it’s not a quick fill.
Sheer Nude French Tip Christmas Tree Nails
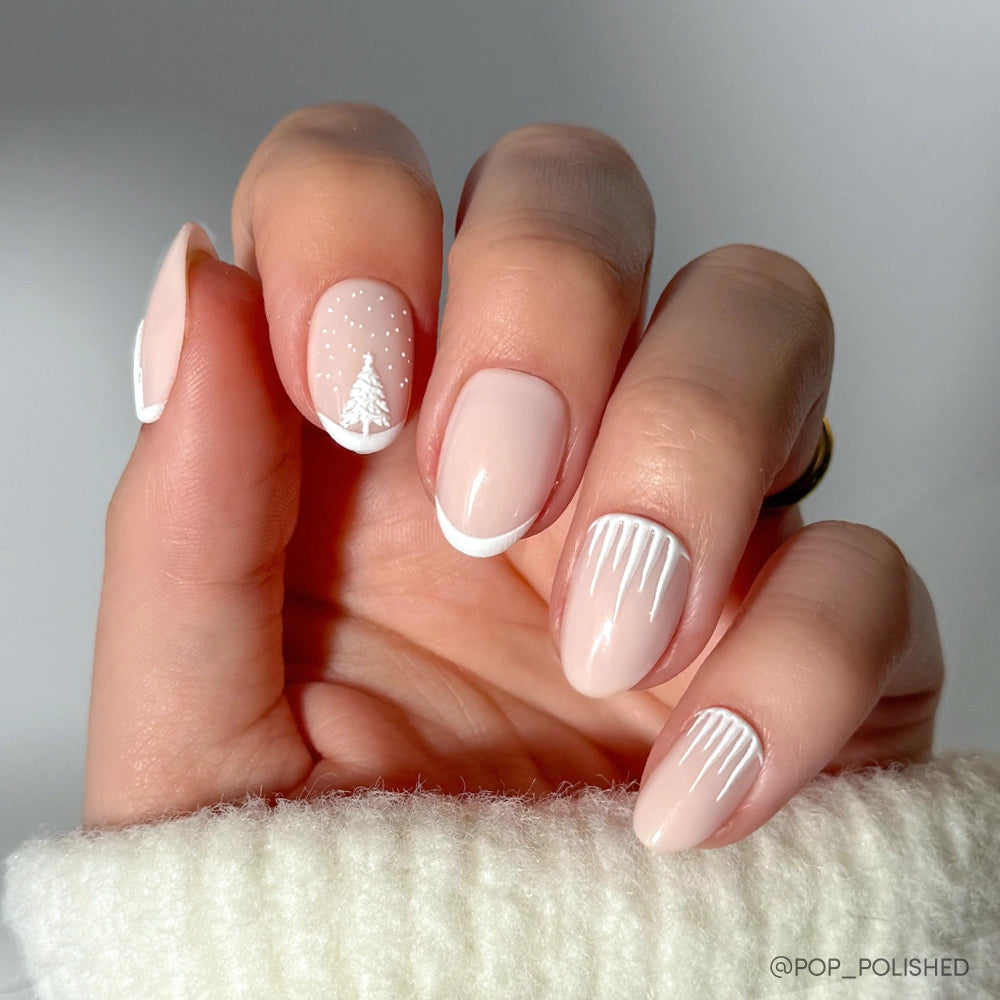
I didn’t expect to love a sheer nude french tip christmas tree nail, but this minimalist version won me over. The sheer nude french tip base keeps it clean, while the ring finger features a delicate white tree with tiny dots that look like falling snow. The thumb and index have subtle white vertical lines extending from the cuticle, which mimic tree trunks or just add structure. On short rounded nails, the design feels fresh and not overly festive. The glossy finish ties it all together without adding bulk. Those vertical lines are surprisingly elongating for short nails, and the tree is so subtle it almost reads as abstract art.
Blue and White Glitter Gradient Snowflake Nails
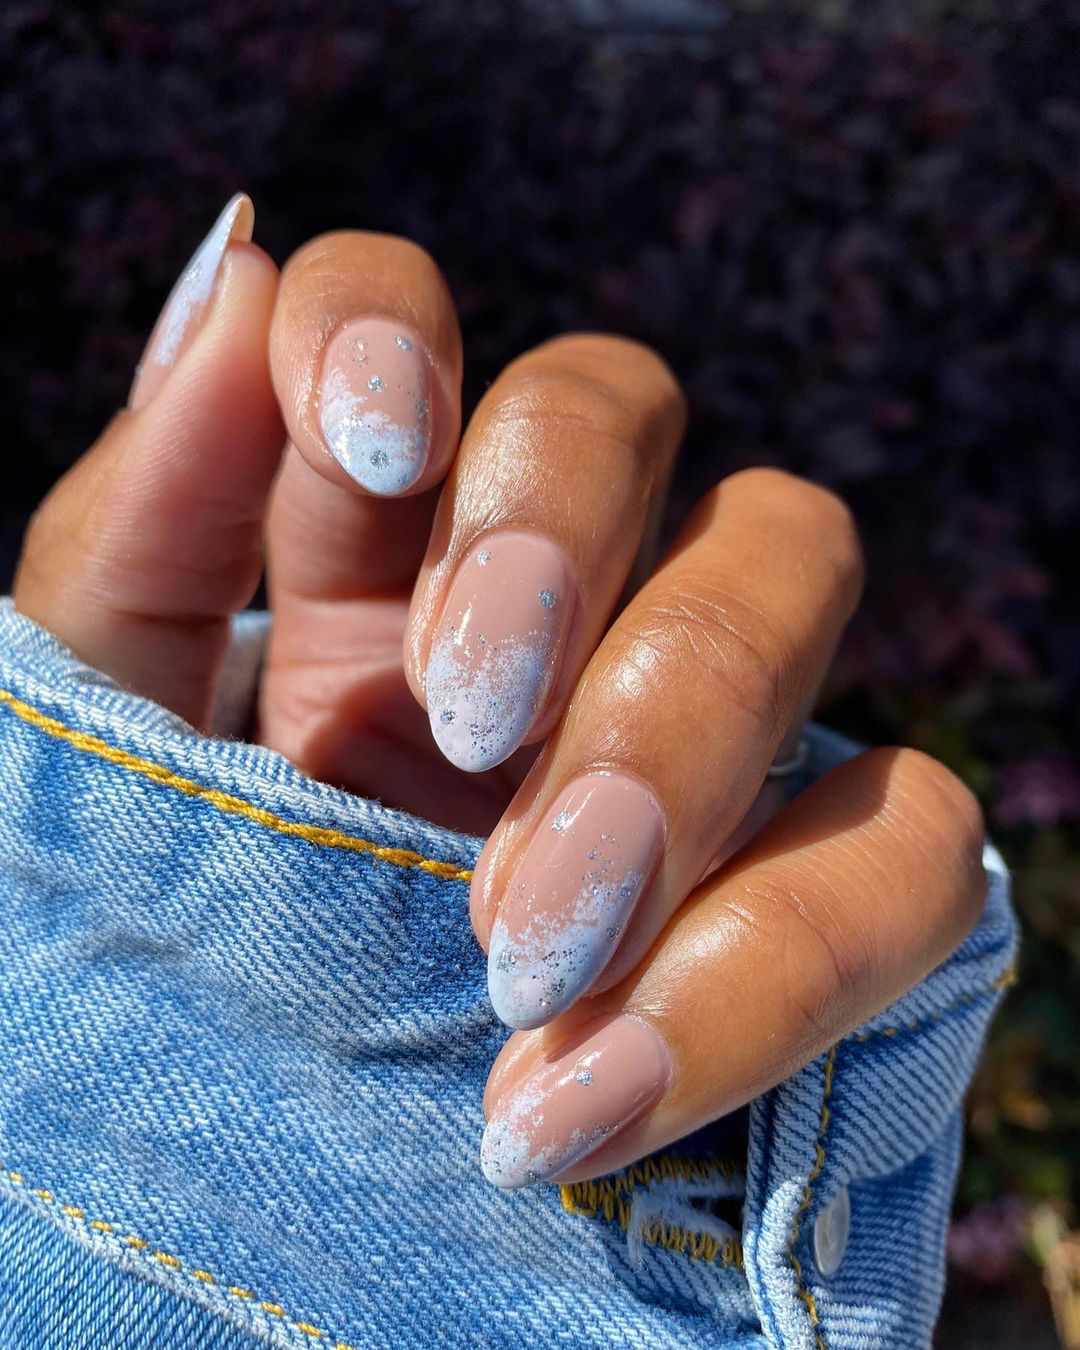
The blue white glitter gradient on these nails is harder than it looks. The key is a sponge application of fine silver glitter from the tip downward, then a second layer of white glitter for opacity. Start with a neutral base, then use a makeup sponge to apply the glitter in thin layers, tapping off excess before each application. The snowflake accents are best done with a thin brush or decals, but decals can lift over the glitter texture. For medium round nails, the subtle design works best when the glitter is sparse at the cuticle.
DIY is possible but expect a learning curve with the sponge. The salon can achieve a smoother blend and sharper snowflakes. The honest downside: the glitter gradient can look patchy if not built in thin layers, and the snowflakes may not be as crisp as solid art. Removal requires extra soak time to get all the glitter off.
Pink to Blue Glitter Gradient Oval Nails
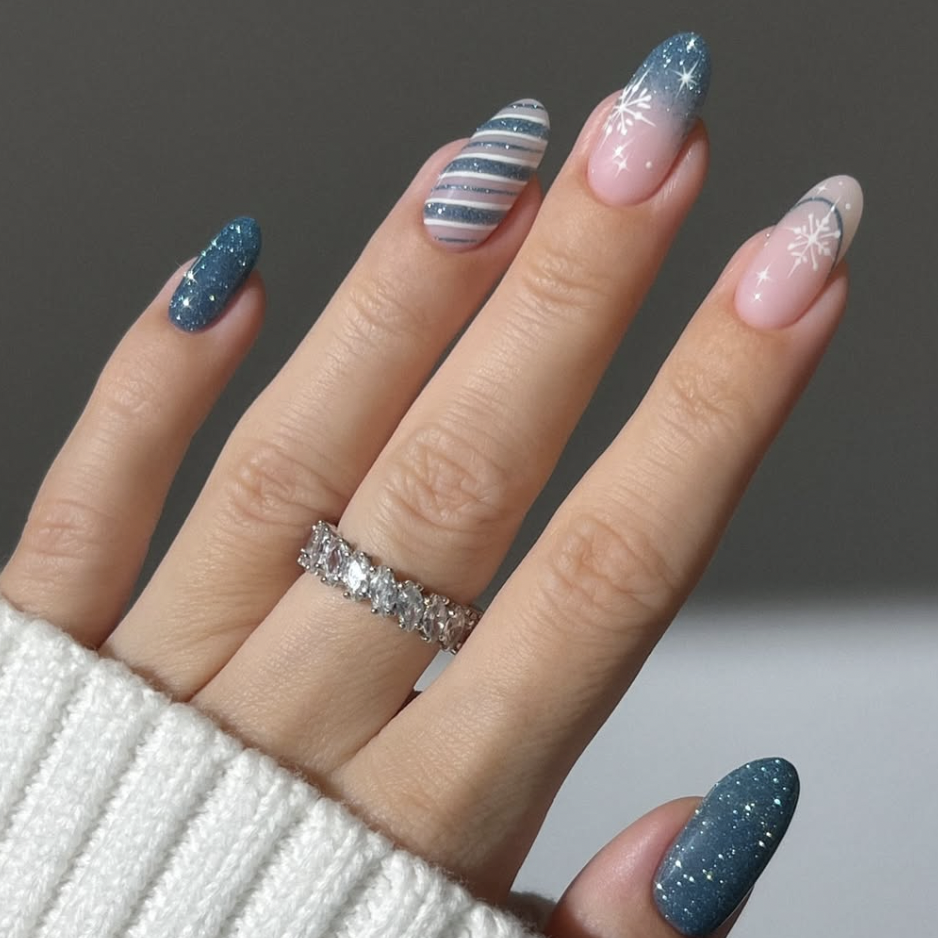
I used to think pink-to-blue gradients belonged on summer birthday nails. Then I tried a pink blue glitter gradient on medium oval nails in December, and the shift hit different. The sparkle catches holiday lights without screaming Christmas. Maybe add tiny snowflakes if you want more. Mine lasted through two weeks of typing and dish duty before I considered a fill. Not bad for a shape I’d written off as dated.
Pink to Blue Glitter Gradient with Snowflakes — Sparkly Blue Glitter At The Tips
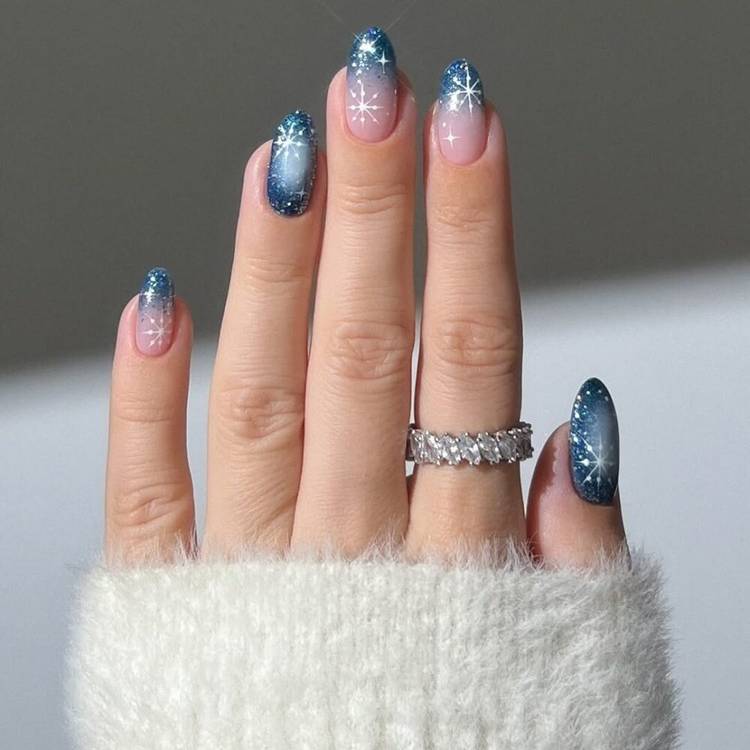
Who actually pulls off a pink blue glitter gradient with snowflakes where the tips go sparkly blue? Someone who doesn’t flinch at color shifting in different light. The sparkly blue at the tips catches the most attention, so if you gesture a lot in conversation, this is your set. Best on medium lengths — too short and the gradient gets cramped. And it flatters cool undertones especially, since both pink and blue lean that way. If you’re more a single-color person, move along. This one demands attention. It works best on someone who embraces detail, because every nail tells a different story. The snowflakes add a delicate touch without going full holiday.
Nude Base Glitter French Tips
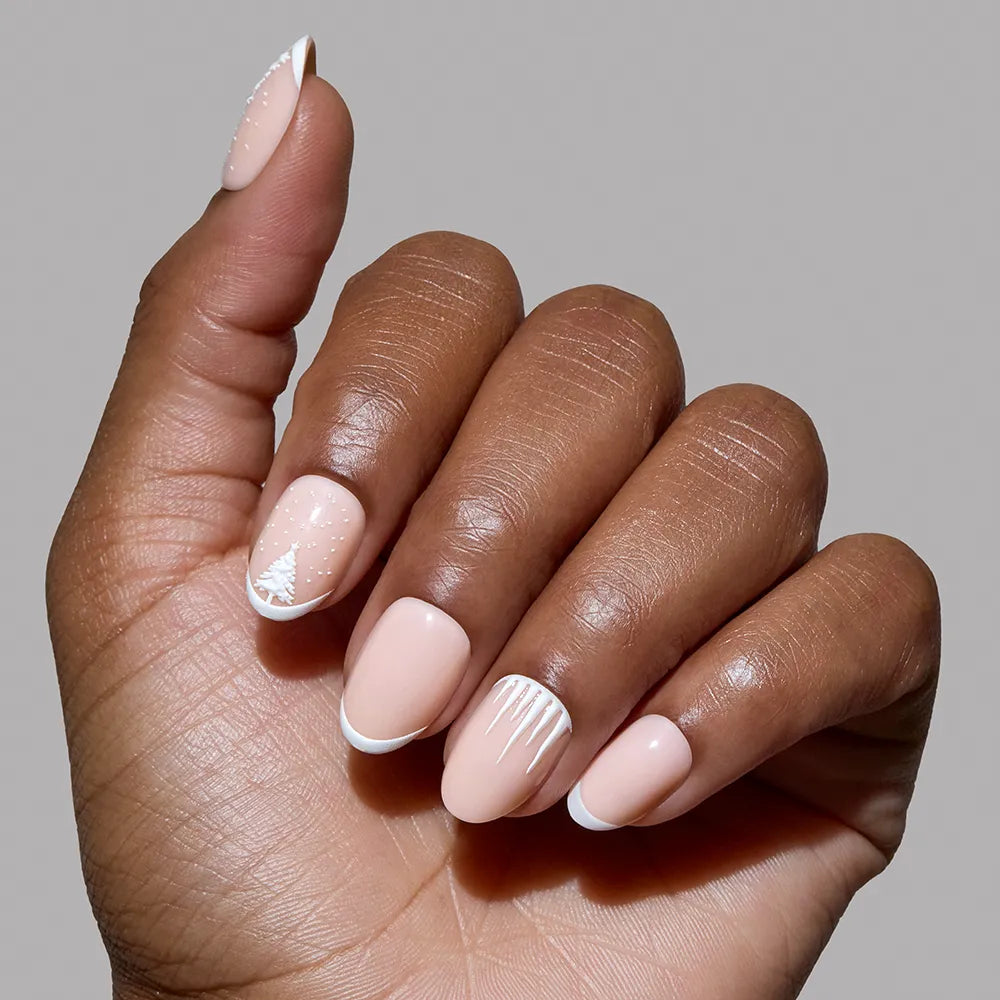
I admit I was skeptical about glitter tips feeling mature. But the nude base keeps it grounded while the glitter french tips add just enough sparkle for winter. Mine held up through a week of typing and cooking — the glitter didn’t dull because it’s embedded. Upkeep is mostly about the nude portion staying clean; after two weeks, the regrowth starts to show. But the glitter tip hides any tip wear, so you get closer to three weeks before a fill feels urgent. The white and silver glitter catches light in different ways, so it stays interesting without bling. For a low-commitment holiday look that doesn’t scream, this is it.
Sheer Pink Gold French Tip Rhinestone Nails
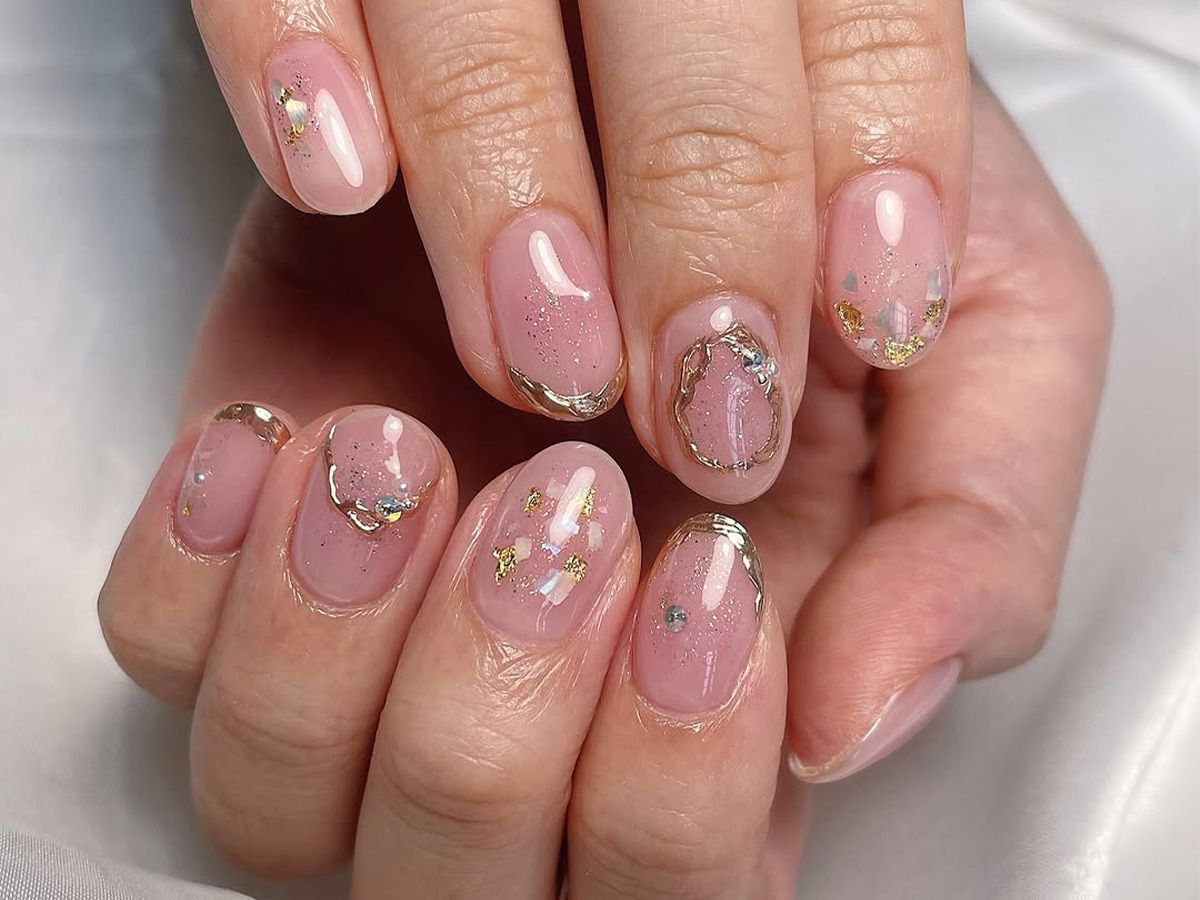
This is the design that made me stop scrolling. A sheer pink base with a gold french tip and scattered rhinestones and gold flakes on every nail, all glossy and short oval. It reads as elegant without trying too hard, and the sparkle catches light from every angle.
Rhinestones can snag on sweaters or fall off by day 3. A thin layer of no-wipe top coat over each stone helps them stay put, and avoid using your nails as tools. Removal needs gentle soaking, not prying, or you risk lifting the whole set.
Silver Glitter French Tip Starburst Nails
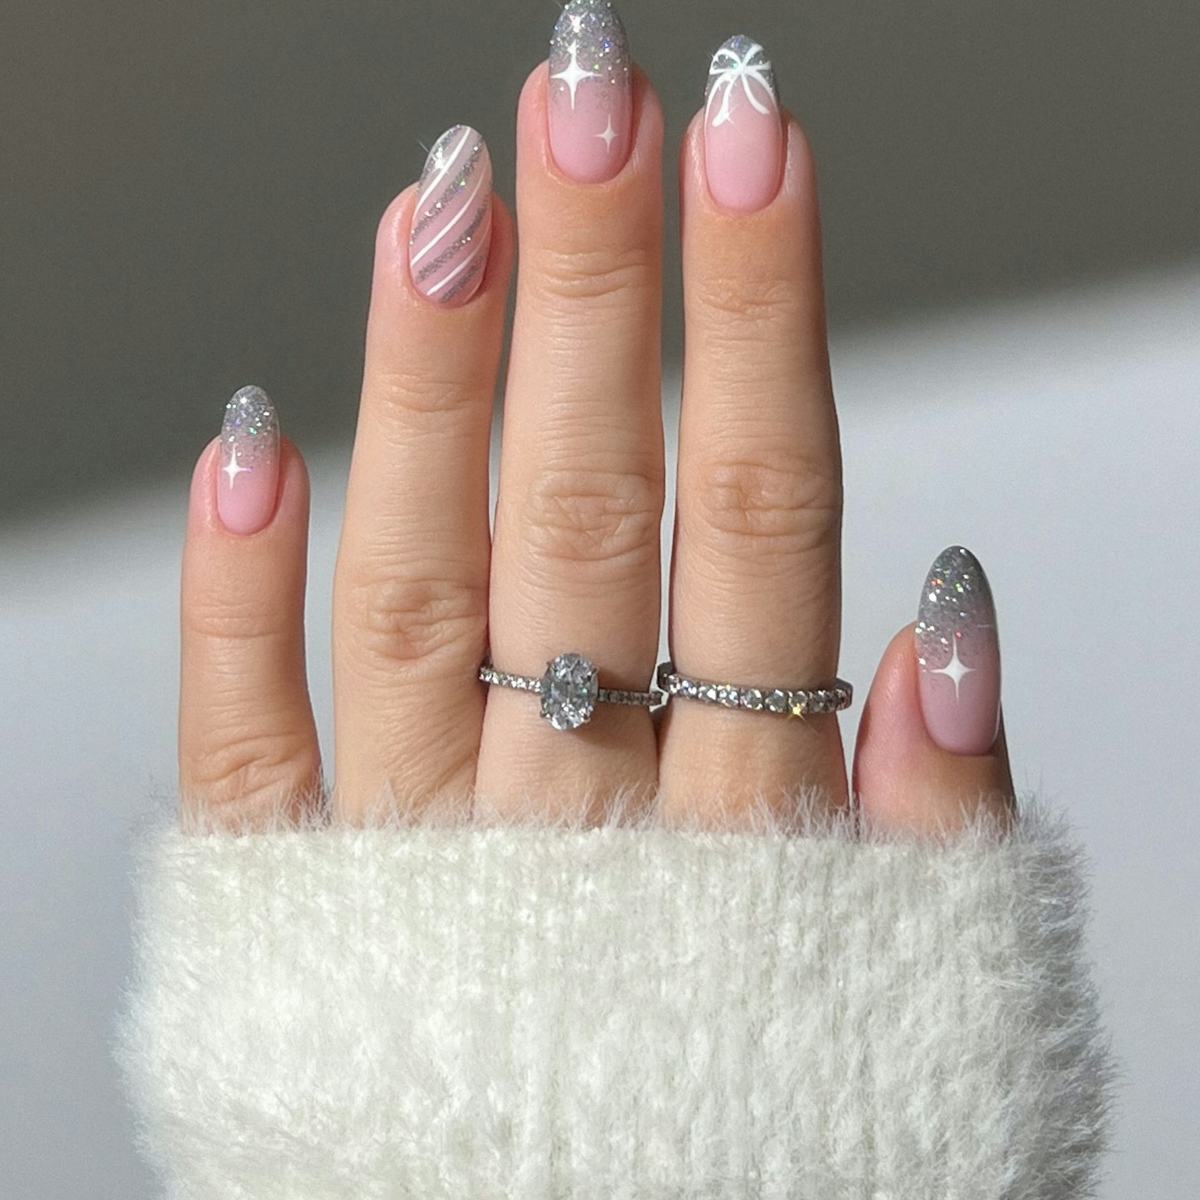
Is this a holiday nail or a glitter bomb at a winter party? A silver glitter french tip on every nail, plus silver diagonal stripes and white starburst on the accent nails, all on a sheer pink base with medium oval shape. It’s festive, sure, and the sparkle is relentless. But three different art elements on one hand can feel busy, especially if you’re not a maximalist. The starbursts are delicate and may chip faster than the glitter tips, so expect touch-ups by week two. Great for a single night out, less ideal for a two-week wear.
Grey Abstract Accents Glossy Oval Nails
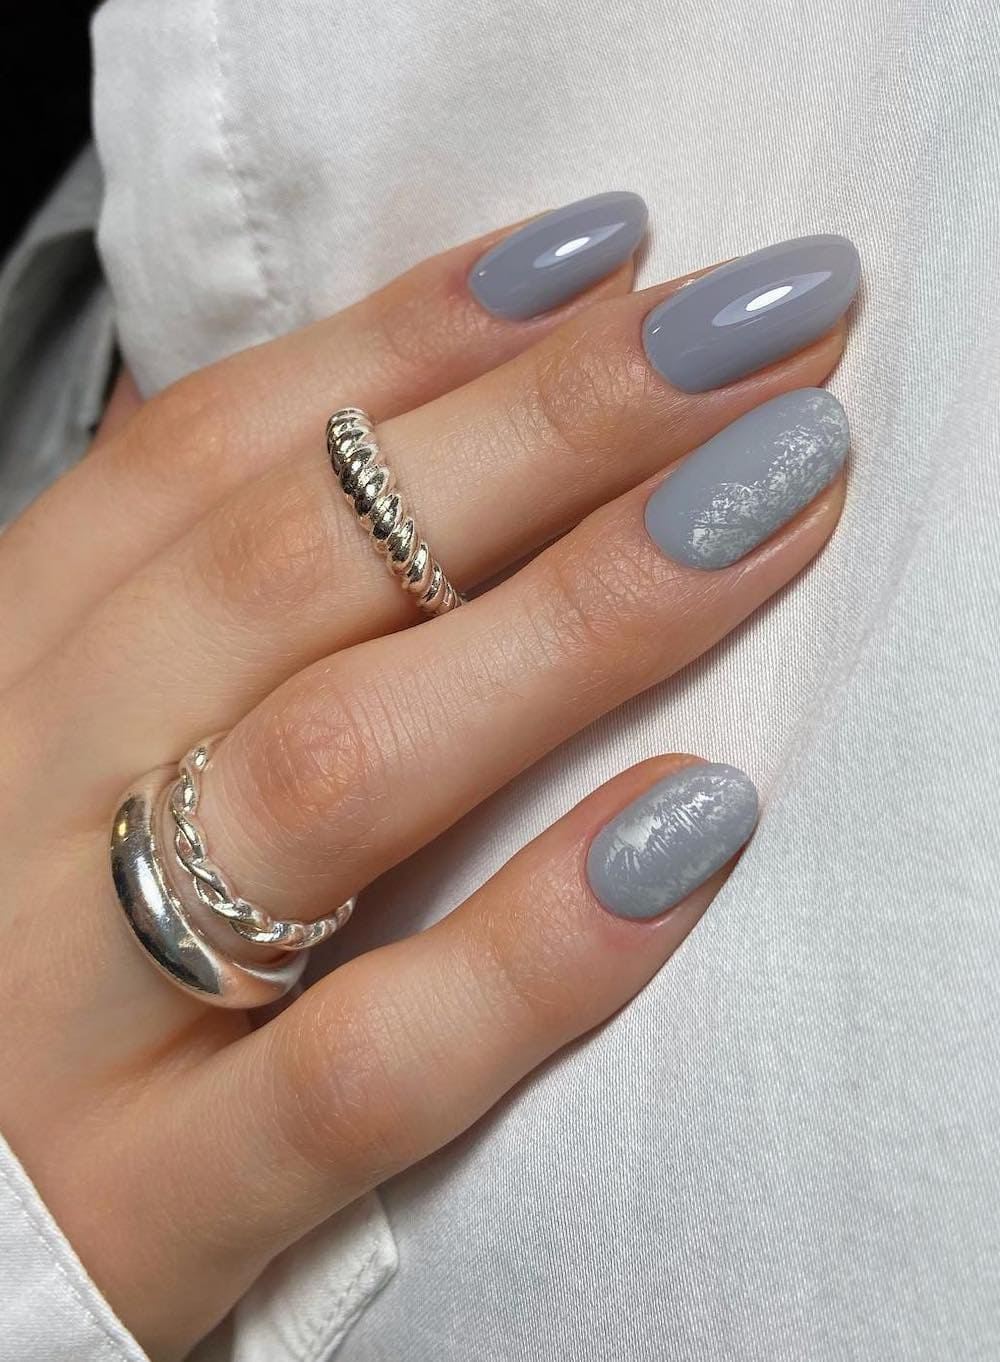
Abstract nail art looks effortless in photos. The reality is a lot of time in the chair. These grey abstract accent nails use white and silver strokes on a medium grey base, glossy finish, medium oval shape. Each accent nail requires steady hand and a fine brush, and the design has no symmetry, which means the tech has to eyeball every curve.
Expect to sit for at least 90 minutes if you want clean lines and balanced negative space. The payoff is a modern, almost architectural look that doesn’t scream holiday. And because the art is abstract, minor wear near the cuticle is less noticeable than with a solid colour.
Teal Jelly Gradient Oval Nails
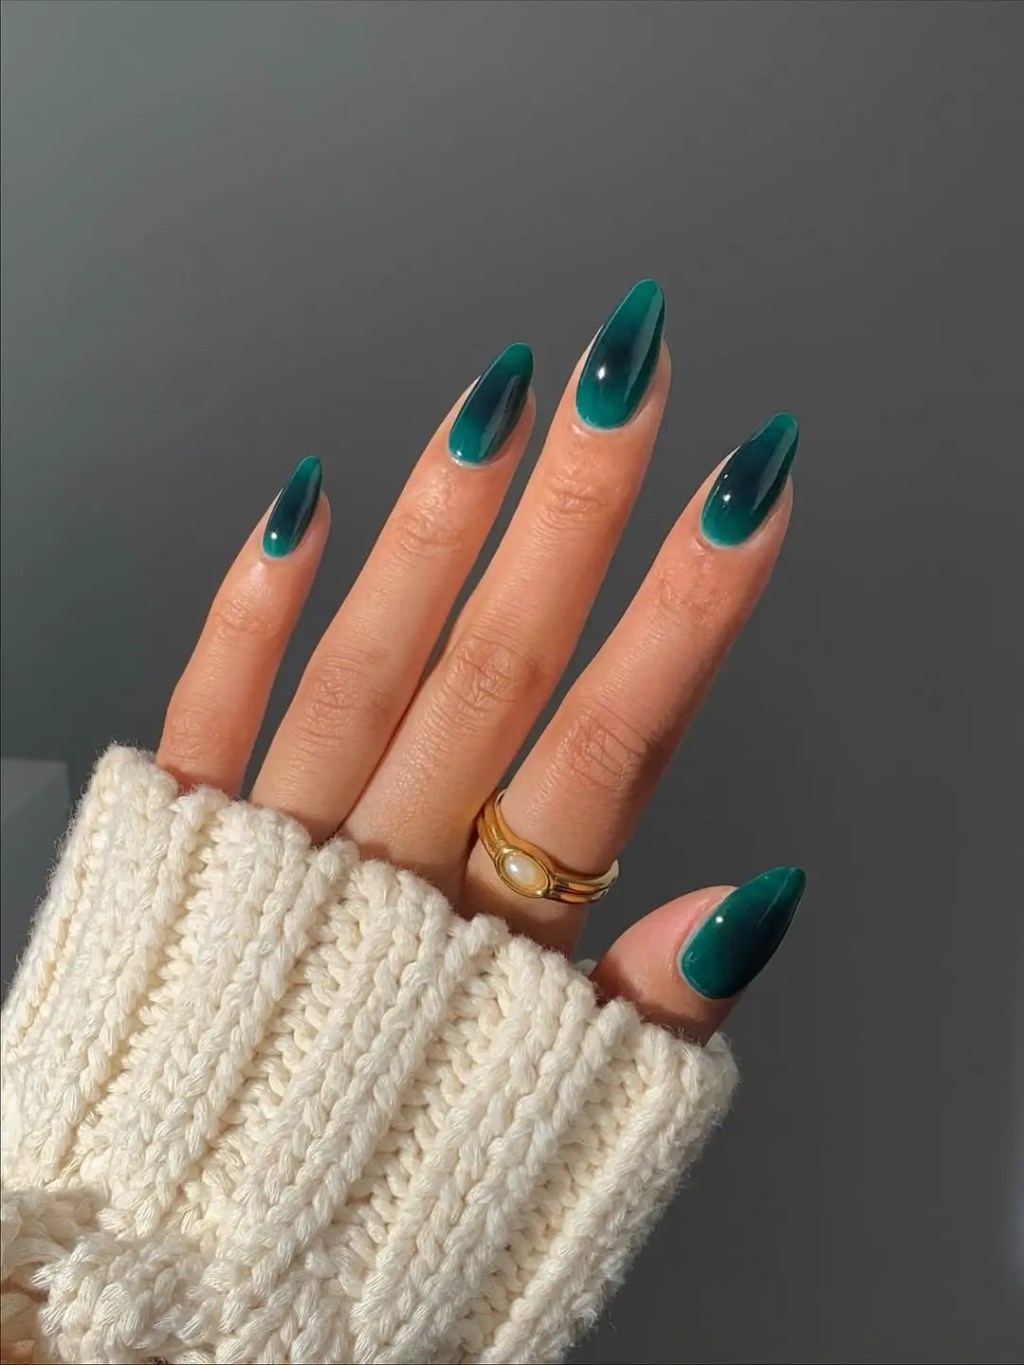
I wasn’t expecting to love a teal jelly gradient nails this much. The translucency gives it this weird depth, like looking into a frozen lake, and the oval shape keeps it from feeling costume-y. It’s glossy but not obnoxious, sheer but not shy. The gradient moves from a deep teal at the cuticle to a lighter wash at the tip, and the jelly finish lets the natural nail peek through just enough to keep it grounded. On medium-length ovals, it reads as sophisticated without trying hard. The kind of look that gets compliments from people who don’t normally notice nails.
Matte Deep Blue Contrasting French Tip Nails
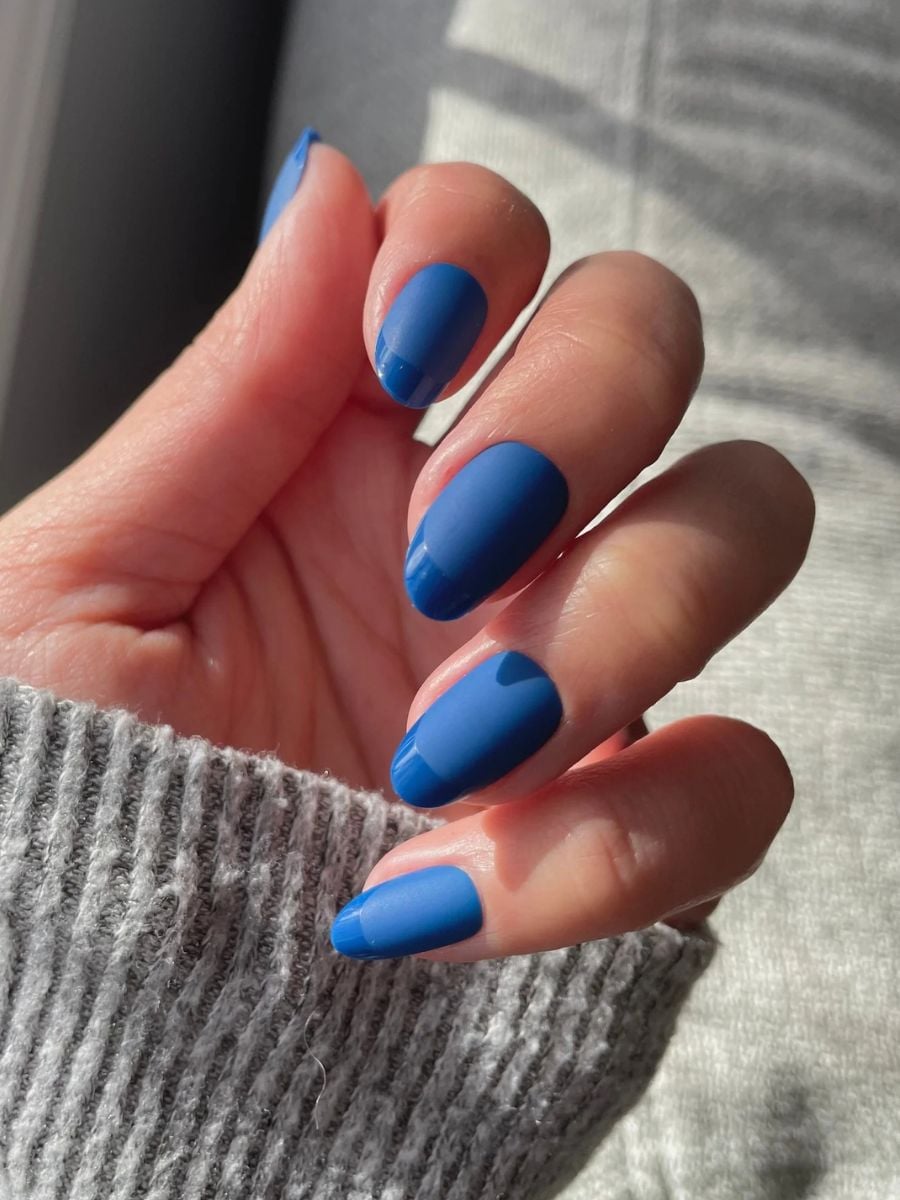
This matte deep blue french tip is not a beginner project. The technique matters: you need a flawless matte top coat over a deep blue base, then a glossy tip painted freehand or with a stencil. Any unevenness in the matte layer shows immediately. The contrast between the velvety matte body and the shiny white tip is striking, but there’s an honest downside: the matte finish picks up oils and can show wear on the tip faster than a full gloss set.
- Medium round shape for balance
- Deep blue creme base
- Matte top coat on the body
- Glossy white tip for contrast
- Clean cuticle work for crisp lines
When it’s done right, it’s one of those designs that looks like it cost twice what it did. The matte finish reads as modern, the glossy tip adds a classic twist. Just be prepared to baby the tips a little.
Final Thoughts
After seeing all 22 designs side by side, I’m still impressed by how much variety round nails can carry. What started as a search for a winter shape turned into a full-on obsession with snowflake placement and jelly gradients. The minimalist gold line set is still calling my name, but that deep red jelly swirl is the one I’m booking next. Round wins.